12 Days of Christmas--Day 5
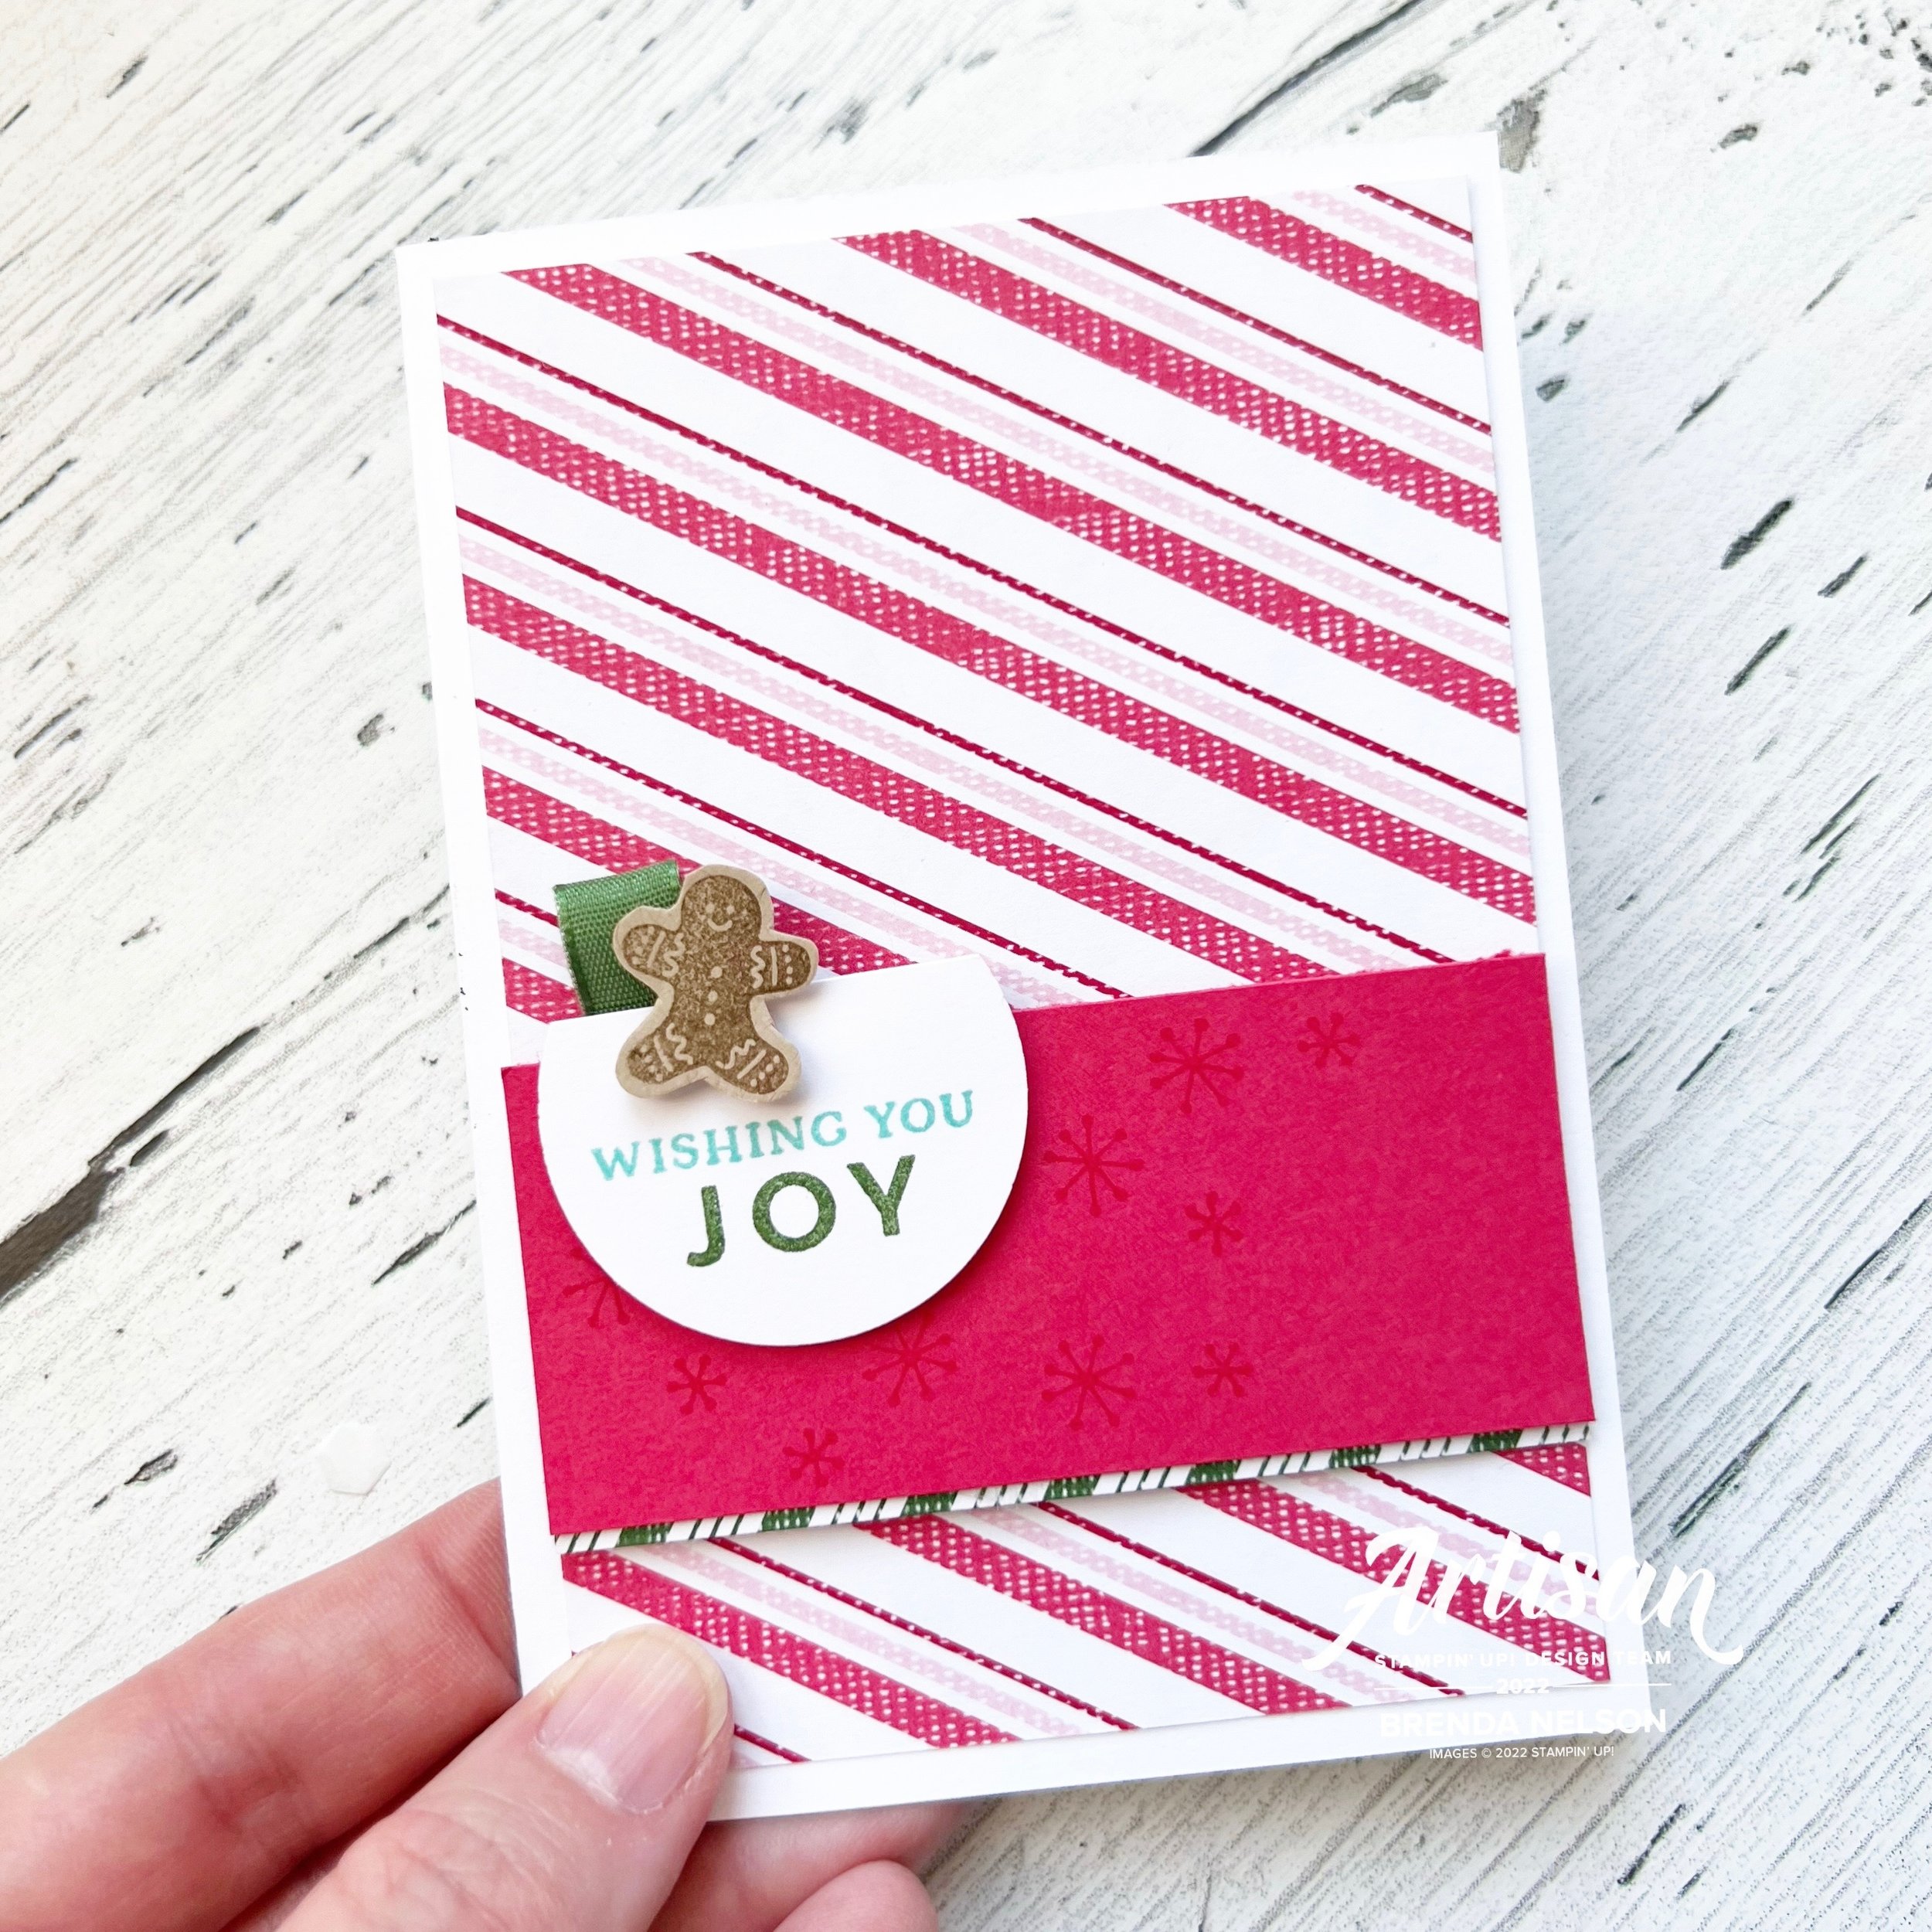
I love a good pocket card don’t you? For my 5th card of 12 Days of Christmas I am sharing one of my ‘go to’ card designs. I make this card style several times throughout the year as I love that you can pull out the Basic White layer and write a message, stick a gift card inside or even a flat little treat. You can use this design for any sentiment or occasion.

I started with a base of Crumb Cake card stock and you score it like a regular card except on one side, score a 1 1/4 inch piece that becomes the flap for the front. I like to round the edges on the top and flap.

I added a strip of Sweetest Christmas DSP to the flap and then adhered the entire flap down using Tear’n Tape. Wrap a length of Linen Thread around the flap to keep the card closed hence creating the pocket.

The Joyful Flurry stamp set was perfect to add to the front and pull out piece, stamping them in Crumb Cake ink. The Wonderful Snowflakes are still my favorite holiday embellishment. I love how they are iridescent and I can pop them right out—NO DIE CUTTING! Yippee! They look perfect with the Garden Green Mittens!


The worlds cutest mittens are from the Celebrate with Tags stamp set and die cut with the Celebrations Tags Dies (my absolute favorite die set in the JJ catty! I have used it SO MUCH!

Merry Christmas is from the same stamp set and I just trimmed it apart using paper snips. It is stamped in Sweet Sorbet—my fav red this season!

I hope you will give this card style a try some time! It is truly one of my go to designs! Don’t forget to go see what Melanie is sharing today!


12 Days of Christmas--Day 4

Welcome to Day 4 of 12 Days of Christmas! I hope you have been inspired so far! I am curious to know what your favorite thing has been? I am torn between my first project and the North Pole Sacks!

Every year I have to create at least one Christmas card that is on a black card base! This year I decided to pair up Basic Black with Orchid Oasis, Night of Navy and Silver Foil. I think it has a really unique look for a holiday card! I hope you like it too and will consider making a black Christmas card as well.

I added a first layer to this card in Basic Black and used a Water Painter with Whisper White ink to spray it it across the card front. If you mix the reinker with some water to make the consistency of milk, it will spray nicely over top of the card base. I was sort of going for a stars in the night sky look.

I added 3 3/4 x 3 1/2 strips of the Brushstroke 12x12 Specialty Paper to the base. If you haven’t order this paper yet—add to cart! You can get a piece of Blushing Bride, Soft Succulent and Night of Navy. It has this gorgeous swirly texture to it, but its nice and lightweight.

I die cut the large sprig from the Decorated Pine Dies in Silver Foil paper and added it directly over top of the Brushstroke paper. The sentiment is from the Christmas to Remember stamp set and I stamped it in Orchid Oasis ink and used the light Smoky Slate Stampin’ Blend to highlight the words ‘Christmas’ and ‘Cherish’. Its cut out with the Stylish Shapes Dies. A definite craft room must have!

Behind the sentiment I added the Silver Metallic Edge Cotton Ribbon that I tied with the Orchid Oasis Bakers Twine.

I hope you like this dramatic holiday card and make sure to visit Melanie and check back tomorrow to see what we are both sharing!


12 Days of Christmas--Day 3

Happy day #3! I hope you have been enjoying the past few days and what Melanie and I have been sharing. I am also posting over on my Instagram @stampwithbrenda—-I hope you are following me over there as well! I love that we not just sharing cards between the 2 of us and we didn’t discuss what the other was sharing so its a surprise for us too!

Todays project is featuring these amazing North Pole Sacks! They are a fun add on that you could get with the November Paper Pumpkin kit and can be found in my online store. They are the perfect size to turn them into a pull out card, gift card holder, mini album and more. The possibilities are endless! Today I am going to share with you a bright and cheery pull out card design. You can even add a gift card inside too!

I love the printed design on these little sacks as the neutral pallet was perfect to add a pop of color with Parakeet Party and Polished Pink. They are a little twist to your standard green and red holiday colors.

The sentiment is from the Framed & Festive stamp set which I have been using a lot these past couple of weeks. I am so glad Stampin’ Up! released this set! The foliage is all from the Christmas Season stamp set. I even cut some of the shapes from the Seasonal Labels dies from card stock. Sometimes you don’t have to stamp, you can just use the die cut shapes meant for stamping without stamping!

The candy cane is from the North Pole Paper Pumpkin Kit and the snowflake die cut (cut from the Snowy White Velvet Sheets) is from the Celebration Tags Dies. I also added a few opal rounds for a little glimmer.

On the pullout I added another sentiment from the Framed & Festive stamp set and did a bit of blending with Parakeet Party. The tab is In Color DSP with another Polished Pink snowflake. I like that you can see it poking out from the top of the bag.


I hope this project inspires you to add this North Pole Sacks to your next order! I think they have lots of potential even beyond the holiday season and can be used for so many things!

I can’t wait to see what Melanie is sharing today! Make sure to go check out what she has to share!


12 Days of Christmas--Day 2

Hello and welcome to another 12 Days of Christmas project! Today I have a card to share with you that I created using one of my favorite stamp sets in the JJ catty—the Trees for Sale!

I actually really love the soft neutral palette of this card. It has a country home sort of feel to it, don’t you think?

The base of the card is Grey Granite and I paired it up with the Gingham Cottage DSP. I love that this is a stack of DSP all in various Gingham colors and patterns! Its such a great stack of paper for scrapbooking and card making.

Along the border of the DSP I added a strip of Crumb Cake card stock die cut with the scallop border die from Hand-penned Petals. Honestly, I never put this die away. I use it all the time. Beside the die I added a sprinkle of little stars/snowflakes from the stamp set in matching ink.

I stamped the 3 trees in 3 shades of green—Old Olive, Mossy Meadow and Pear Pizzazz. The sold image of each tree was stamped off on my grid paper and the next layer was full strength ink.


The sentiment was stamped with Soft Suede ink on Crumb Cake. I added some Linen Thread behind and few Classic Matte Dots in grey to the background.

I love this card design and know it can be modified for any occasion.

Thanks for coming by today! Make sure to go check out Melanie’s project for today!


12 Days of Christmas--Day 1

Hello my friends! I am so excited to share 12 Days of Christmas with you—with a twist! My awesome friend Melanie from @melsinkyfingers and I have decided to team up to each share 12 awesome holiday projects with you! At the end of each of my posts there will be a link to go visit her blog and see her project of the day. In the end, you will actually have 24 project ideas!

Thanks Melanie for making this cute graphic for us!

I can’t wait to get started! My first project is this fun notecard set and basic box. I got this project template from another talented friend Lisa Althouse @stampaholic. I just love our stampin’ community!

This basic box is perfect for holding 4 notecards and envelopes. You could even create this project without a lid and use the box to hold holiday snacks or treats (like Oreo Popcorn! I have this recipe on my blog under Lifestyle—Favorite Recipes).

I used the Sweetest Christmas DSP as my color inspiration and paired it up with the Handmade Wishes Bundle. I just love this bundle because the stamp set is so versatile. You can created so many different phrase/sentiment combinations. And the design of the label punch is really unique!

The label on this box is designed to reflect that a treat will be in the box. I plan to add a single card and a little holiday treat inside these boxes! I added another panel to the front of my box that I ran through the Timber 3D folder.


Sweet Sorbet has definitely been my favorite red this season. I added a panel to the front of my card and stamped some little snowflakes as an accent.

A couple strips of DSP (its so fun to mix and match patterns), and a cute sentiment stamped on Pool Party card stock in Coastal Cabana, make this notecard so fun. Of course I had to add some Garden Green Ribbon and white Bakers Twine.

I love a good stripe pattern and this Sweet Sorbet/ Blushing Bride one is just perfect for a card front! I softened the front with a panel of card stock and a bit of stamping. The little gingerbread man was the perfect fun add on to this sentiment!


I love to stamp little hearts on my projects, they just make everything perfect. This little notecard has DSP with a ribbon border, the punch and sentiment and of course some Bakers Twine. This is such a ‘Good Card Design’!

The best part of this little notecard is the candy canes that are die cut, right from the DSP! Isn’t that brilliant? It makes creating this card so easy!

I hope you have fallen in love with this project as much as I have! I shared it with my team last month and it was so well received, I knew it would make the best project to kick off 12 days of Christmas. I have a few other 3D projects to share, some cards and of course some scrapbooking/mini album inspiration projects. I hope you will check back each day and go over to Melanie’s blog to see her awesome projects as well!

Click here to get to Melanie’s first 12 Days of Christmas post! I can’t wait to see what she made!