Tombstone Treat Boxes

Have you seen these amazing Tombstone Treat Boxes yet? They are so fantastic! They are easy to assemble as they have areas with adhesive strips already built in! So you do not need to add in any of your own adhesive! YAY! And they actually fit a decent amount of stuff inside! I decided that I could add some treats AND a little mini card!

final (1) 5.jpg

I wanted the feeling of a halloween spooky sky to anchor the little black tree so I die cut a Pumpkin Pie circle with the Layering Circles Dies. I added it to the box and then snipped off the edge. I took my Rich Razzleberry Stampin’ Write Marker and flicked it across the circle and box.

The trees are cut from Basic Black cardstock using the Frightful Tags Dies. I added one on the circle and one poking out from the top. I then tied a length of the Bumblebee Gingham Ribbon around the box.

Over top I added the sentiment, Happy Haunting, on Highland Heather cardstock, stamped with Momento Black Ink. I added a marker spray with my Highland Heather marker over top and added this circle with a Dimensional.

The happy bat is from the Banner Year stamp set and is stamped with Momento Black Ink on Bumblebee cardstock. You will need to hand trim this little bat and add it with a mini Black Dimensional to the tree.

Lastly some Cute Stars Adhesive-Backed Sequins were added to the box! Voila! A fun Tombstone Treat Box!

final (22) 3.jpg

I measured the dimensions of the inside of the Tombstone Treat Box to create the little mini card. I thought it was a neat way to add a little message on top of your treats!

final (45).jpg

The base of the mini card is Basic Black and I added a layer of Basic White over top. I used my Blending Brush with Bumblebee ink to create a little halo for my tree to rest on. The little bats are from the Little Delights stamp set and are stamped using Momento Black Ink.

The sentiment, Batty for You, is from the Frightfully Cute stamp set on Highland Heather cardstock. And this time for the inside, I stamped the happy bat on Pumpkin Pie cardstock to add to the tree!

If you are loving this Tombstone Treat box—stayed tuned! I have some other projects designed to share with you this month! However, I definitely encourage you to order them sooner than later! You don’t want to miss out on these!

Hey Boo!

Ya YOU! Hey BOO! Ok, I will stop it! But what I won’t stop is sharing some fun Halloween inspiration with you this month! This is my third project share and today I am sharing a really spooktacular Halloween card with you that uses a really cool technique!

final (32) 2.jpg

The base of this card is Fresh Freesia which is a color you might not think of when you think of Halloween. I think all the purples work for this holiday so I incorporated three of them onto this card project.

There is a base layer of Basic White behind the vellum layer to help the colors of the Stampin’ Blends pop. I used the dark Stampin’ Blend marker for all three—Highland Heather, Rich Razzleberry and Fresh Freesia. The technique is the popular Alcohol Blends technique. There are a million videos on how to make this so just do a quick search! Basically you need 3-5 things for this technique:

  1. Stampin’ Blends

  2. Isopropyl Rubbing Alcohol in 99%

  3. Vellum

  4. A straw

  5. A Waterpainter

The straw option is used to blow the rubbing alcohol around and I have created some projects with that look, so to speak, so watch for some future posts! For this card I used my Waterpainter to drop and spritz the rubbing alcohol on top of my blends.


I colored my Stampin’ Blends across my vellum, dividing it into 3 sections. I then dipped my Waterpainter into the rubbing alcohol and flicked it across the card. This is what created the speckled look.

Because you could see the lines between the colors, and I didn’t really like that, I took the Waterpainter to the edges to where the colors met and touched the vellum. This allowed the color to bleed into each other a little bit.

TOP TIP: A little rubbing alcohol goes a long way. Sometimes less is better

final (32) 2.jpg

After I had created this fun background it was easy to add some fun aspects to the card. We have such a great selection of Halloween stuff in our catalogues right now!

“Hey Boo” is from the Cutest Halloween stamp set and the sentiment is die cut with a label shape from the Frightful Tags Dies.

final (32) 2.jpg

I added a fun spiderweb cut from the Black Glitter Paper and the Frightful Tags dies. Over top I added our sentiment and a cute owl, cut from Bumblebee card stock, and cut with the same dies. Now when you cut the owl, his eyes and nose will be hollow, so I added a small scrap of Basic Black cardstock behind to fill them in.

The skull is stamped from the same stamp set, Cutest Halloween, and is hand trimmed. While there is a punch to coordinate with this stamp set, it only cuts out the cat, ghost and pumpkin.

I used my Stampin’ Blends again, this time in Daffodil Delight, to color the Black & White Gingham Ribbon. This ribbon is the BOMB! Its the perfect width and everyone loves gingham. And you can customize it by coloring it with Stampin’ Blends OR even with a Blending Brush and an ink pad!

I hope this card inspires you to make some spooktacular yourself!

Color Fusers--October Blog Hop!

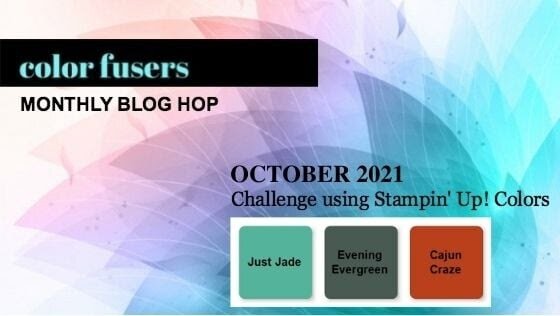
Hello friends! Welcome to the most SPOOKTACULAR month of the year! Our Color Fusers Blog Hop this month is featuring the color combo of Just Jade, Evening Evergreen and Cajun Craze and it was a good challenge to create a Halloween Project—since that is the theme of my blog this month!

colorfusers oct.jpeg

The project I created to share this month is a mashup of the Detailed Pumpkins Dies, the Adorning Designs Decorative Masks and the Banner Year stamp set. All of these elements came together to create a unique Halloween card!

final (1) 7.jpg

I started with a card base of Just Jade and used one of the masks or stencils with my Just Jade ink pad and Blending Brush to create a fun tone on tone design on my card front. I also angled the mask so that it was a diagonal for something a little bit different!

I cut a thin strip of Evening Evergreen card stock and attached it following this diagonal to bring more attention to that detail. After I stamped out the sentiment, Happy Haunting (in Evening Evergreen ink) I used the same stencil over top with Just Jade ink. This is a really fun way to jazz up your sentiments and to blend these two greens together. I added some retired Cajun Craze Twine (I seriously need to quit being a hoarder) and some of the new awesome Chevron Evening Evergreen Ribbon behind the sentiment.

final (4) 5.jpg

The two Cajun Craze pumpkins are from the Detailed Pumpkins Dies. Both of the dies, in their original form, have area that you can ‘see’ through. I wanted my big pumpkin to be more solid so I glued it to another piece of Cajun Craze card stock and then trimmed around the edges with my paper snips!

final (1) 8.jpg

Bling makes everything better of course, so I couldn’t resist adding some In Color Jewels in Evening Evergreen for a little sparkle!

If you are just joining our awesome hop here you can go back to see what my fellow Artisan Design Team member, Tami Hewlett, has designed or you can keep going forward and loop around. Next up on the hop is the amazing Melanie Hockin!!! Whatever route you take I hope you visit everyone along the way!

Happy Halloween MONTH!

Self proclaimed Halloween LOVER over here! In fact I have created so many things that I am going to share 3 projects per week with you this whole month and an extra special post on Halloween! This means you can expect 14 amazing awesome and unique Halloween projects this month—ALL featuring our Amazing Stampin’ Up! products!

final (44).jpg

I want to kick things off with this super fun BOO BOX or a Halloween Happiness Box—you decide what you want to call it! It uses one of our Mini Paper Pumpkin Boxes that I spritzed with Pumpkin Pie reinker mixed with Rubbing Alcohol. I used one of our Stampin’ Spritzers to cover the top and sides of the box. I really love how it turned out and it was SO FAST to change the outside look of this box!

I created a belly band to go around the box using a 2 x 12 strip of the gingham print from the Hostess DSP stack—Pattern Party! This is one of the best Hostess Rewards Stampin’ Up! has ever offered in my opinion! And I love the fact that a belly band can be slipped off of the box so after the recipient has gotten to all of the treats inside they can fill it up again, slide on the belly band, and give this fun BOO BOX to someone else! That is the whole purpose of what we create, to brighten as many lives as possible!

final (42).jpg

I decorated the belly band with a fun spider web cut with the Frightful Tags Dies. You will notice how many times I used these dies in creating my projects this month! I would highly recommend adding them to your next order! You can always use my Monthly Hostess Code or shop my online store if you live in Canada!

The spiderweb is also cut from the Black Glitter Paper for that extra little pop of fun. The Highland Heather label is also from the Frightful Tags dies and the mini spider webs stamped on top are from the Banner Year stamp set. You can find this amazing stamp set in the Annual Catalogue. It also has a sentiment inside saying “Happy Fall Y’all”…just saying…you need it! Behind the label is some black twine from the Baker’s Twine Essentials Pack, also in the Annual Catalogue.

I finished off my BOO BOX but cutting the letters BOO using the Playful Alphabet Dies in Pumpkin Pie cardstock. i used the Foam Adhesive Sheets to cut the letters again and add the cardstock letters to it. The Foam Adhesive Sheets are like one giant Dimensional. And to jazz up the BOO a little bit, I took my Pumpkin Pie Stampin’ Blend to the bottom half of the letters. Its such an easy way to add some interest to your letters!

Well that is my first awesome Halloween project to share with you this month! I hope you will visit me on Monday, Wednesday and Fridays as I continue to share Halloween projects, cards and scrapbook pages with you this month!

Color Fusers--September Blog Hop

Well hello there! It has been a hot minute…and I am happy to say that I am back! I took a little blog siesta to enjoy the summer and work on some other things! So I am happy to be back especially with the Color Fusers as I absolutely LOVE this monthly creative challenge. I am always excited to try and created with different color combos as I find I do tend to get stuck in a rut sometime. This month our challenge was to use Basic White, Basic Black and a color of our choice…immediately I thought of Halloween! How can you not? It is the best holiday ever!

color fusers september.jpeg
Are you someone who gives crafty gifts at Halloween? I love a good reason to give candy and my kids teachers definitely have been spoiled over the years with some fun gifts! What I am loving this season—these Kraft Gift Boxes!

Are you someone who gives crafty gifts at Halloween? I love a good reason to give candy and my kids teachers definitely have been spoiled over the years with some fun gifts! What I am loving this season—these Kraft Gift Boxes!

So I may have cheated a little bit by using this Kraft Gift Box for my project…but really, its a non color? Haha, and I really focused on Basic Black for that spooky Halloween feel. I left my Basic White minimal and only added in some Pumpkin Pie cardstock to die cut my pumpkin.

final (10) 3.jpg

If you haven’t assembled a Kraft Gift Box yet, it does come with some pre-sticky tabs, however I always want to keep a box reusable in a sense. By creating a belly band for your box it means you don’t have to add any permanent adhesive to your project. And who can resist a sparkly belly band!

I cut a 2 x 12 inch strip of the Black 12x12 Glitter Paper and shaped it around the box. I also don’t want this to be permanently glued to the Kraft Gift Box so I cut a long length of the Crinkled Seam Binding Ribbon. Using my Black Stampin’ Blend I colored the ribbon. I honestly hope this ribbon never retires as it really like having access to all of our colors as you can customize it using our Stampin’ Blends, a Stampin’ Write Marker or even with a Blending Brush and an ink pad! Its fabulous!

I die cut two black wreaths using the Seasonal Swirls Dies and off set them from each other using Glue Dots. The pumpkin is die cut from the Detailed Pumpkins Die and added on with a Dimensional. The sentiment is from the Sparkle of the Season stamp set but is cut with a label die from the Frightful Tags Dies.

final (13) 2.jpg

I am absolutely loving the Frightful Tags Dies, in fact, I don’t even bother putting them away as I keep reaching for them! The spider web is the perfect Halloween image and I have been using it on so many things already! In this case I decided to cut one in half and use each half to peek out at the top and the bottom of the project. I thought it was a really fun edition to this!

Now here is the real question…who actually eats Candy Corn? I mean, enough people must that they keep making it every year! Haha! I thought it was a fun filler for this Kraft Gift Box AND it matched my color scheme!

I am super curious to see how the rest of the team used this color combo! I am always so inspired by what everyone makes!