Be Inspired Blog Hop--Mini Catalogue!

What has been inspiring you out of the 2023 Mini Catalogue? There are honestly SO MANY fantastic things that I can’t even really choose! But I am excited to see all the awesome creations today from my fellow Blog Teammates as we shared projects featuring this Mini Catalogue!

We had our first snowfall of many this week so I think it is perfect for me to share a set of holiday cards that are on a nice crisp white background. With a bit of a fun and bright color palette!

I created this fun and bright set of holiday cards featuring the Joy of Noel Bundle. I just love being able to stamp and cut out ‘Noel’ with some fabulous dies.

I knew I wanted to create these cards using one of my favorite color combination—Coastal Cabana, Flirty Flamingo, Lemon Lime Twist (welcome back, I have missed you!) and Pool Party (you know, Coastal Cabana’s bestie).
I wanted each letter to be a different color, so why not make 4 cards mixing up the colors of each letter? No brainer and so efficient!

I did a little background stamping with the image from the Joy of Noel stamp set that looks like a sweater pattern. I stamped it off on my scratch pad in Pool Party first so it was just a light color and then flicked my Pool Party Stampin’ Blend over top. I also used my Stampin’ Blend to color some of our Basic Rhinestones.
I cut a 1 1/4 x 4 1/4 inch strip of Basic White that I could add my “Noel” to. I cut the letters (all cut with one die, so awesome!) on the Foam Adhesive Sheets first, then inlaid the individual letters after stamping and die cutting them. This way the letter is raised and completely solid. I love it!

Behind the panel I added three die cut sprigs cut with Lemon Lime Twist card stock and the Joy of Noel Dies.

I also added a bit of Silver Cord and White Iridescent Ribbon (trimmed in half) behind the Noel.

I LOVE how these set of cards turned out and I cannot wait to mail them out to some friends this holiday season. I think they are so bright and festive, even though they are a bit of an unusual holiday color combination.

I am really excited to see what Janneke has designed for us this month! I love her creations and am always so inspired by them! Click on the image to head straight to her blog!

I am so happy if my project inspires you to create some projects using something other than red and green for holiday cards! Please click any image to shop with me and help me keep doing what I love!

Around the World on Wednesday--Sketch Challenge!

Hello friends and welcome to Around the World on Wednesday, a fun Blog Hop with amazing Stampin’ Up! creators from ‘Around the World’! I am so proud to be in a Hop with so many amazing designers!

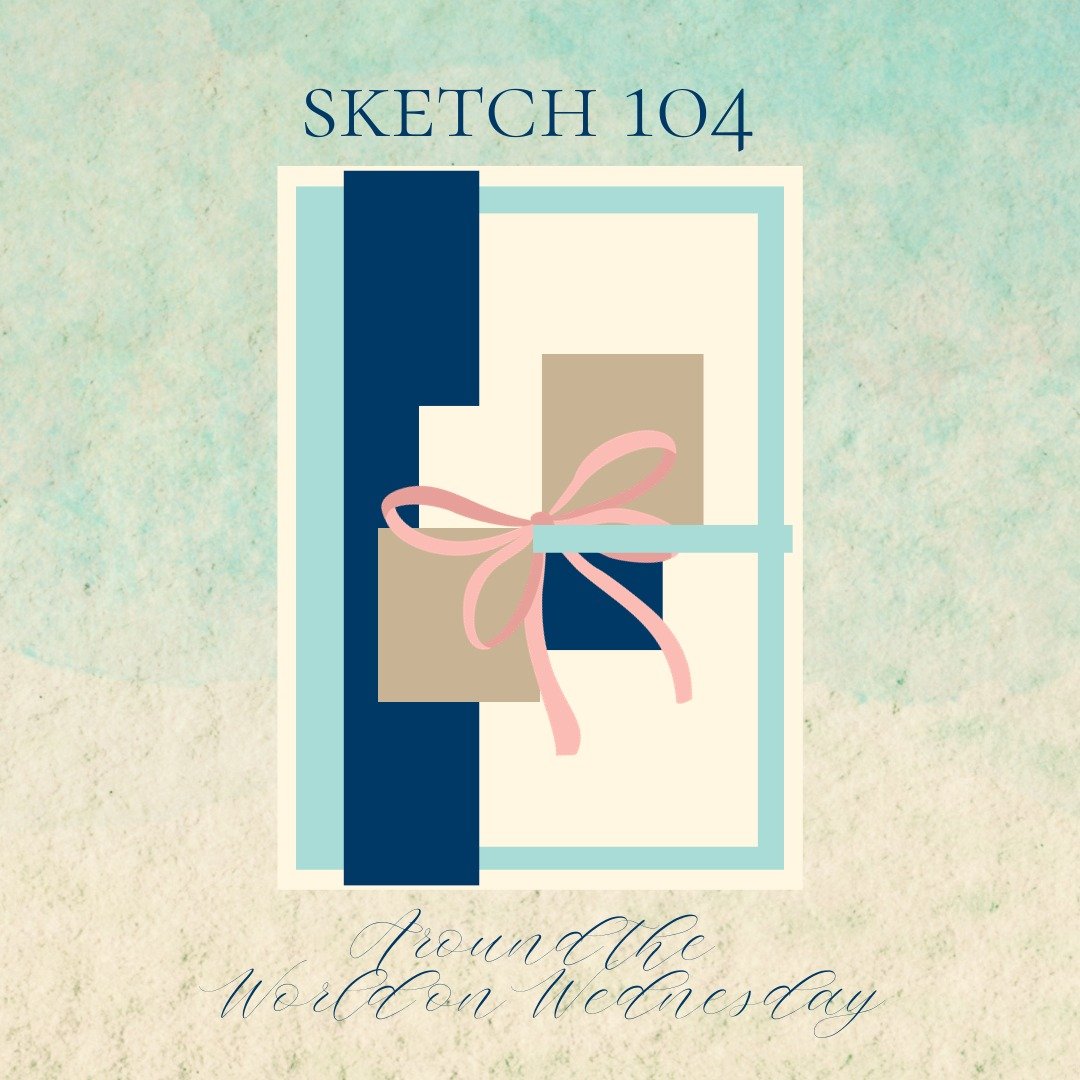
This month, we have a sketch challenge! I always love a sketch challenge to see how people interpret the sketch!

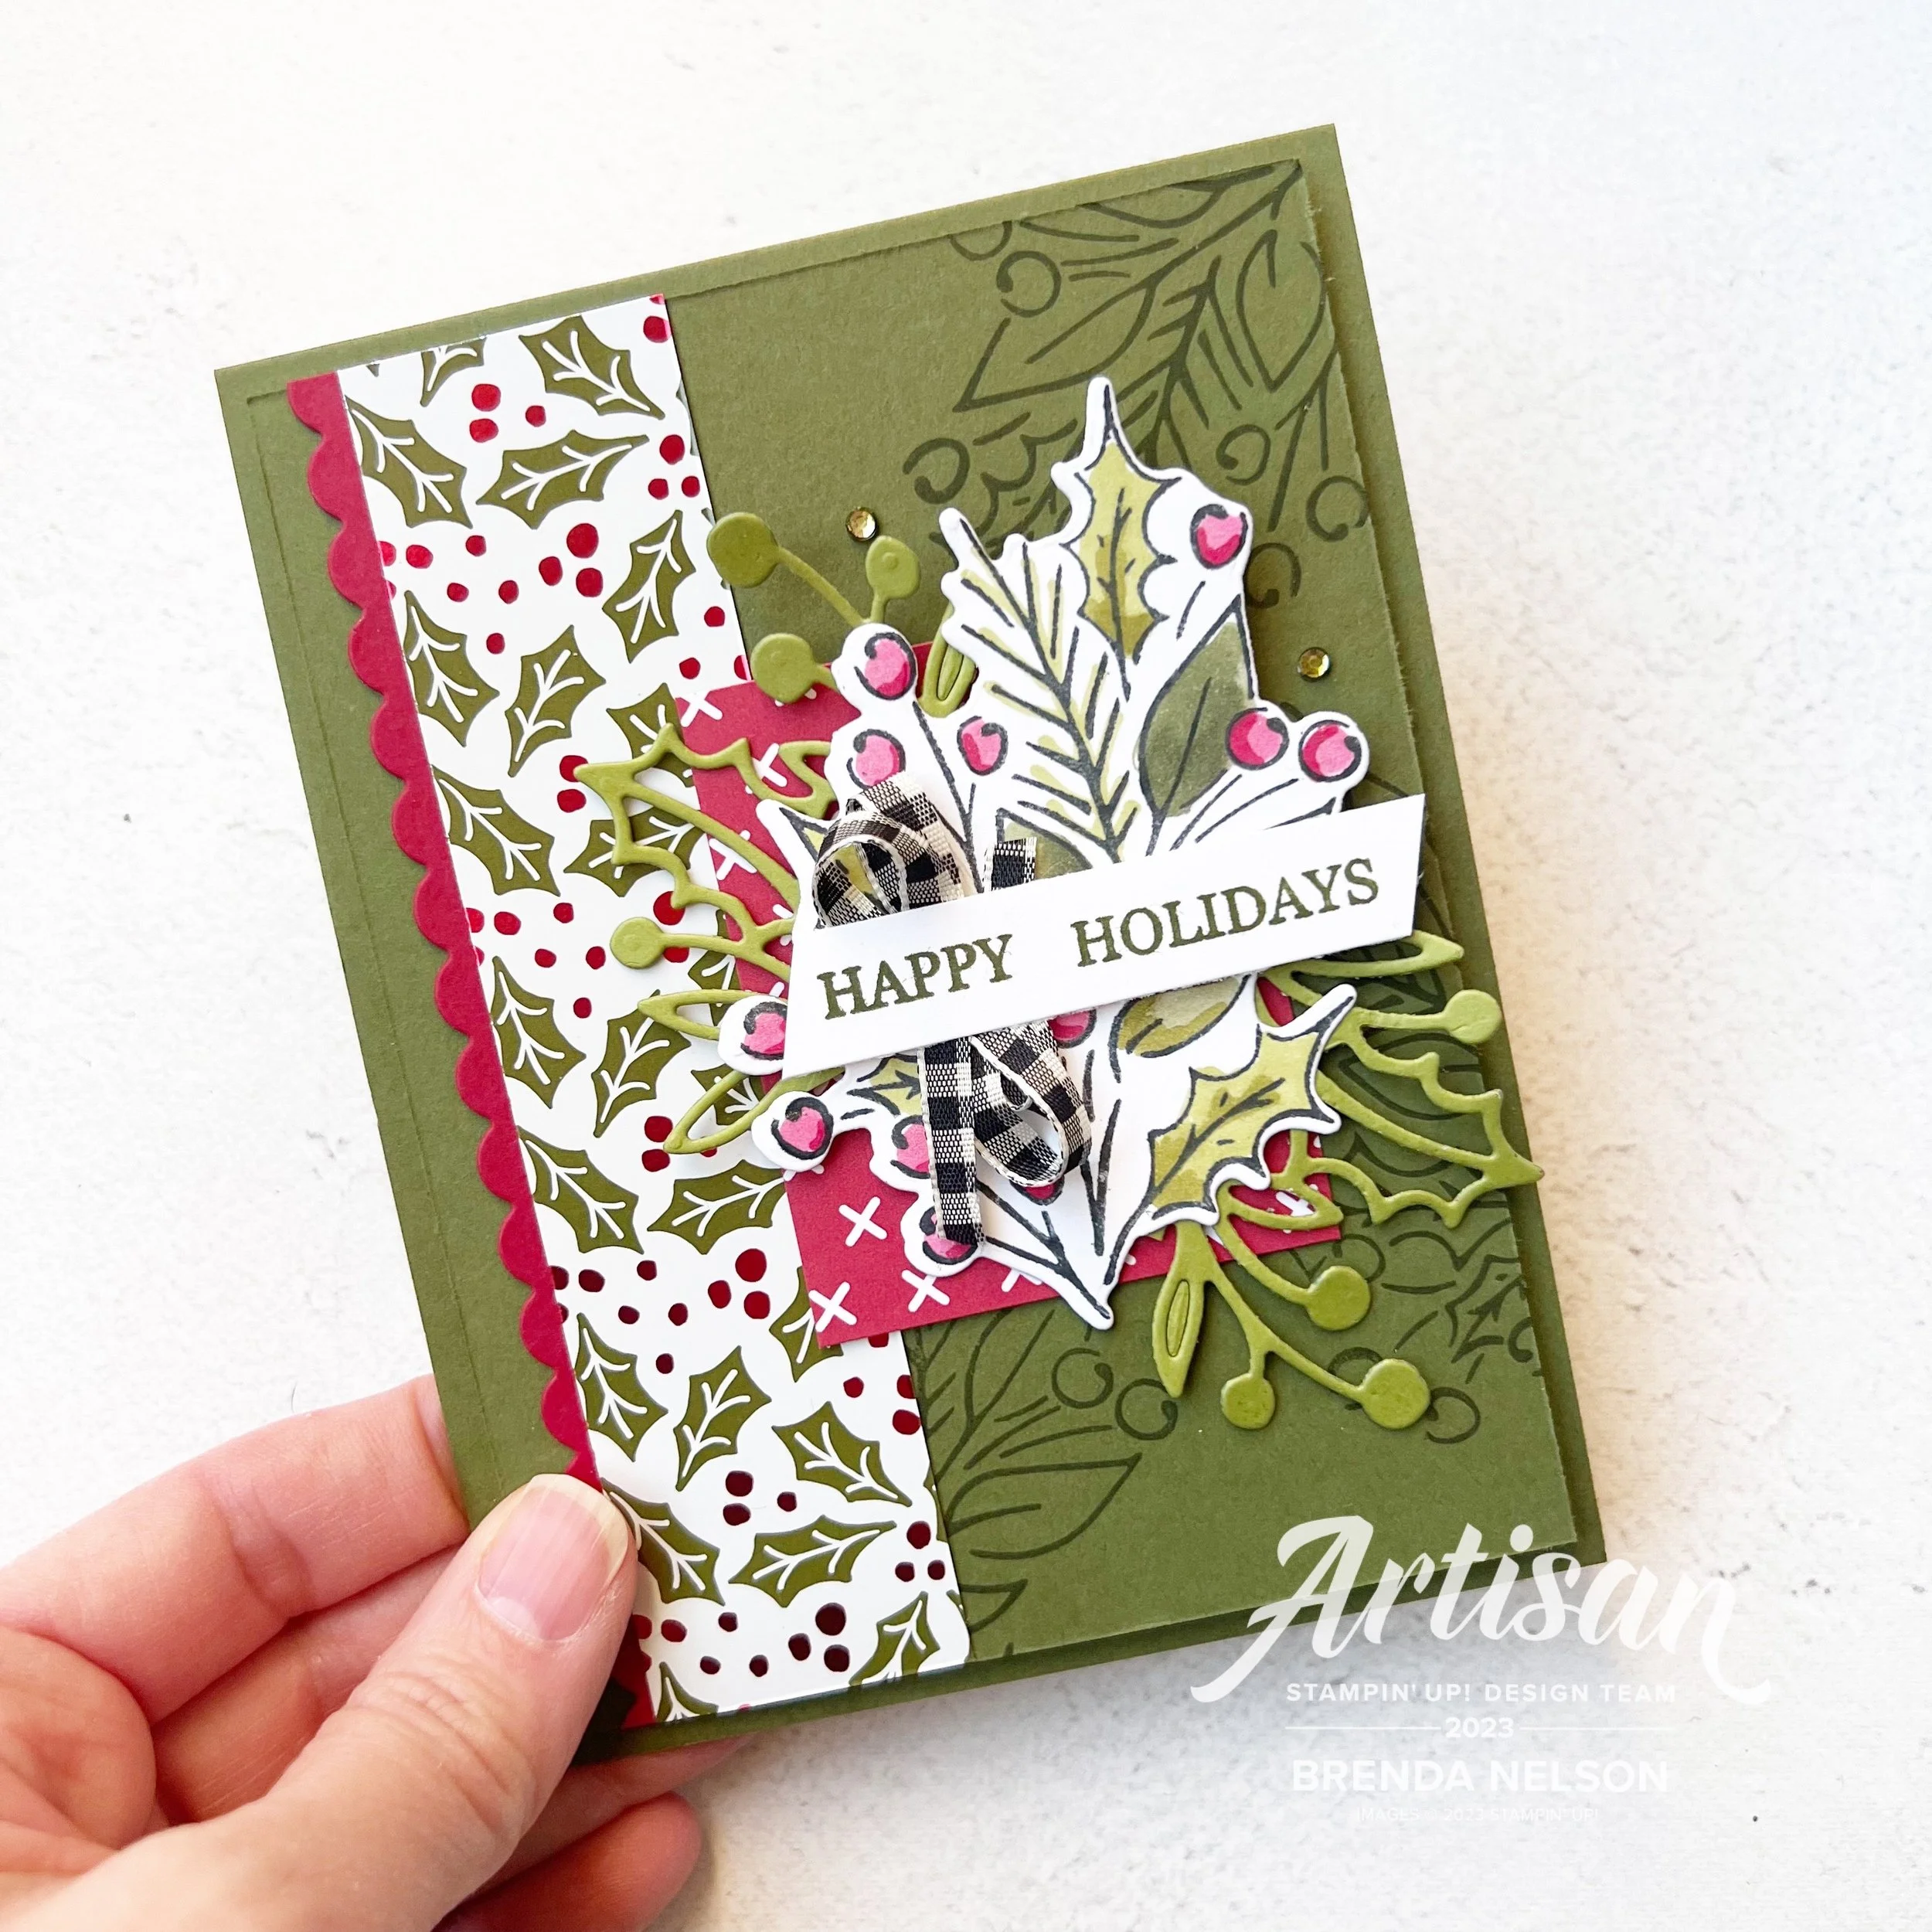
I will admit, I did stick pretty true to the original sketch and I focused on the Joy of Christmas suite with a twist on the DSP!

I decided to use the new DSP which is an Online Exclusive called Shining Christmas, instead of the DSP included in the suite. One side of the DSP has a glossy appearance and the other side is more matte.

The two primary colors in the DSP are Cherry Cobbler and Mossy Meadow, so I decided to focus on Mossy Meadow as my base and first layer. I did some background stamping with the large image from the Joy of Noel stamp set in Mossy Meadow ink.

I added a side strip of the holly leaves pattern from the Shining Christmas DSP and used a retired die to add a scallop strip in Cherry Cobbler as an accent.

Instead of 4 separate squares (as shown in the sketch) I chose to just cut one larger piece of DSP in a Cherry Cobbler X pattern. I used this as the base to add all of my other elements.

I stamped out the same image as the background in Momento ink and used my Stampin’ Blends in Mossy Meadow, Old Olive and Cherry Cobbler to color the image. I added some Wink of Stella to the berries as well.

One of my favorite dies sets is the Christmas Classics —I LOVE the label die with the greenery! You can easily snip the greenery separate from the label tot use as accents pieces, which I have done here on my card in Old Olive. I tucked it behind my colored image.

Happy Holidays is stamped from the Christmas Classics stamp set with a little bit of the Black & Very Vanilla Large Check Ribbon.

TOP TIP: If the ribbon feels to big or wide for your project—cut it in half! By doing so on this card, it felt more on scale with the sentiment.

I wanted a little bling so I took some Basic Rhinestones and gave them a quick wash of color with the Mossy Meadow Stampin’ Blend so they would have the perfect color.

I can’t wait to see what the other members of the Team have designed using this sketch! Please make sure to hop all the way around so you don’t miss any fabulous ideas!

Next up on the Hop is Theresa McEntee from the United States, I know you will love what she has made!


Creative Convention--Day 7!

Yay! A whole week of fun and inspiration! I have had an amazing time at Backstage being inspired myself so I wanted to inspire you as well! I hope you have enjoyed all of my posts so far and I have gotten you excited for the upcoming Holiday catalogue!

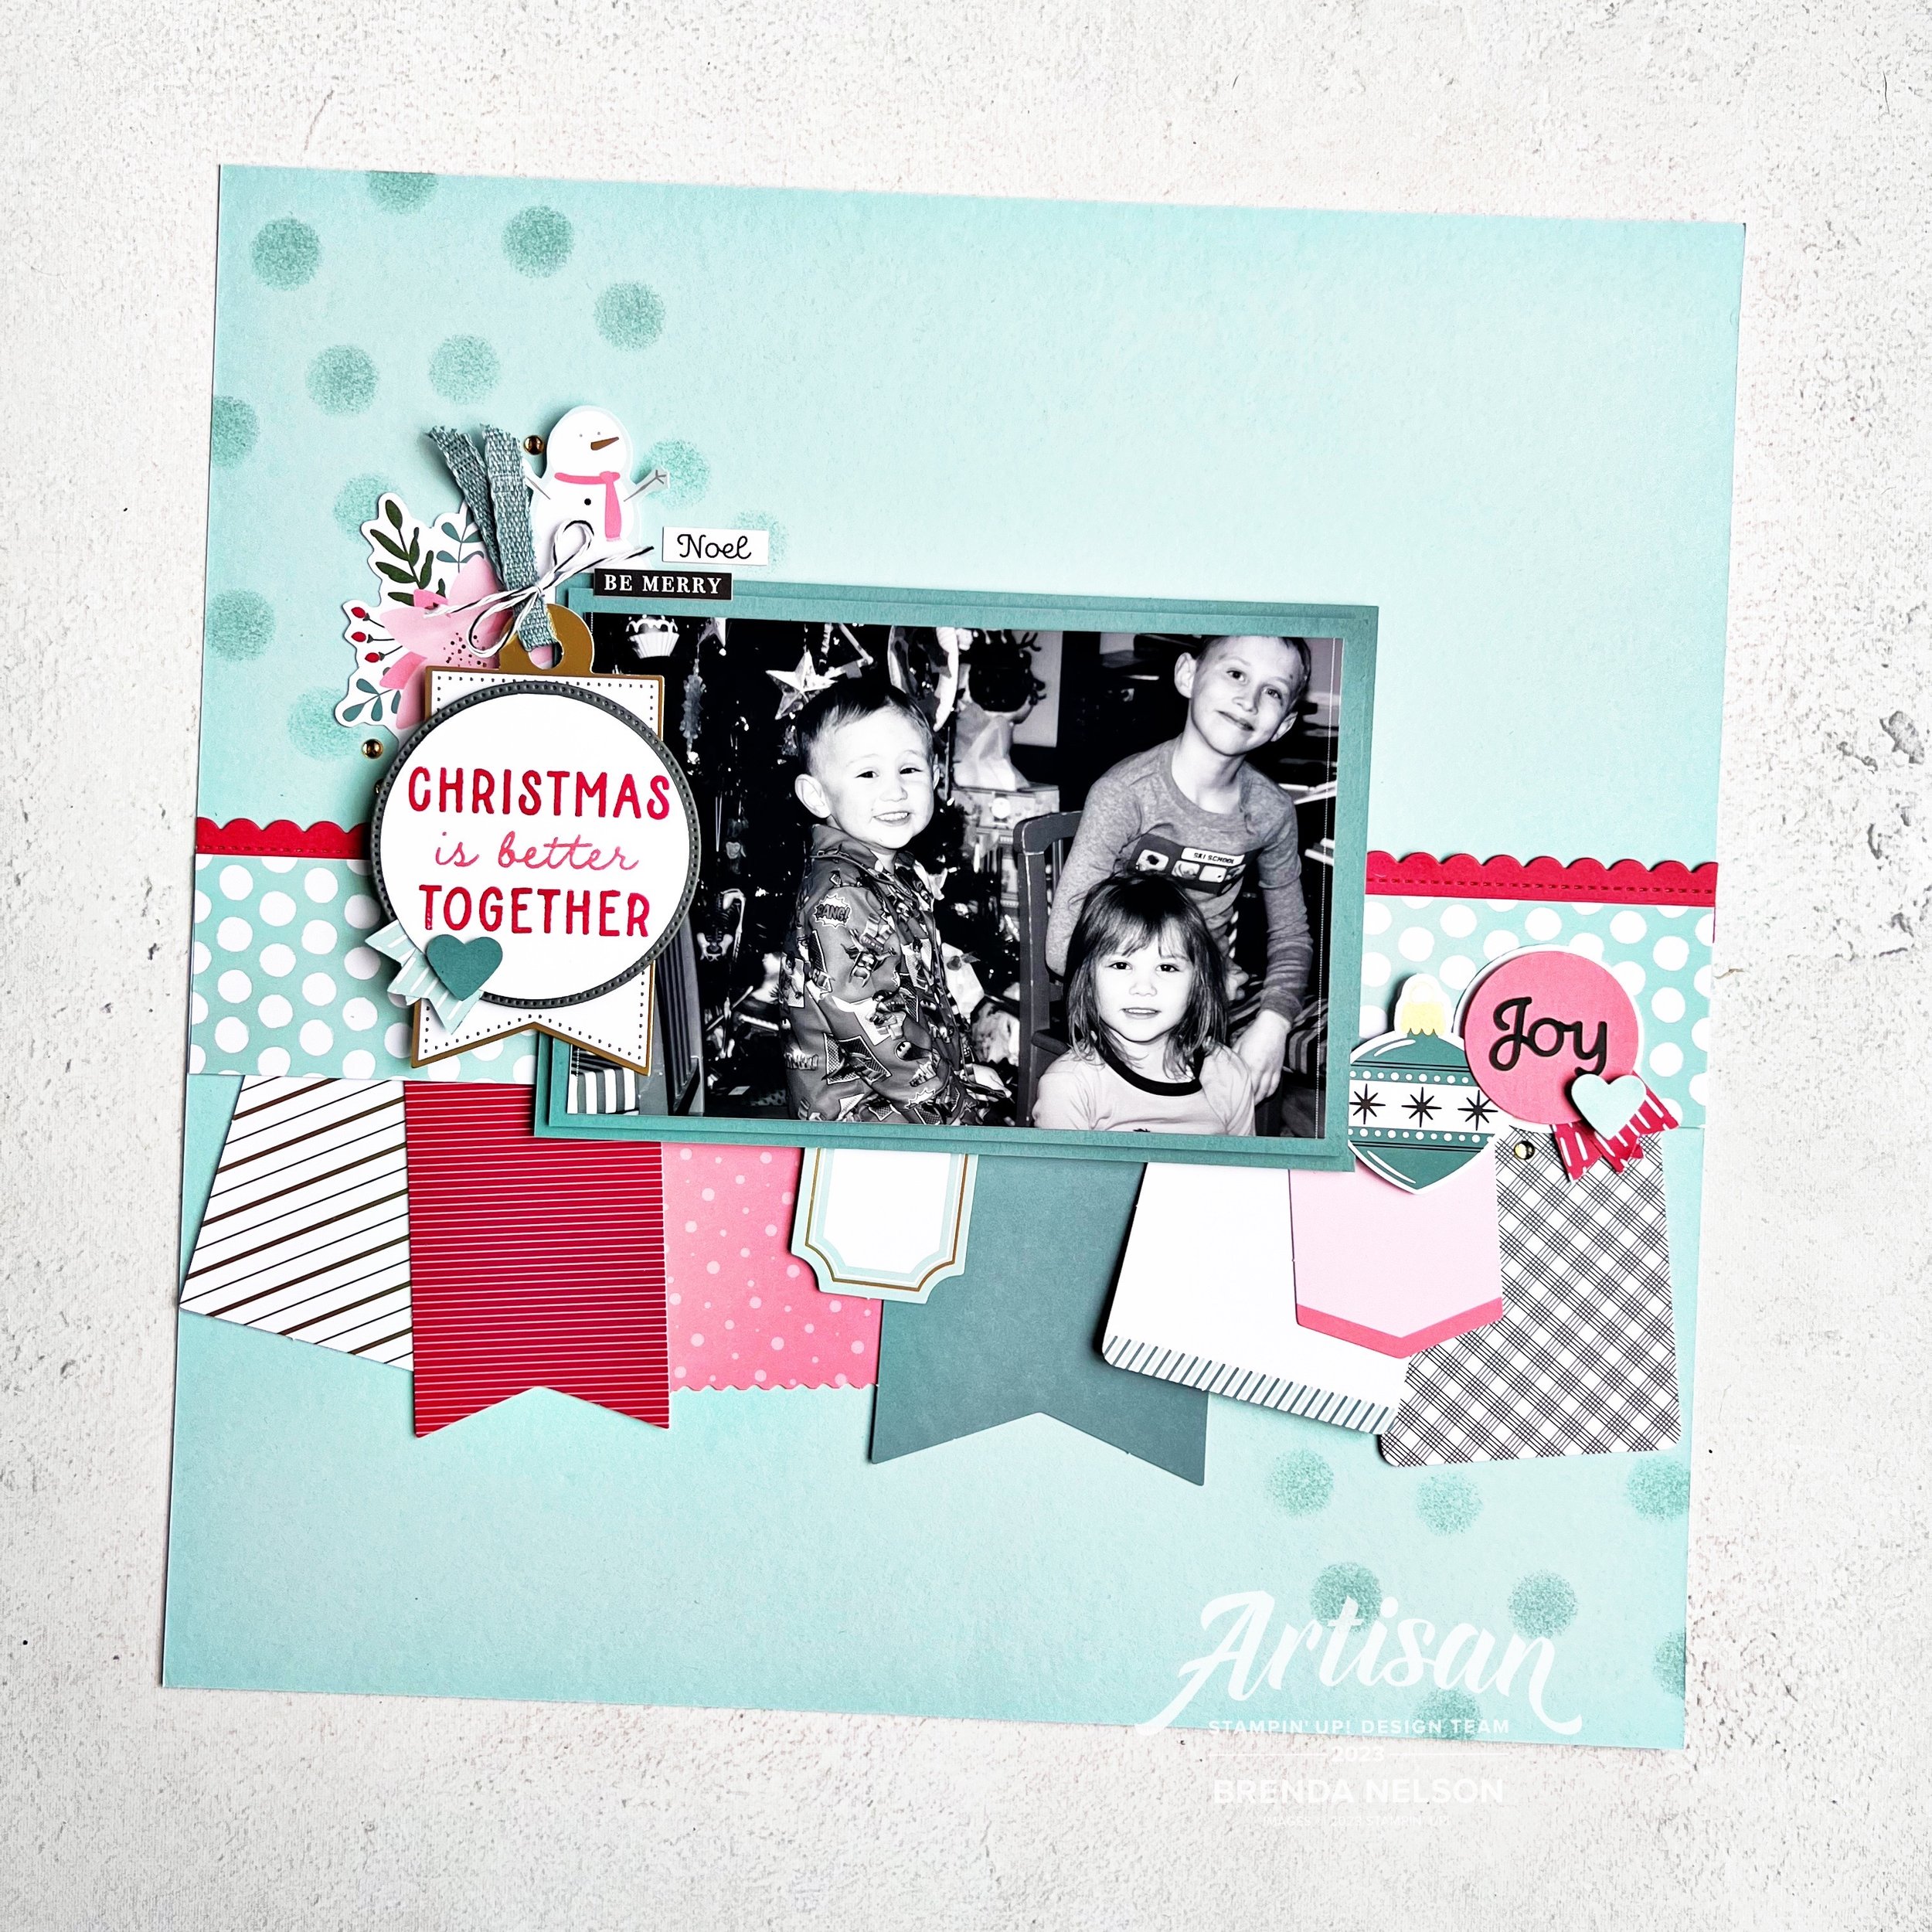
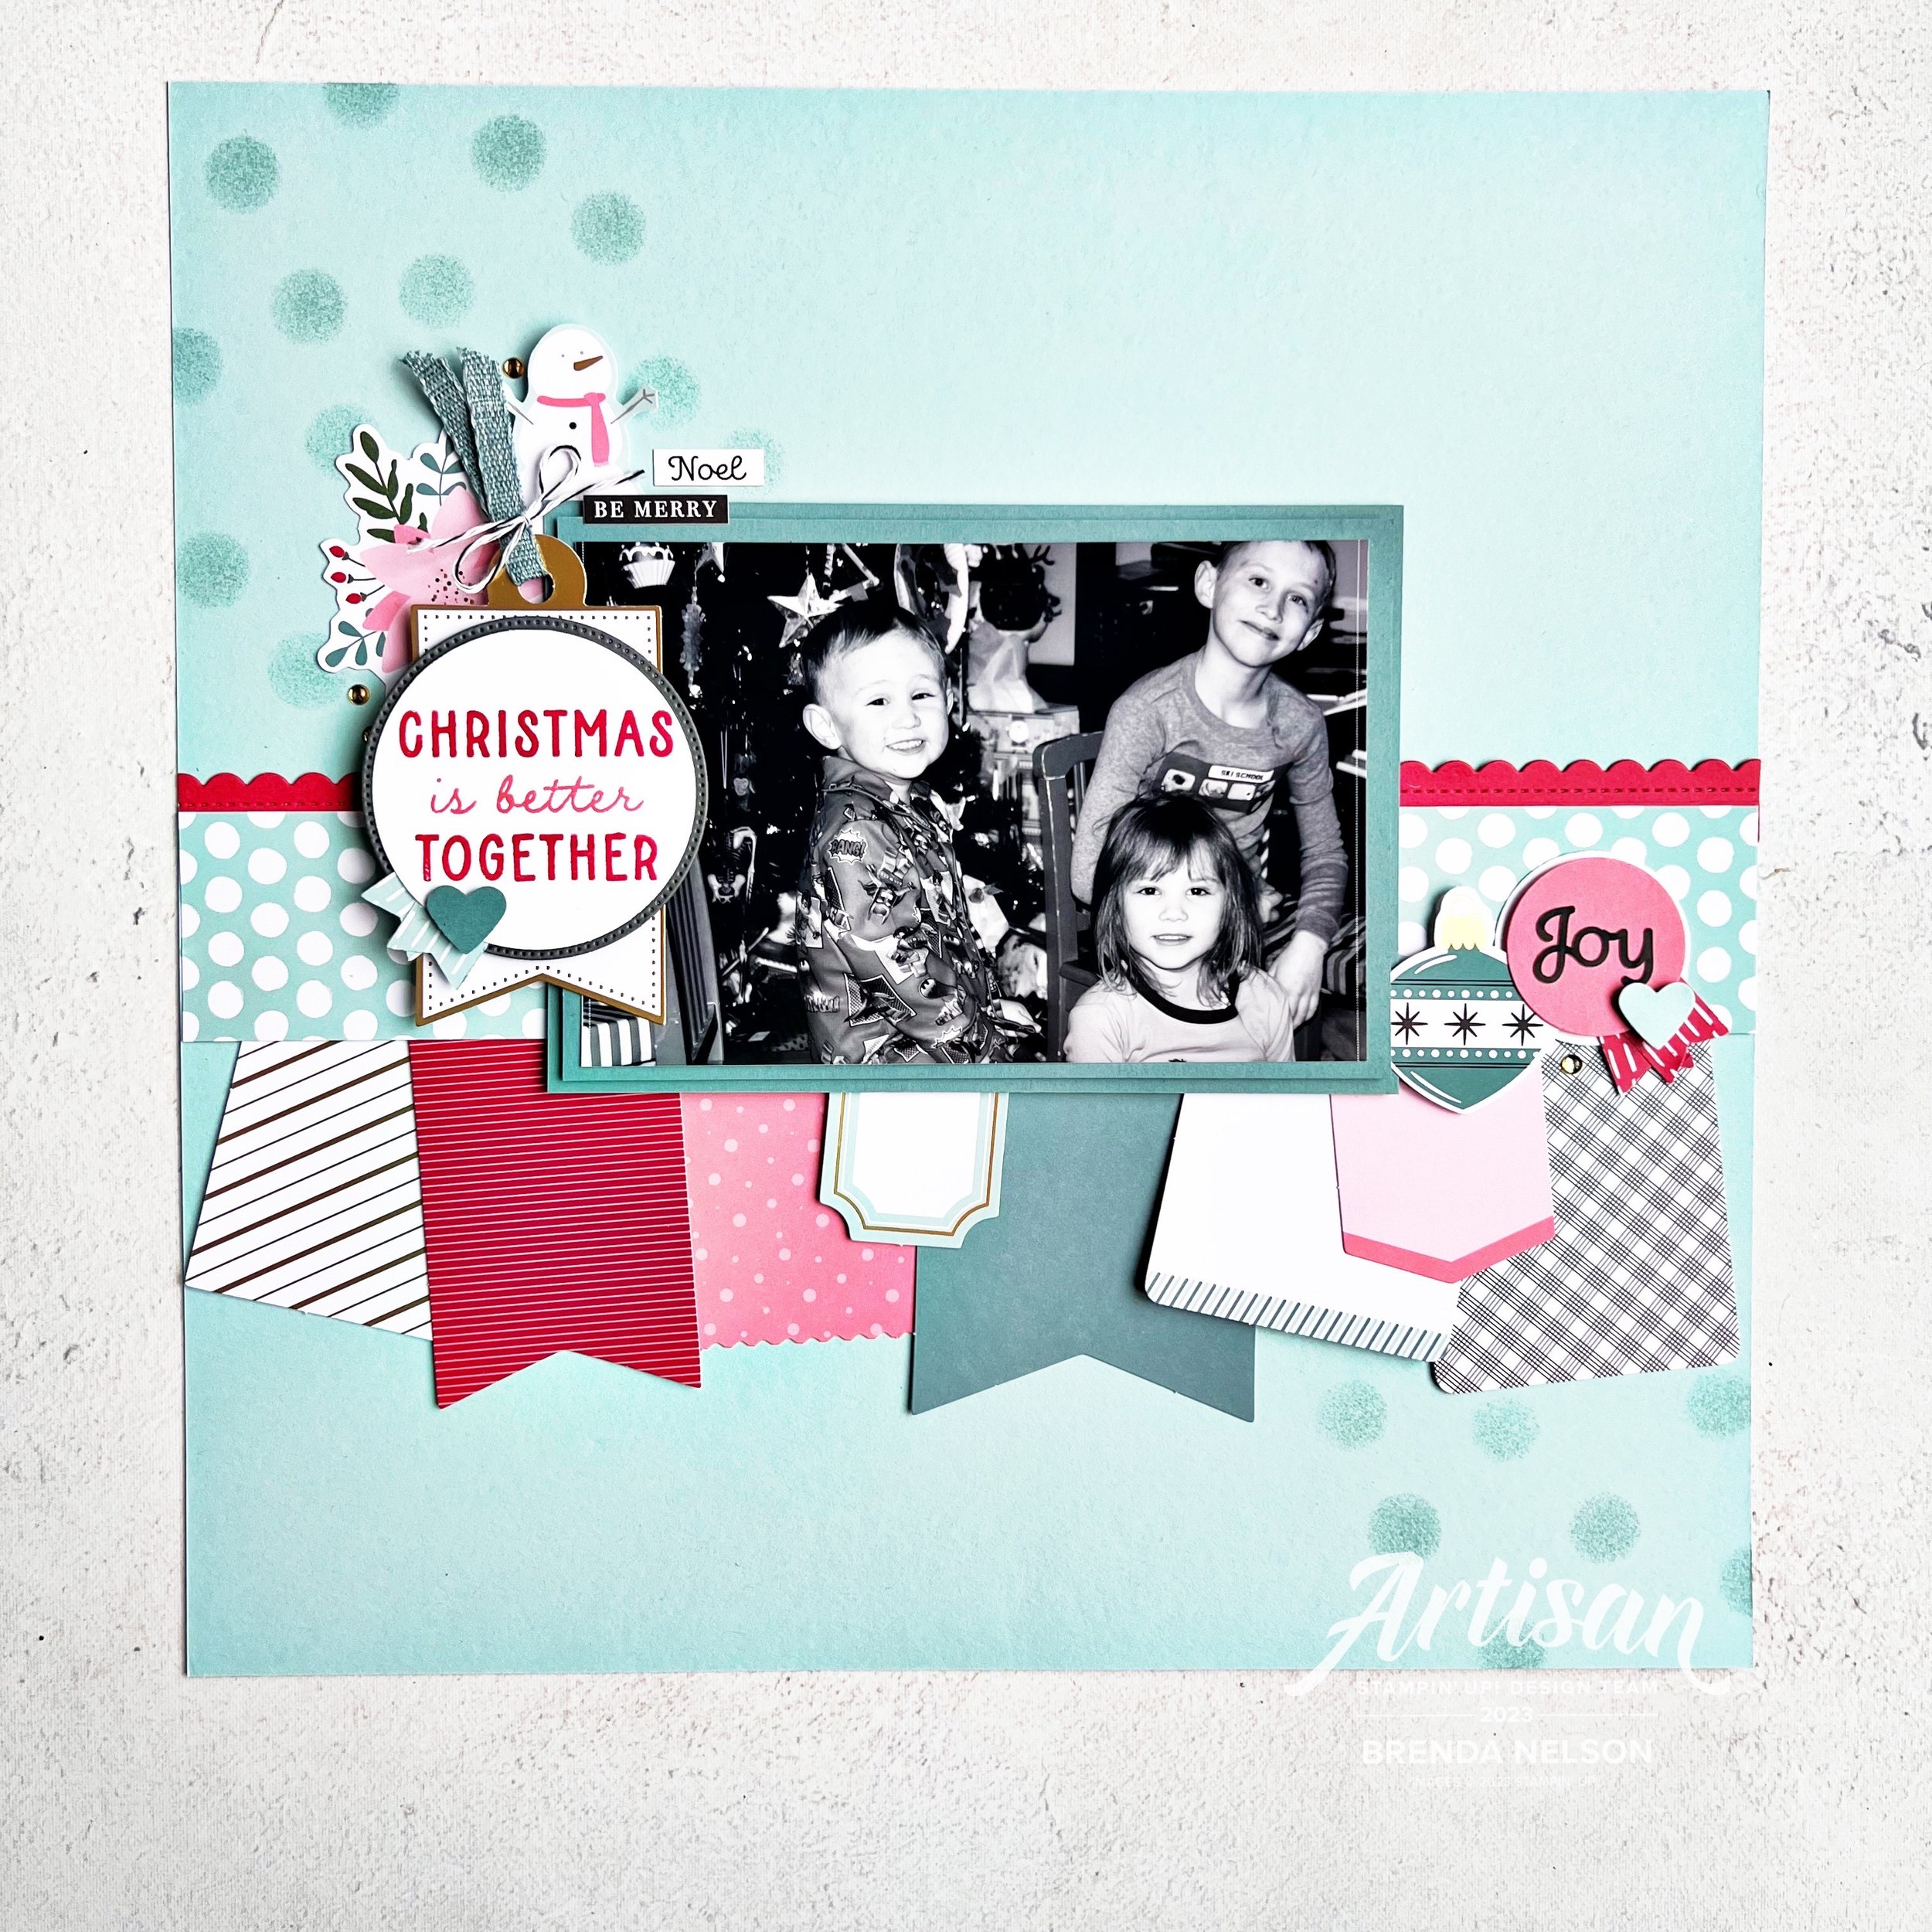
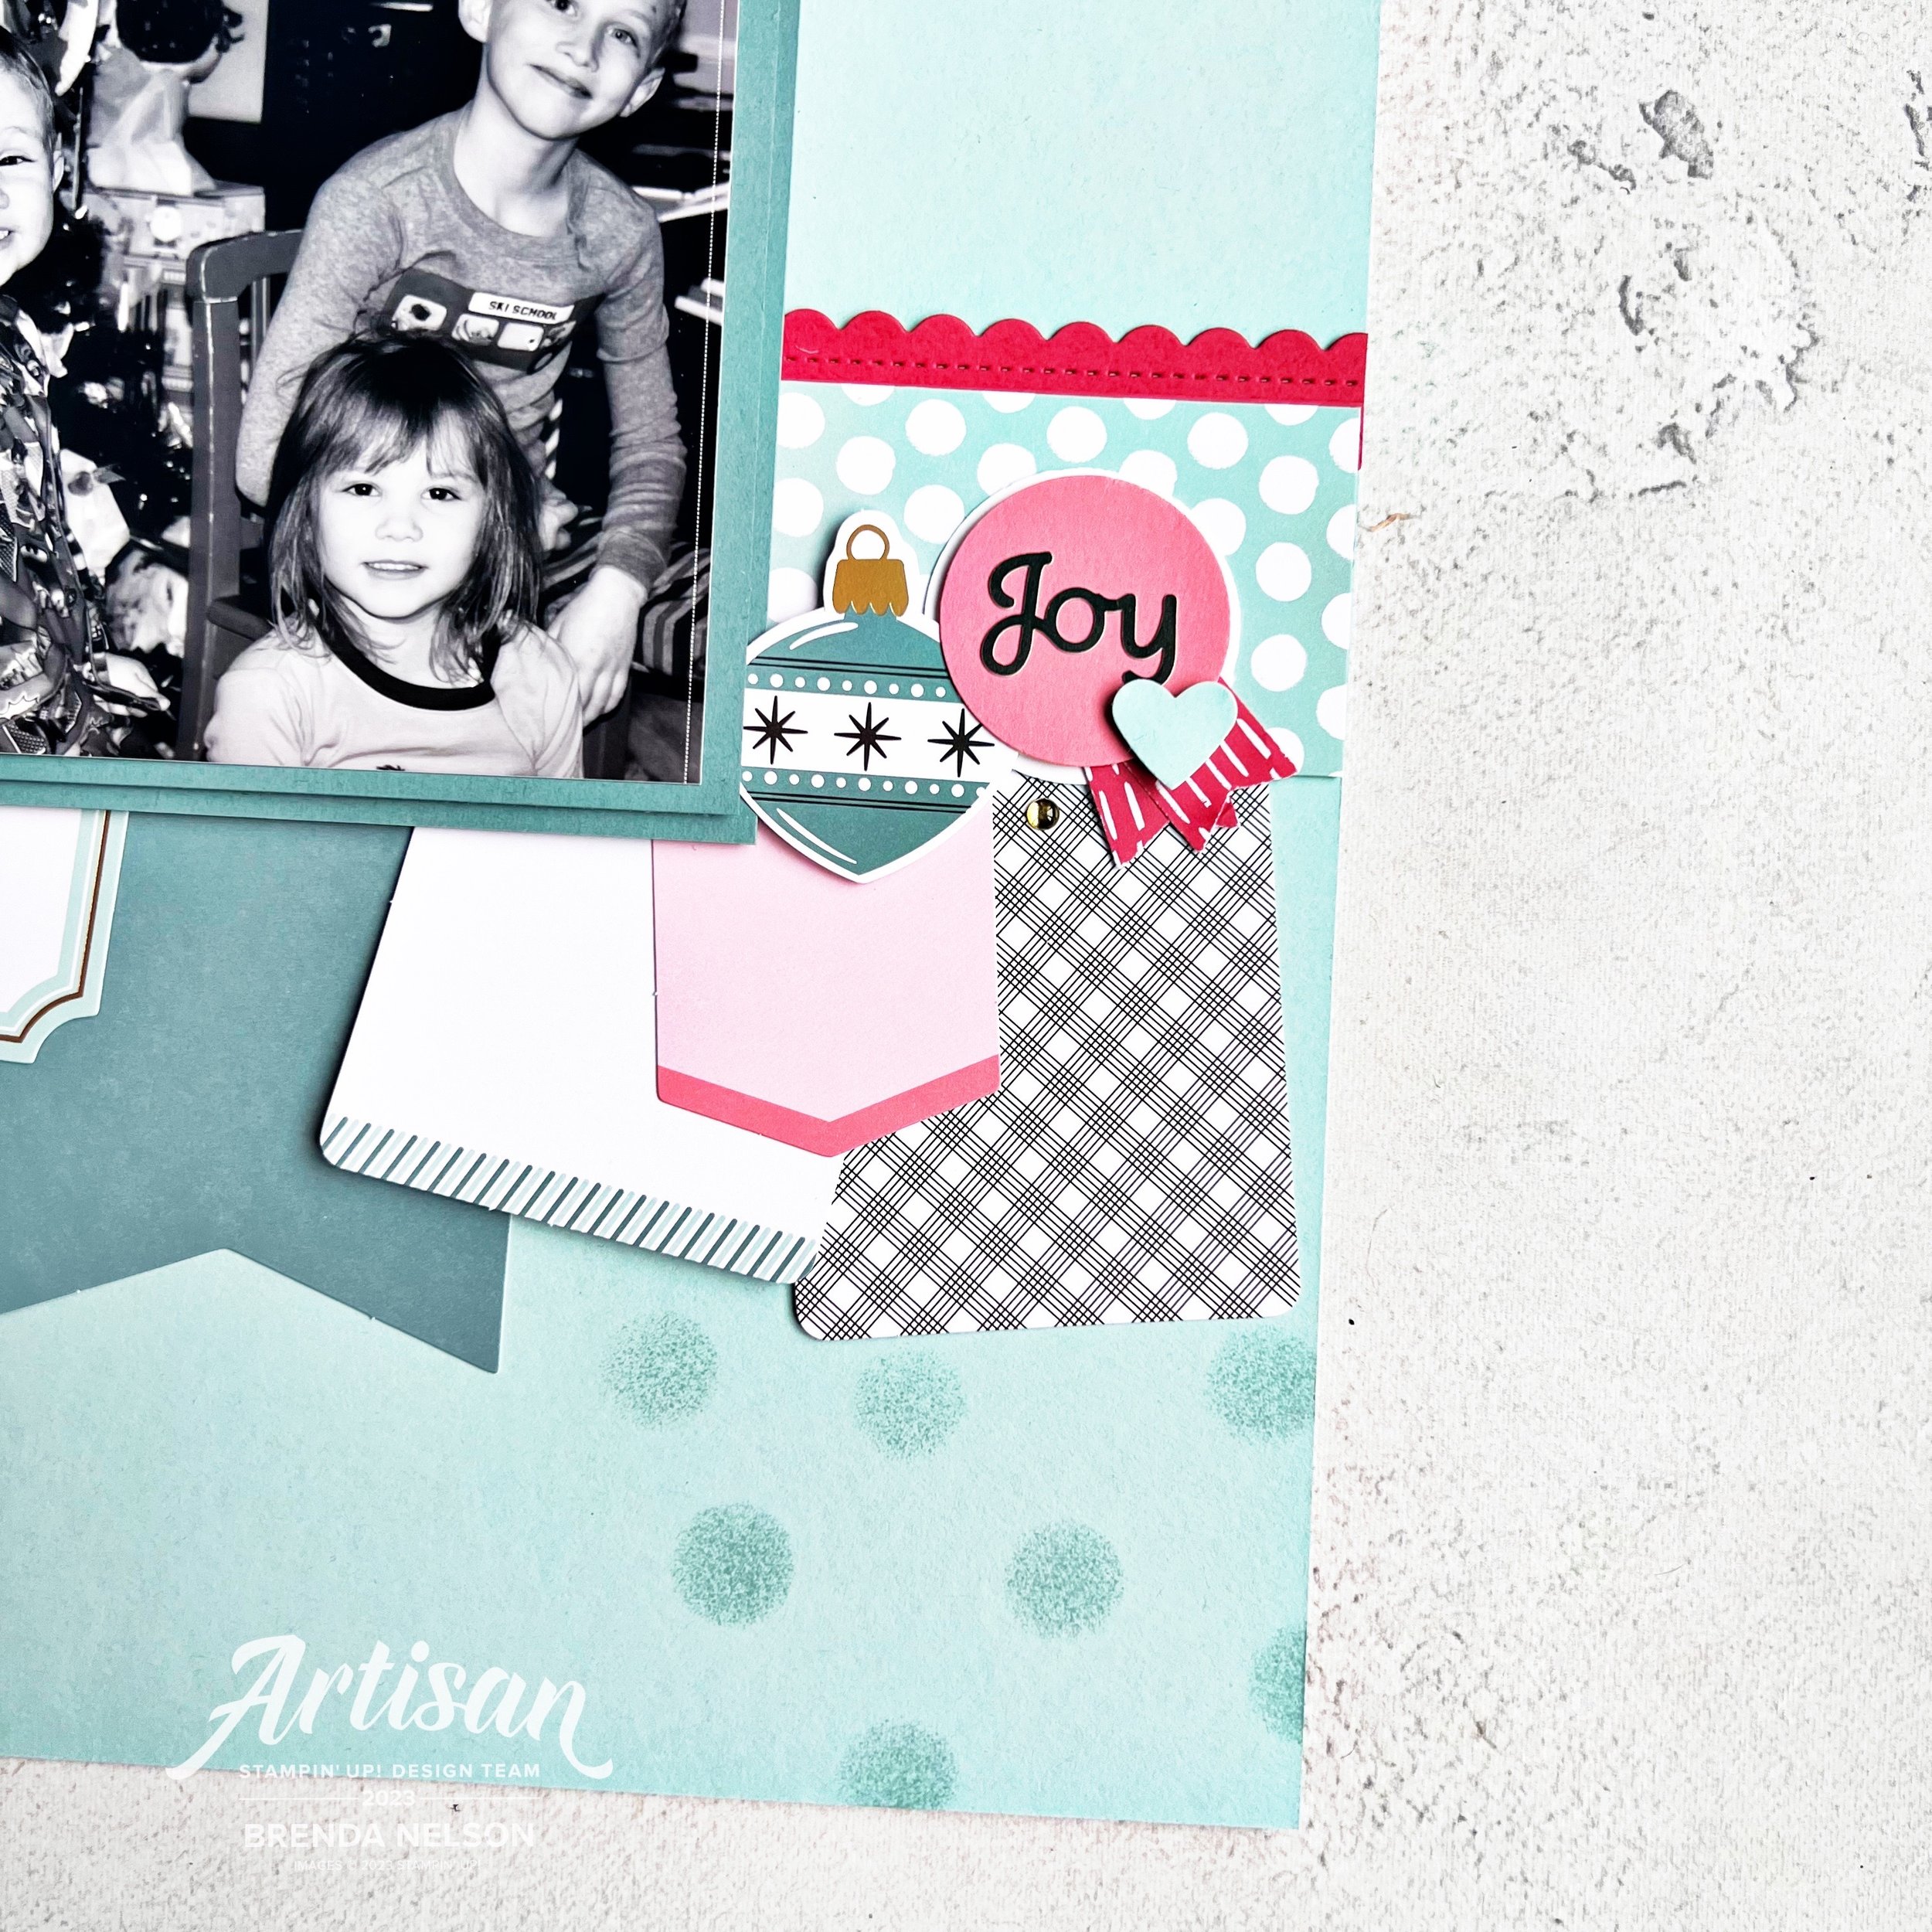
My last project had to be a scrapbook page, there was no way I could not share one as that is actually my passion. While I do enjoy making cards, I really LOVE making scrapbook pages!

I really wanted to use the new Festive Tags —kits are on sale this month, and I love how SU released a new kit and put it on sale for us! Isn’t that amazing? I always love our tag kits as I find them to be extremely valuable in content and a total time saver when the holidays get busy!

I thought these tags would look awesome as a banner on a scrapbook page and I was right! I was so easily able to bring my vision to life with this tag kit. I love the color palette of the kit—Lost Lagoon, Pool Party, Sweet Sorbet, Flirty Flamingo with gold accents!

I also printed my christmas picture in black & white—the reason is that I find holiday photos almost overwhelming with all the color and it sometimes competes with the colors in your scrapbook page, so this is an easy solve—print in black & white so it is a neutral canvas!

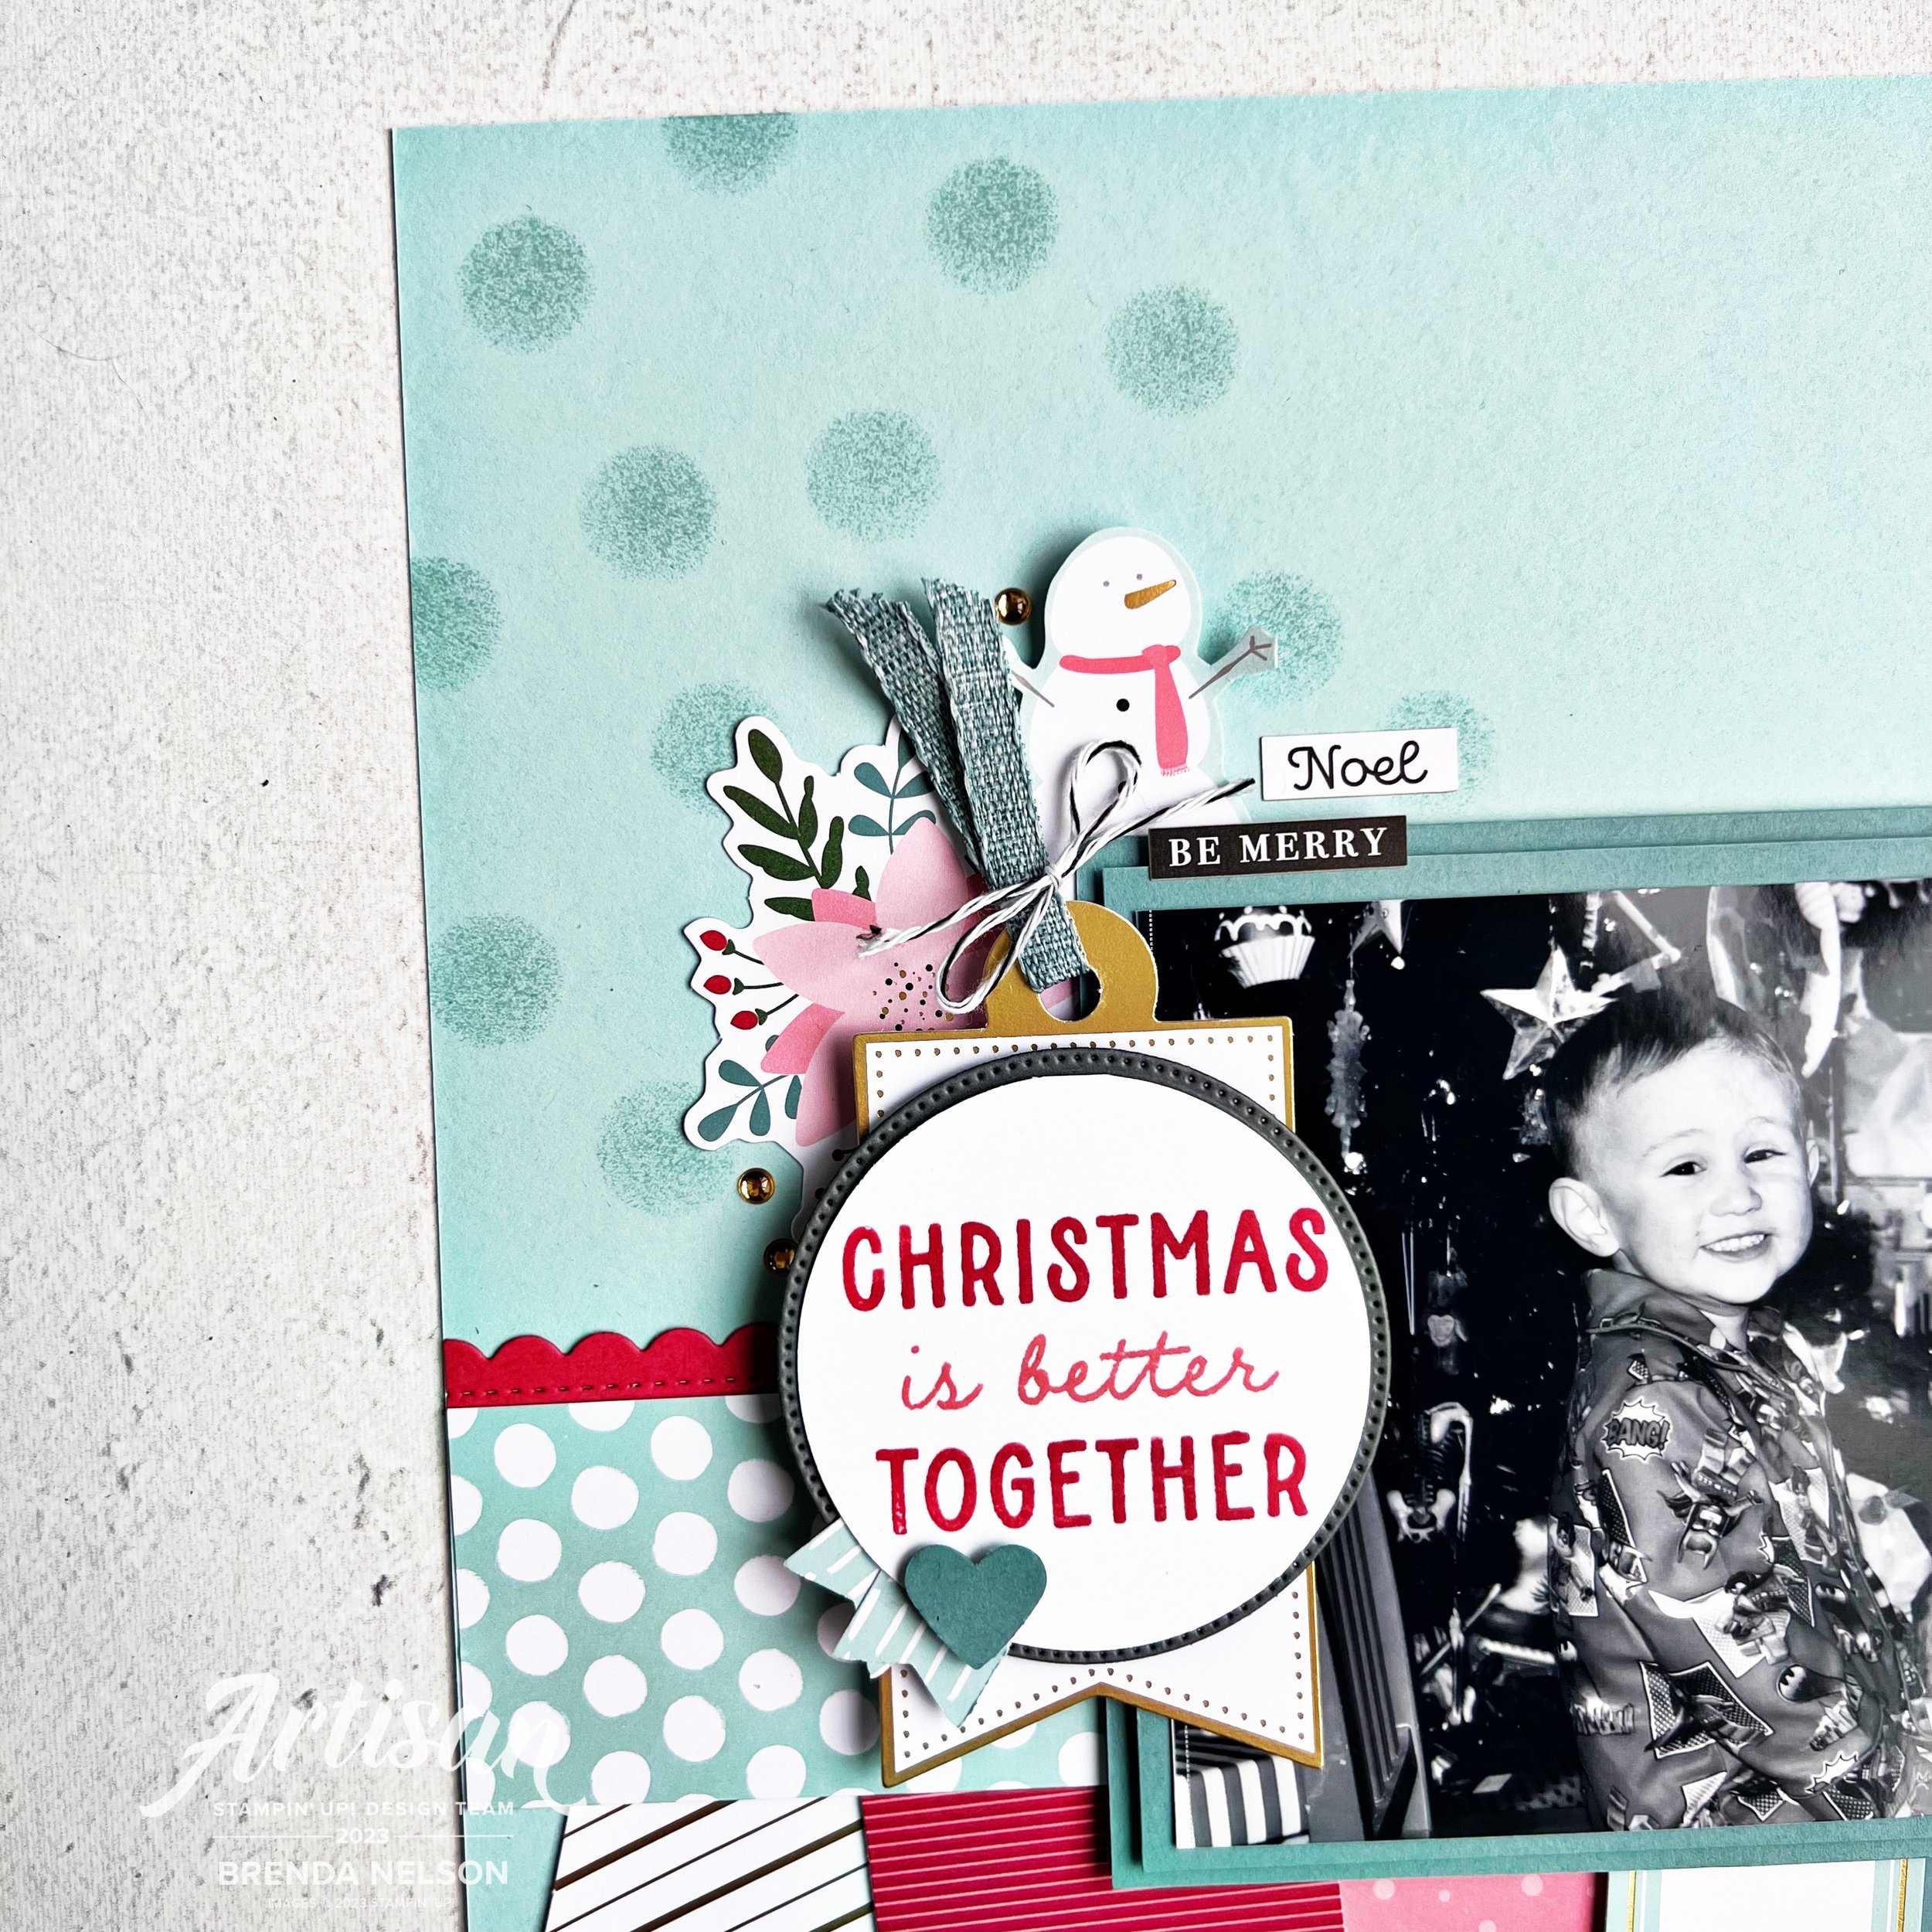
There is only one things stamped on this page because I could not resist this sentiment. I was absolutely perfect for this page! You can find ‘Christmas is better Together’ in the Beary Cute stamp set. I love it so much!

I also decided that my Pool Party background needed a little something and since I had already added polka dot Pool Party DSP (from the 6x6 Subtles paper collection) to my page I decided to continue that theme. The easiest way to add polka dots is with a finger dauber! It is the ideal size as the scale works perfectly on scrapbook pages and cards.

Not only does this kit have adorable tags but it also has cut things like snowmen, trees, ornaments and a whole bunch of holiday words that are STICKERS! Yes, this actually a stamp free kit!

I miss these little kids—this was christmas eve 2012! They say the days are long but the years are fast and it is so true!

I really hope this scrapbook page encourages you to look at our Kits as a whole in a new way. I often find I can use the elements to create completely different projects than intended!

Thank you so much for being a part of my “Creative Convention”—please feel free to shop with me if you do not have a demonstrator. I love what I do and your support allows me to keep doing it!

And if you missed yesterday’s post, please go back and take a look and consider joining me and Tricia for the Joy of Christmas Stamp Camp on October 21st on Zoom! We would love to spend the day stamping with you!

Creative Convention--Day 4!

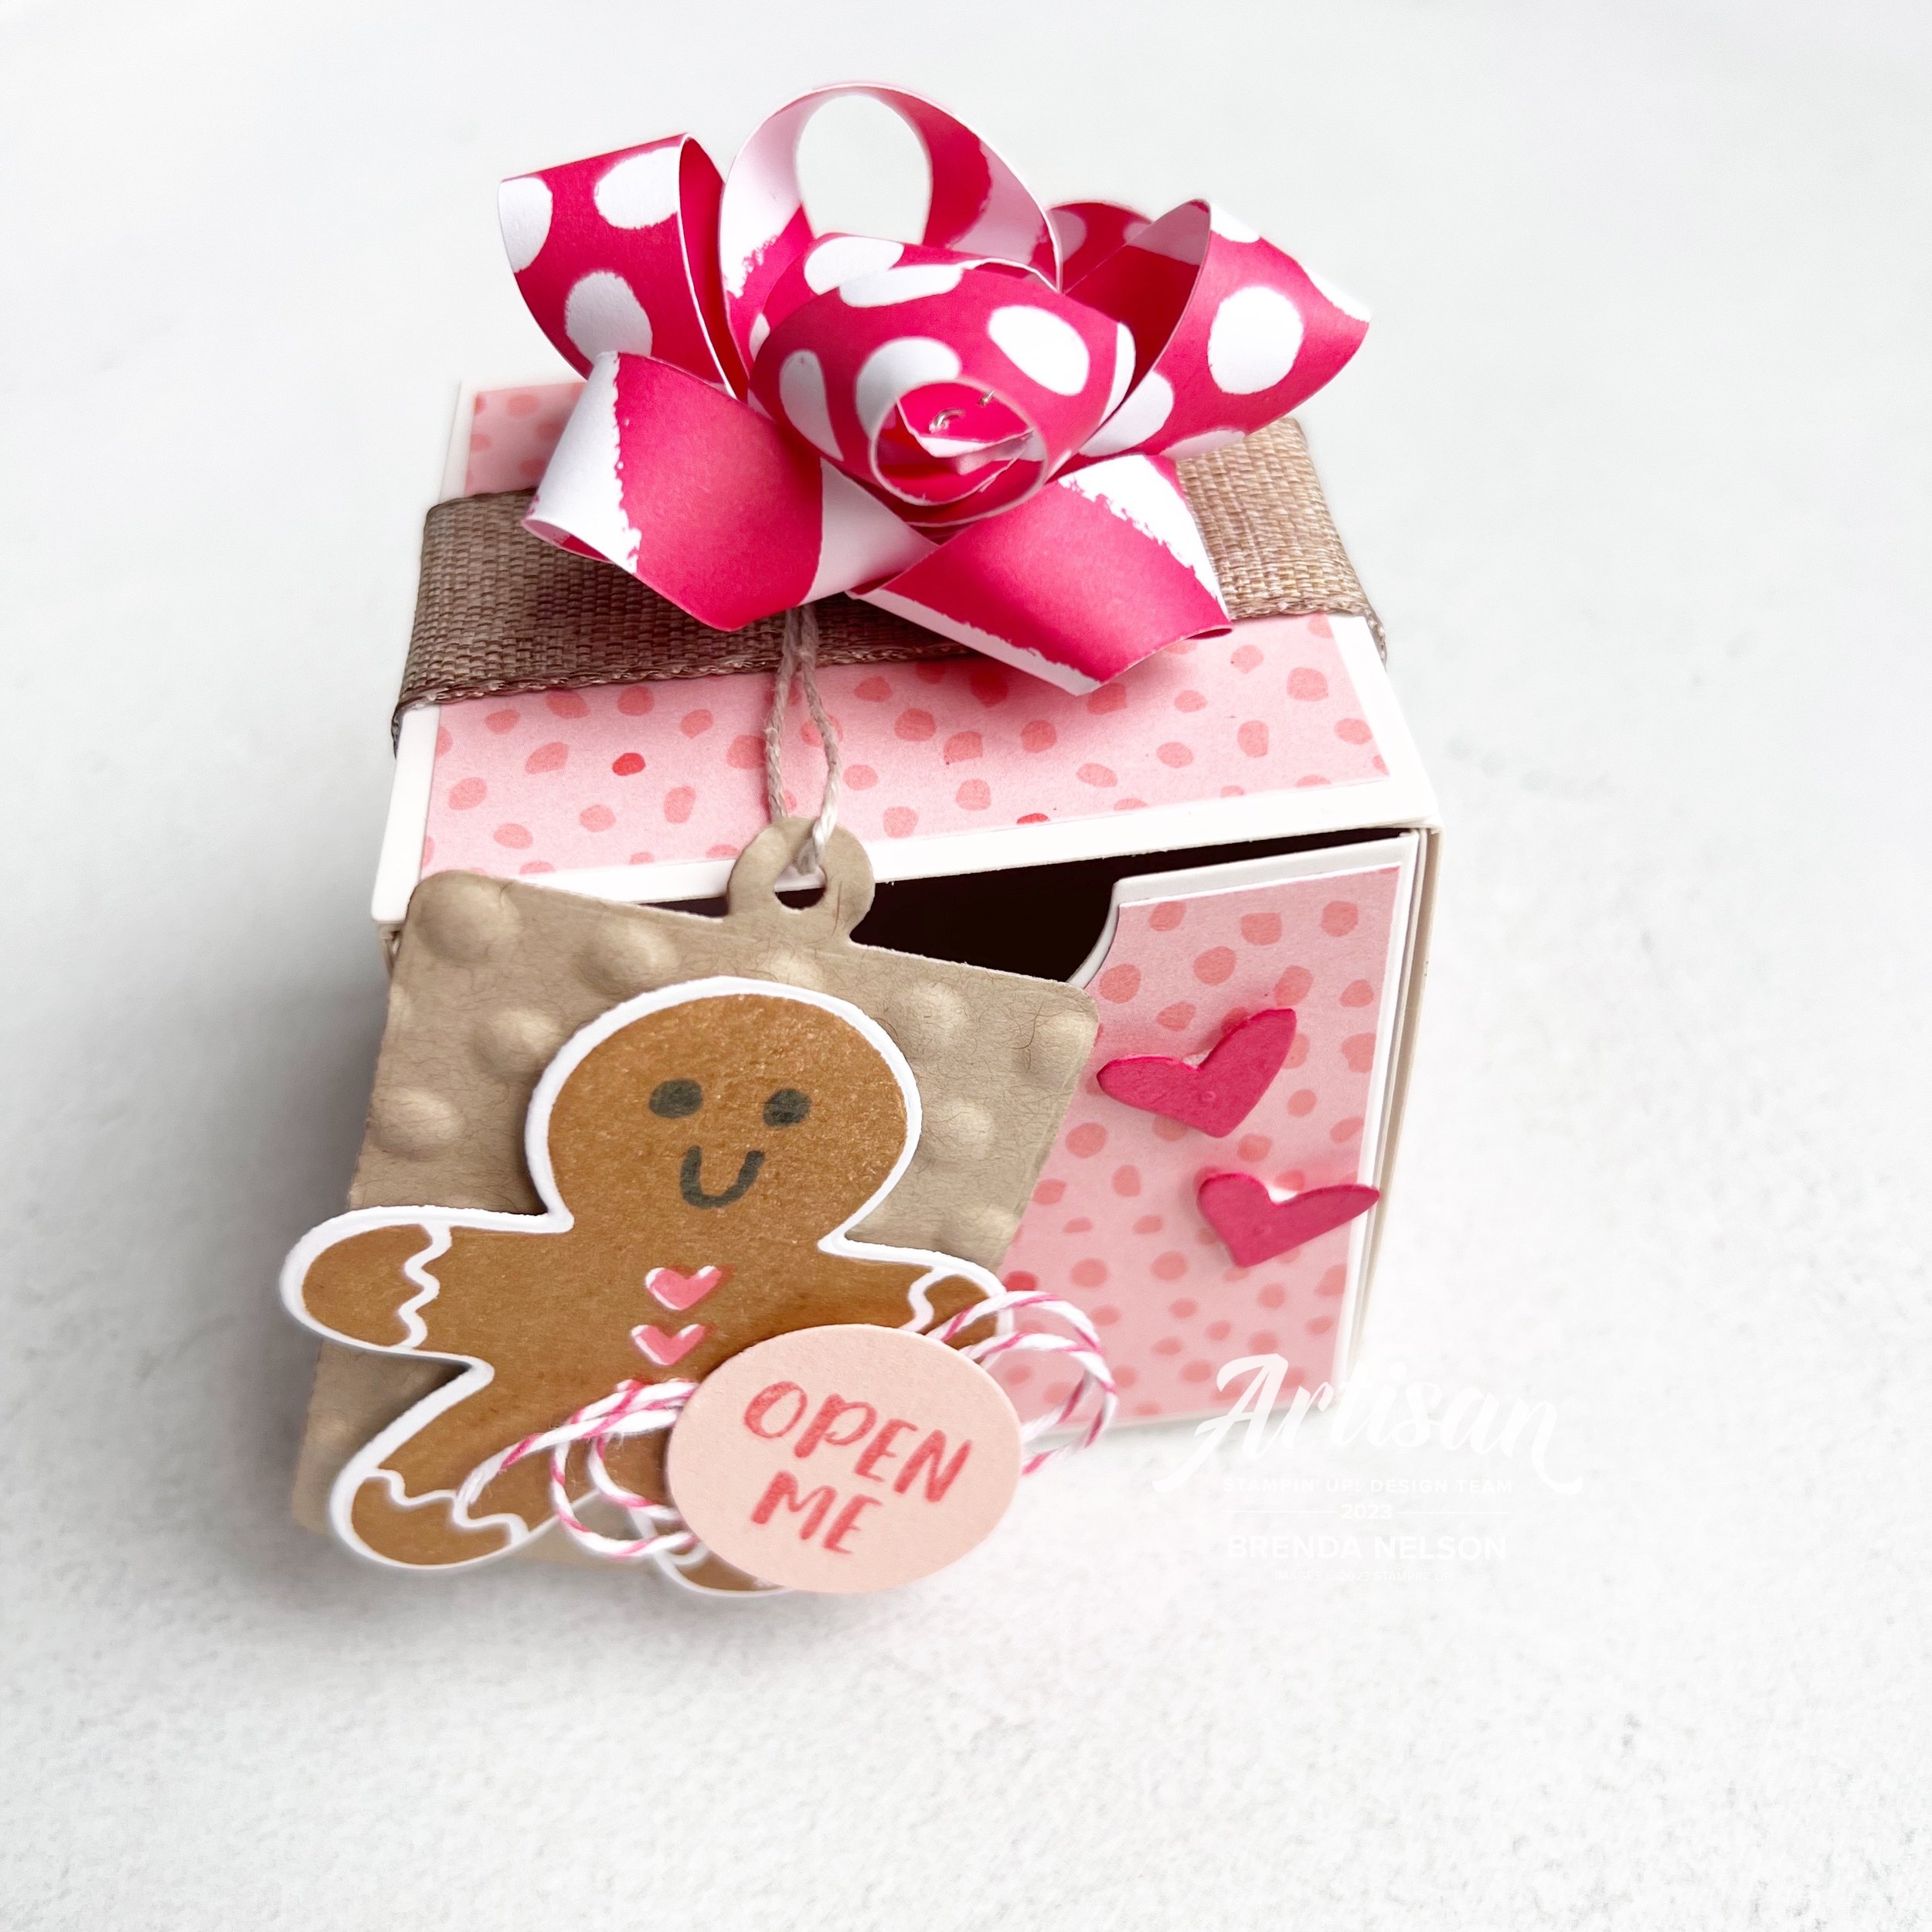
Hello friends! Today I decided to share something that is NOT a card with you because I am really excited about these new Nested Treat Boxes that are coming out in the Holiday Catalogue! Welcome back for my 4th share of my Creative Convention—my week long blogging extravaganza while I am away at Backstage!

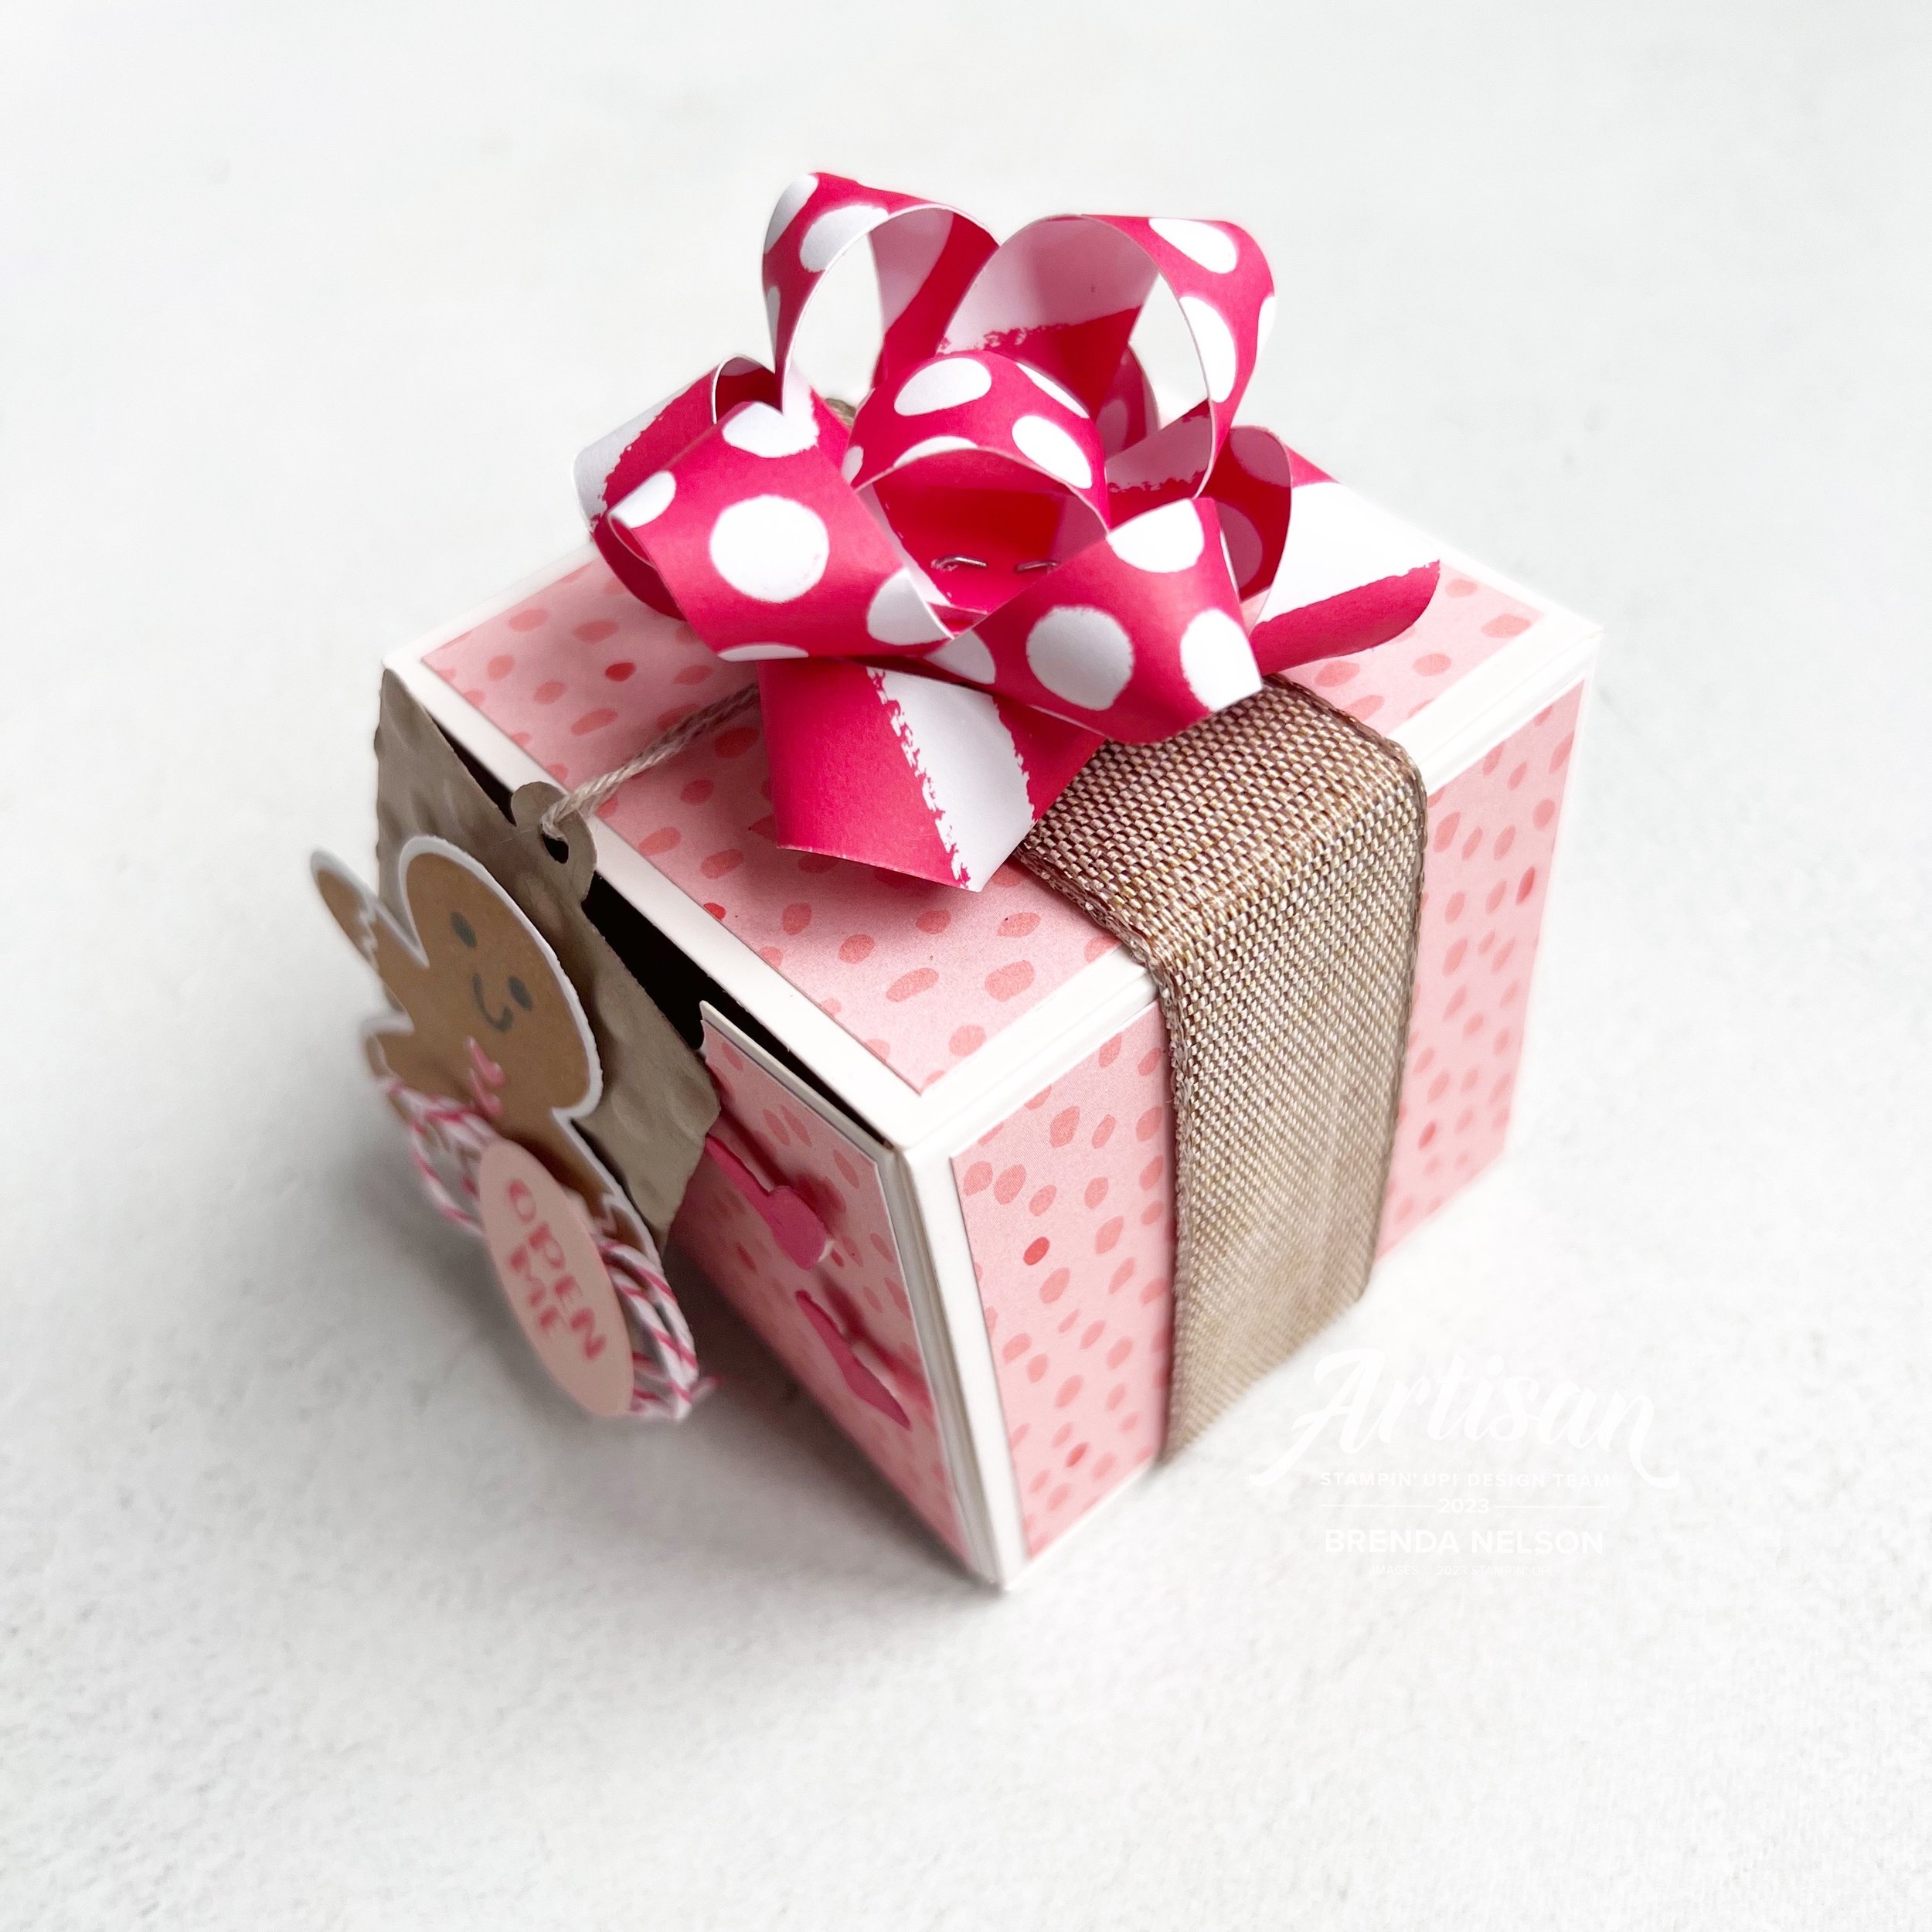
These Nested Boxes felt like a natural pairing with the Sending Cheer stamp set. This set is a part of a bundle and was one of my choices when planning my pre-order. While I do love traditional Christmas, I also love fun whimsical Christmas too and this bundle definitely fits the bill!

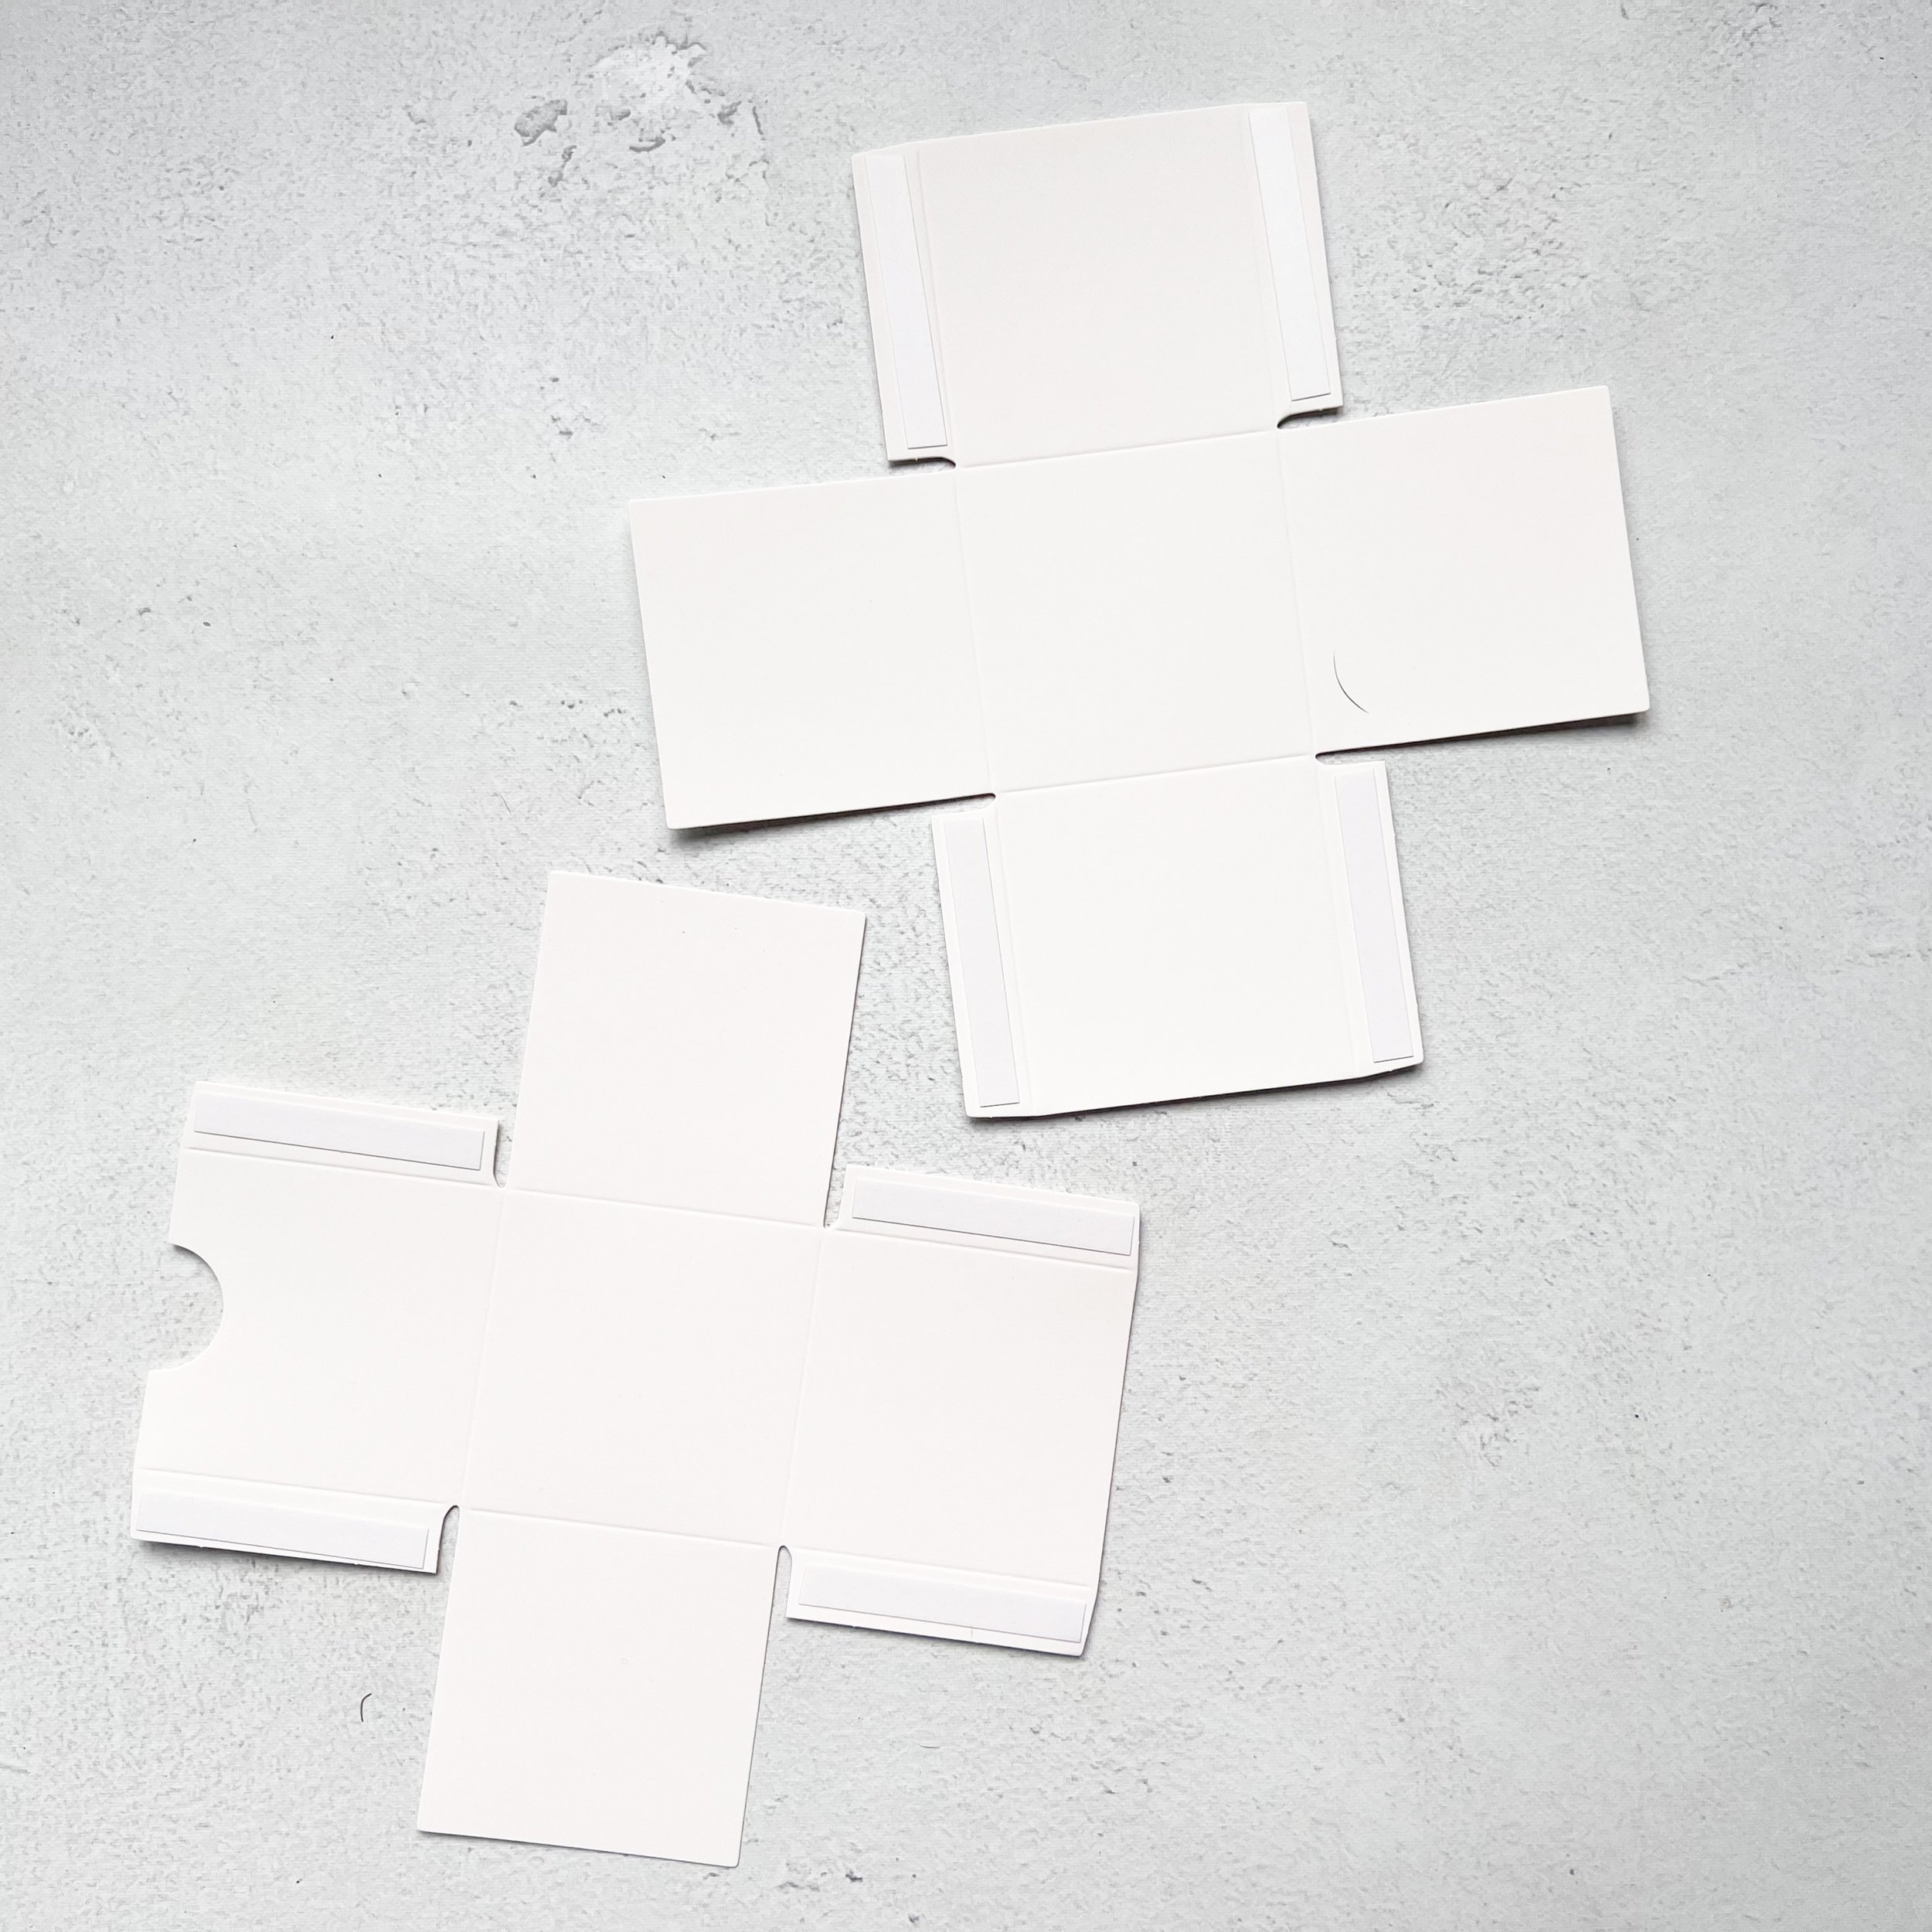
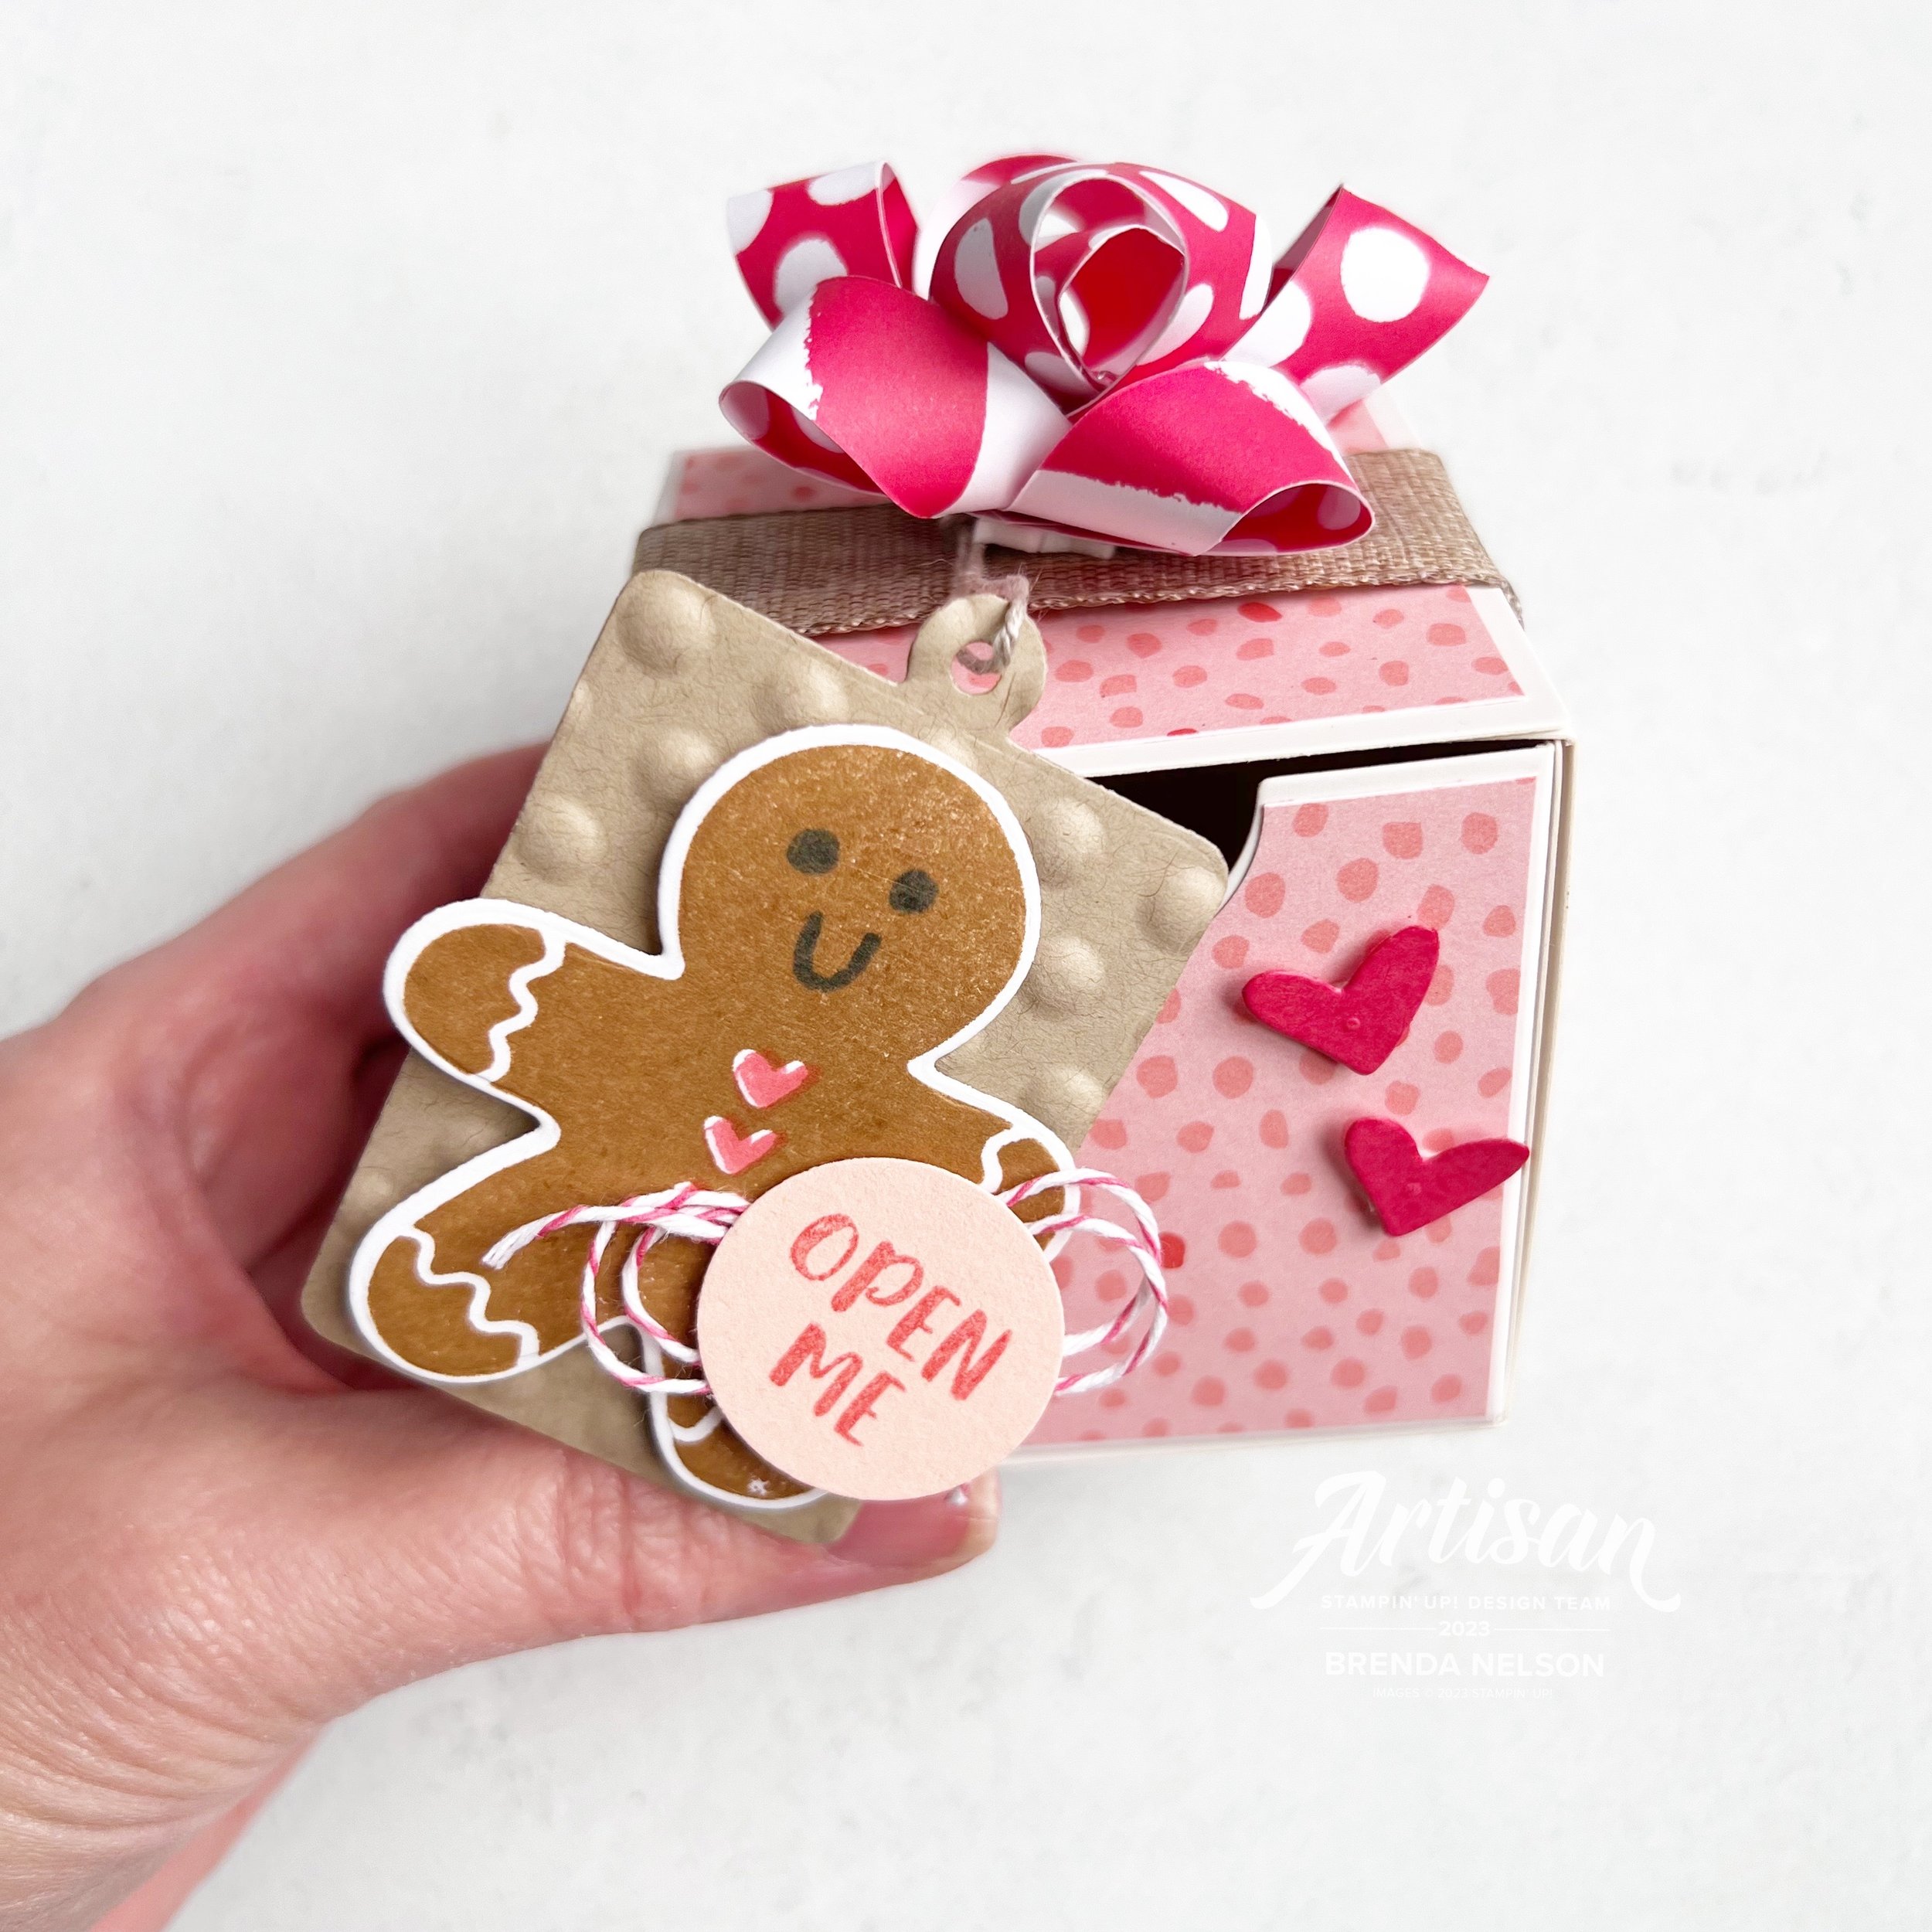
These Nested Treat Boxes are 2 1/2 x 2 1/2 wide so they can fit a variety of awesome surprises inside!

Instead of using this bundle to make a card, I thought it would be fun to use it to decorate the Nested Treat Boxes. I used squares of DSP from the Garden Walk 6x6 paper to cover the sides of the box and wrapped a length of the Natural Ribbon around the box.

The boxes come in two pieces—the outside and the inside and the inside box has a little notch out so you can get your finger in there to pull it free. You can take a 1 inch circle punch or die and snip out a section of the DSP so that it matches the box!

I love that this box glues itself together! It is a definite perk and makes assembly so easy!


The box was screaming for a mini bow so I made one using strips of DSP from the In Color 2022/24 collection in Sweet Sorbet. Sweet Sorbet is one of my favorite holiday reds! It plays so well with pink so it was a perfect fit to match this DSP! I reversed the patterns on each layer of the bow as well so you see both stripes and dots!

I cut a tag from the Sending Cheer Dies in Crumb Cake card stock and ran it through the polka dot embossing folder that is part of the Online Exclusive embossing folders.

I found Pecan Pie was the perfect color for a Gingerbread Man—you can add his face and fill in his heart buttons with 2 additional stamps in the set. There is a die for him too that is actually a tag, so just snip it off. Easy peasy!

I hope this cut little project inspires you to #addtocart the Nested Treat Boxes when they become available. I think they will make some fun holiday decor, are great for birthdays and little gifts that you want to give!

12 Days of Christmas--Day 12

For my final 12 Days of Christmas project I want to share a mini album with you. The cover of this mini album was actually one of my Artisan Design Team projects shared a couple months back. I decided to complete this album and offer it as a class! It is a pretty simple album idea that I have used repeatedly for different seasons and events!

The base of this album is an 8 1/2 x 11, cut in two pieces. I used 2 sheets to create this album and after it was all decorated I added two binder rings (found at any office supply store) with a variety of ribbons tied around the top ring. I have made several versions of this album, either designed to be horizontal (like this one) or vertical (to stand up on a shelf or table).

The base of this album is Smoky Slate which I thought was a nice neutral to pair up with the Santa Express Designer Series Paper.

I added a mix of patterns on the left side of the album along with a strip of Poppy Parade card stock to define an edge.

On the right side I stamped ‘Ho Ho Ho’ in Smoky Slate and added a DSP tag from the Santa Express paper along with the sentiments from the Santa’s Delivery stamp set. A bit of Iridescent Trim through the top completed the look of the tag. I used some of the Adhesive Backed Stars as a fun accent embellishment on the front as well.

This page is the inside of the cover. Now, do you ever have a boo boo? I do, I dropped an ink pad in the top left of this page and since I had already completed the front cover and didn’t want to start again, I just covered it with some DSP, hahaha! Sometimes you gotta do what you gotta do!

This album is pretty simple because I knew that I wanted kids in my studio to make it and my youngest stamper was 6! She did an amazing job. You can step up these pages if you like, but if not I think this is an all ages project.

Merry Christmas is cut from a retired punch and I added some Sweet Sorbet Bakers Twine and a Wonderful Snowflake behind it as an accent. The Mint Macaron scalloped border is from the Hand Penned Dies. I actually never put this die away, it just lives permanently on my magnet board beside my Stamp Cut & Emboss Machine.

I love the Joyful Flurry stamp set, especially when you can mount several stamps on a large block and stamp all at once, which is what I did for the boarder. I added a couple die cut snowflakes from the dies and the “let is snow” sentiment.

The next two pages feature the Spruced Up Dies and snowflakes once again. “Snowflake Wishes…” is a sentiment from the retired Snowflake Wishes stamp set/bundle. I will never part with it as I absolutely LOVE this sentiment!

And finally the last two pages in this easy mini album. Behind the “Falala" which is from the Framed & Festive stamp set, I added the other part of the trees from the Spruced Up Dies. I love how you get 2 trees cut at once with this set. Such a time saver and brilliant. I added more DSP and some Adhesive Backed Stars as well.

The “Ho Ho Ho” page is the last page in the book and the sentiment is from the Santa’s Delivery stamp set. I added some Basic White Bakers Twine behind the sentiment and on top of another Wonderful Snowflake.

I hope this quick and easy album inspires you to create your own! I have made them for all seasons and they are suitable for any age group!

I can’t wait to see what Melanie’s final project is today! THANK YOU SO MUCH for hopping along with us as we shared 12 Days of Christmas projects. I covered cards, treats, scrapbooking and a mini album within my 12 Days so I hope you enjoyed the variety—its the spice of life after all!