12 Days of Christmas--Day 1

Hello my friends! I am so excited to share 12 Days of Christmas with you—with a twist! My awesome friend Melanie from @melsinkyfingers and I have decided to team up to each share 12 awesome holiday projects with you! At the end of each of my posts there will be a link to go visit her blog and see her project of the day. In the end, you will actually have 24 project ideas!

Thanks Melanie for making this cute graphic for us!

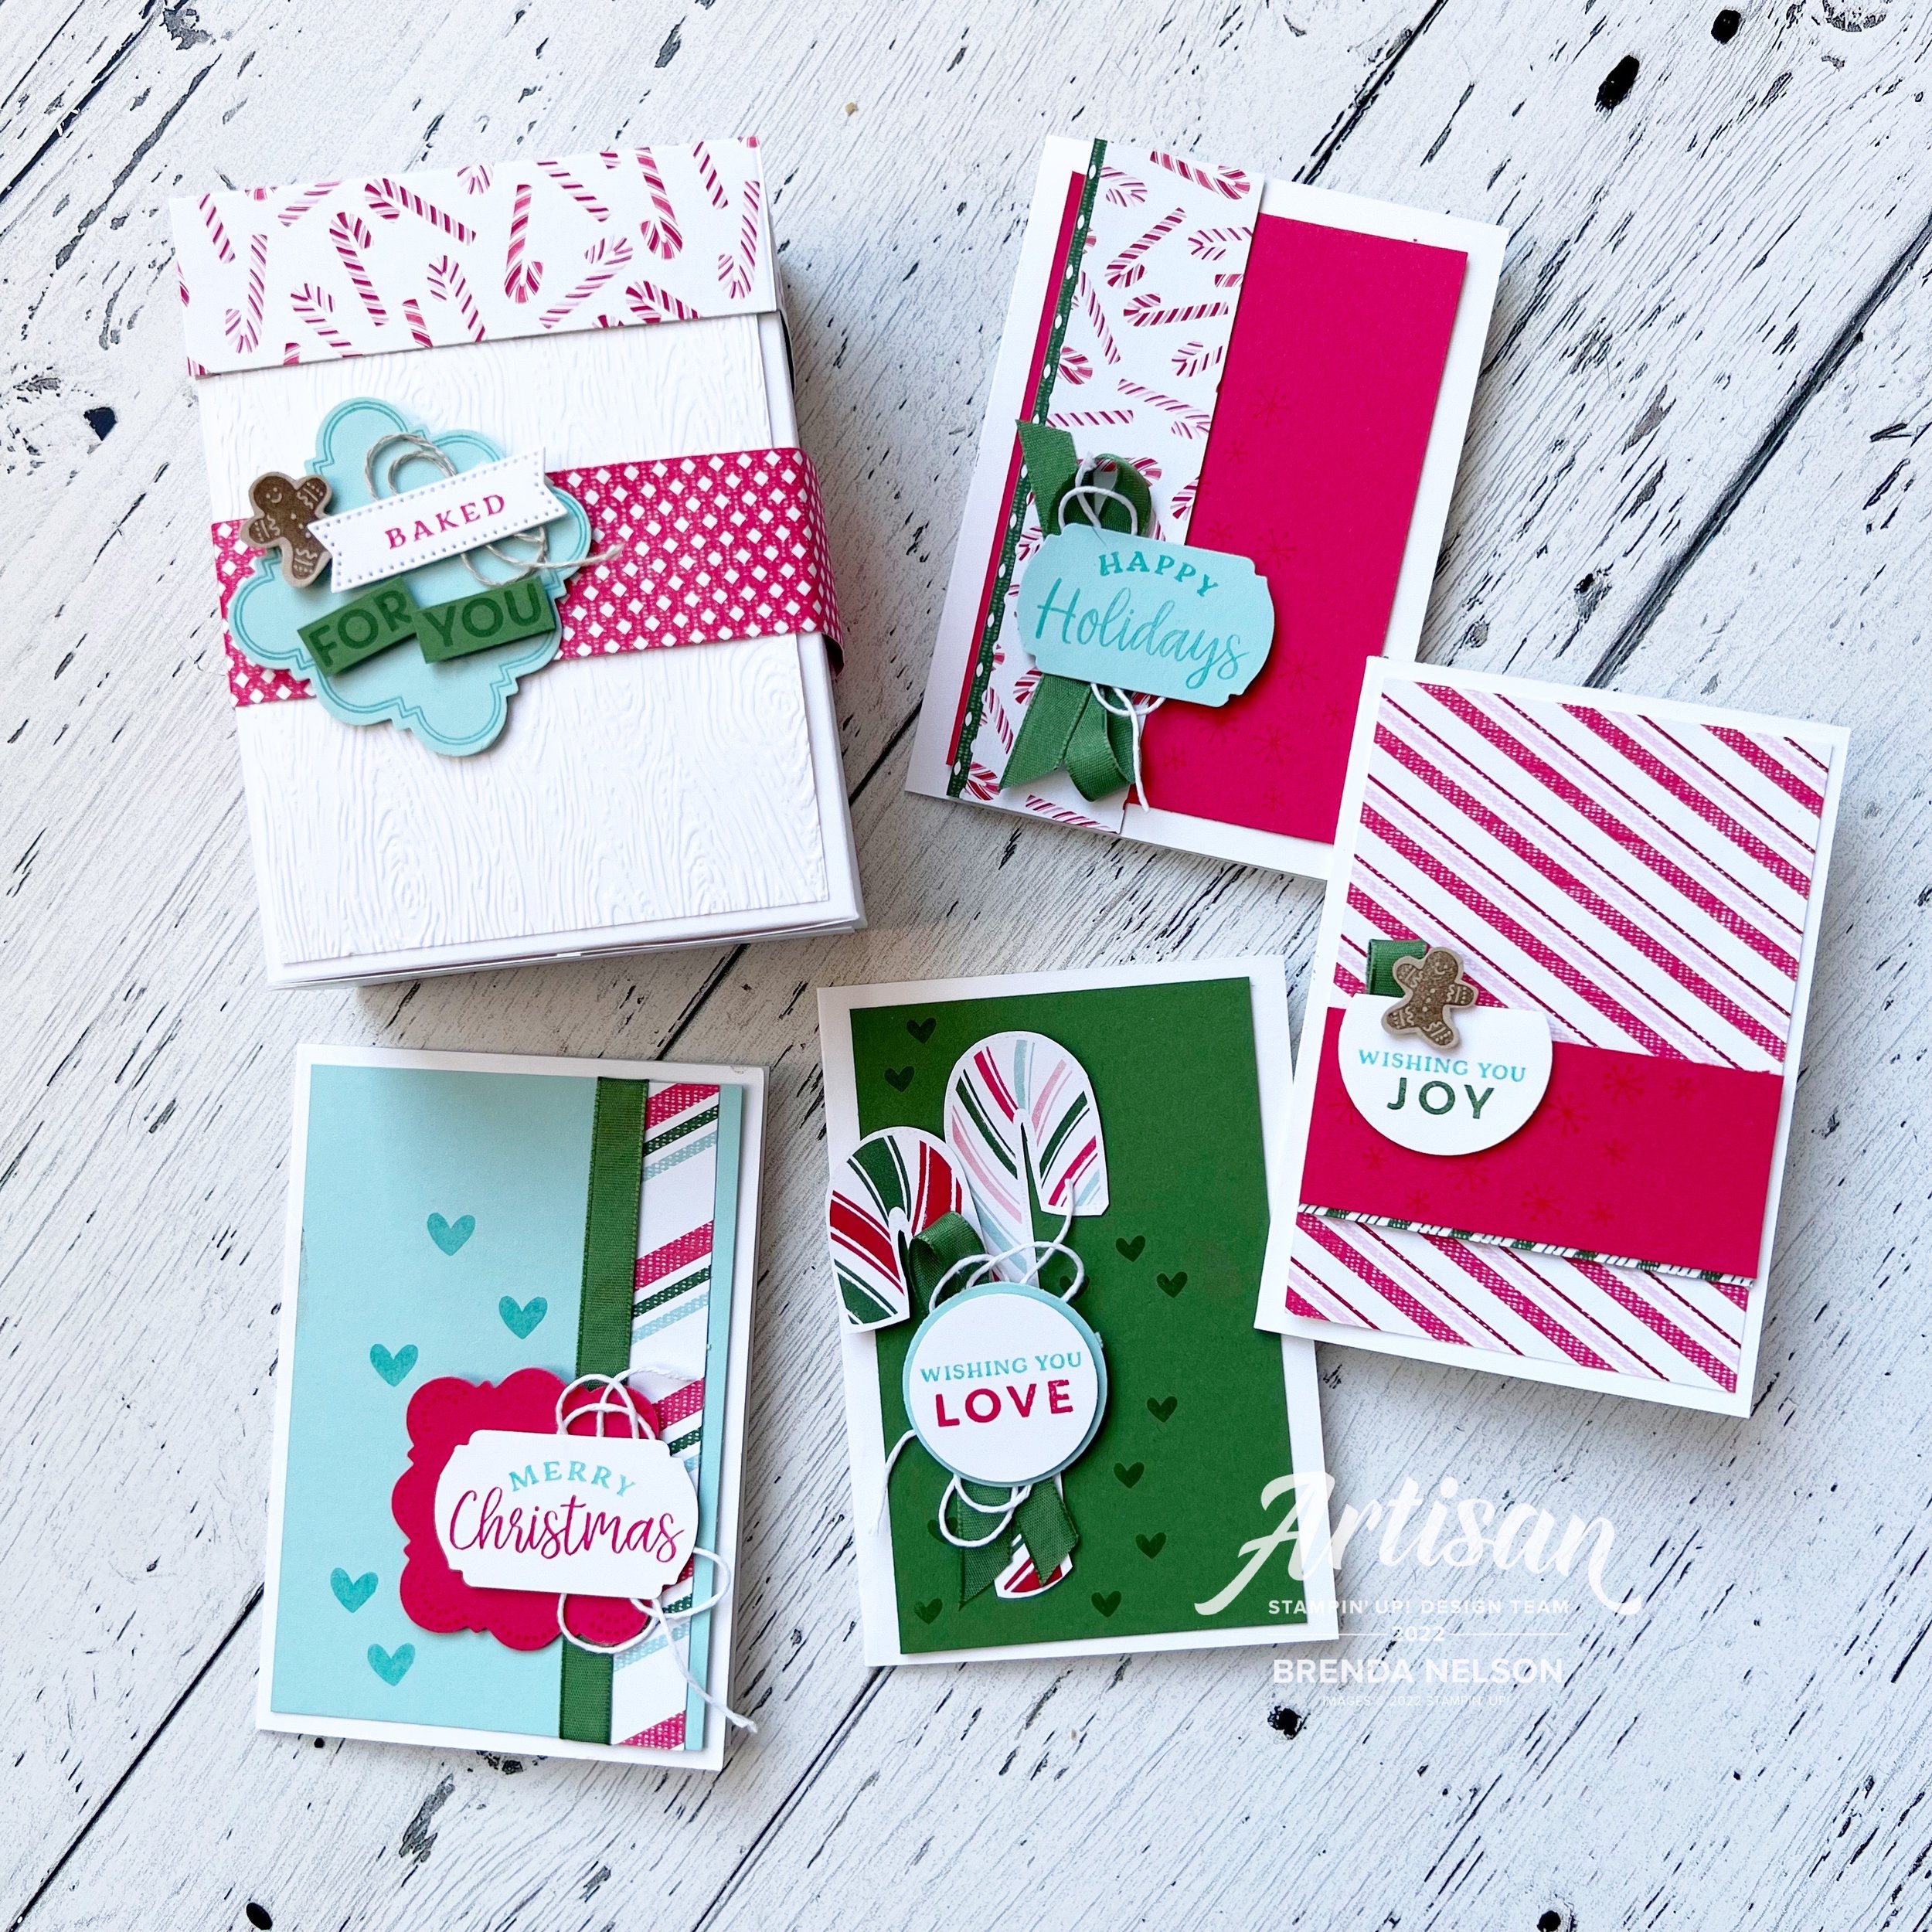
I can’t wait to get started! My first project is this fun notecard set and basic box. I got this project template from another talented friend Lisa Althouse @stampaholic. I just love our stampin’ community!

This basic box is perfect for holding 4 notecards and envelopes. You could even create this project without a lid and use the box to hold holiday snacks or treats (like Oreo Popcorn! I have this recipe on my blog under Lifestyle—Favorite Recipes).

I used the Sweetest Christmas DSP as my color inspiration and paired it up with the Handmade Wishes Bundle. I just love this bundle because the stamp set is so versatile. You can created so many different phrase/sentiment combinations. And the design of the label punch is really unique!

The label on this box is designed to reflect that a treat will be in the box. I plan to add a single card and a little holiday treat inside these boxes! I added another panel to the front of my box that I ran through the Timber 3D folder.


Sweet Sorbet has definitely been my favorite red this season. I added a panel to the front of my card and stamped some little snowflakes as an accent.

A couple strips of DSP (its so fun to mix and match patterns), and a cute sentiment stamped on Pool Party card stock in Coastal Cabana, make this notecard so fun. Of course I had to add some Garden Green Ribbon and white Bakers Twine.

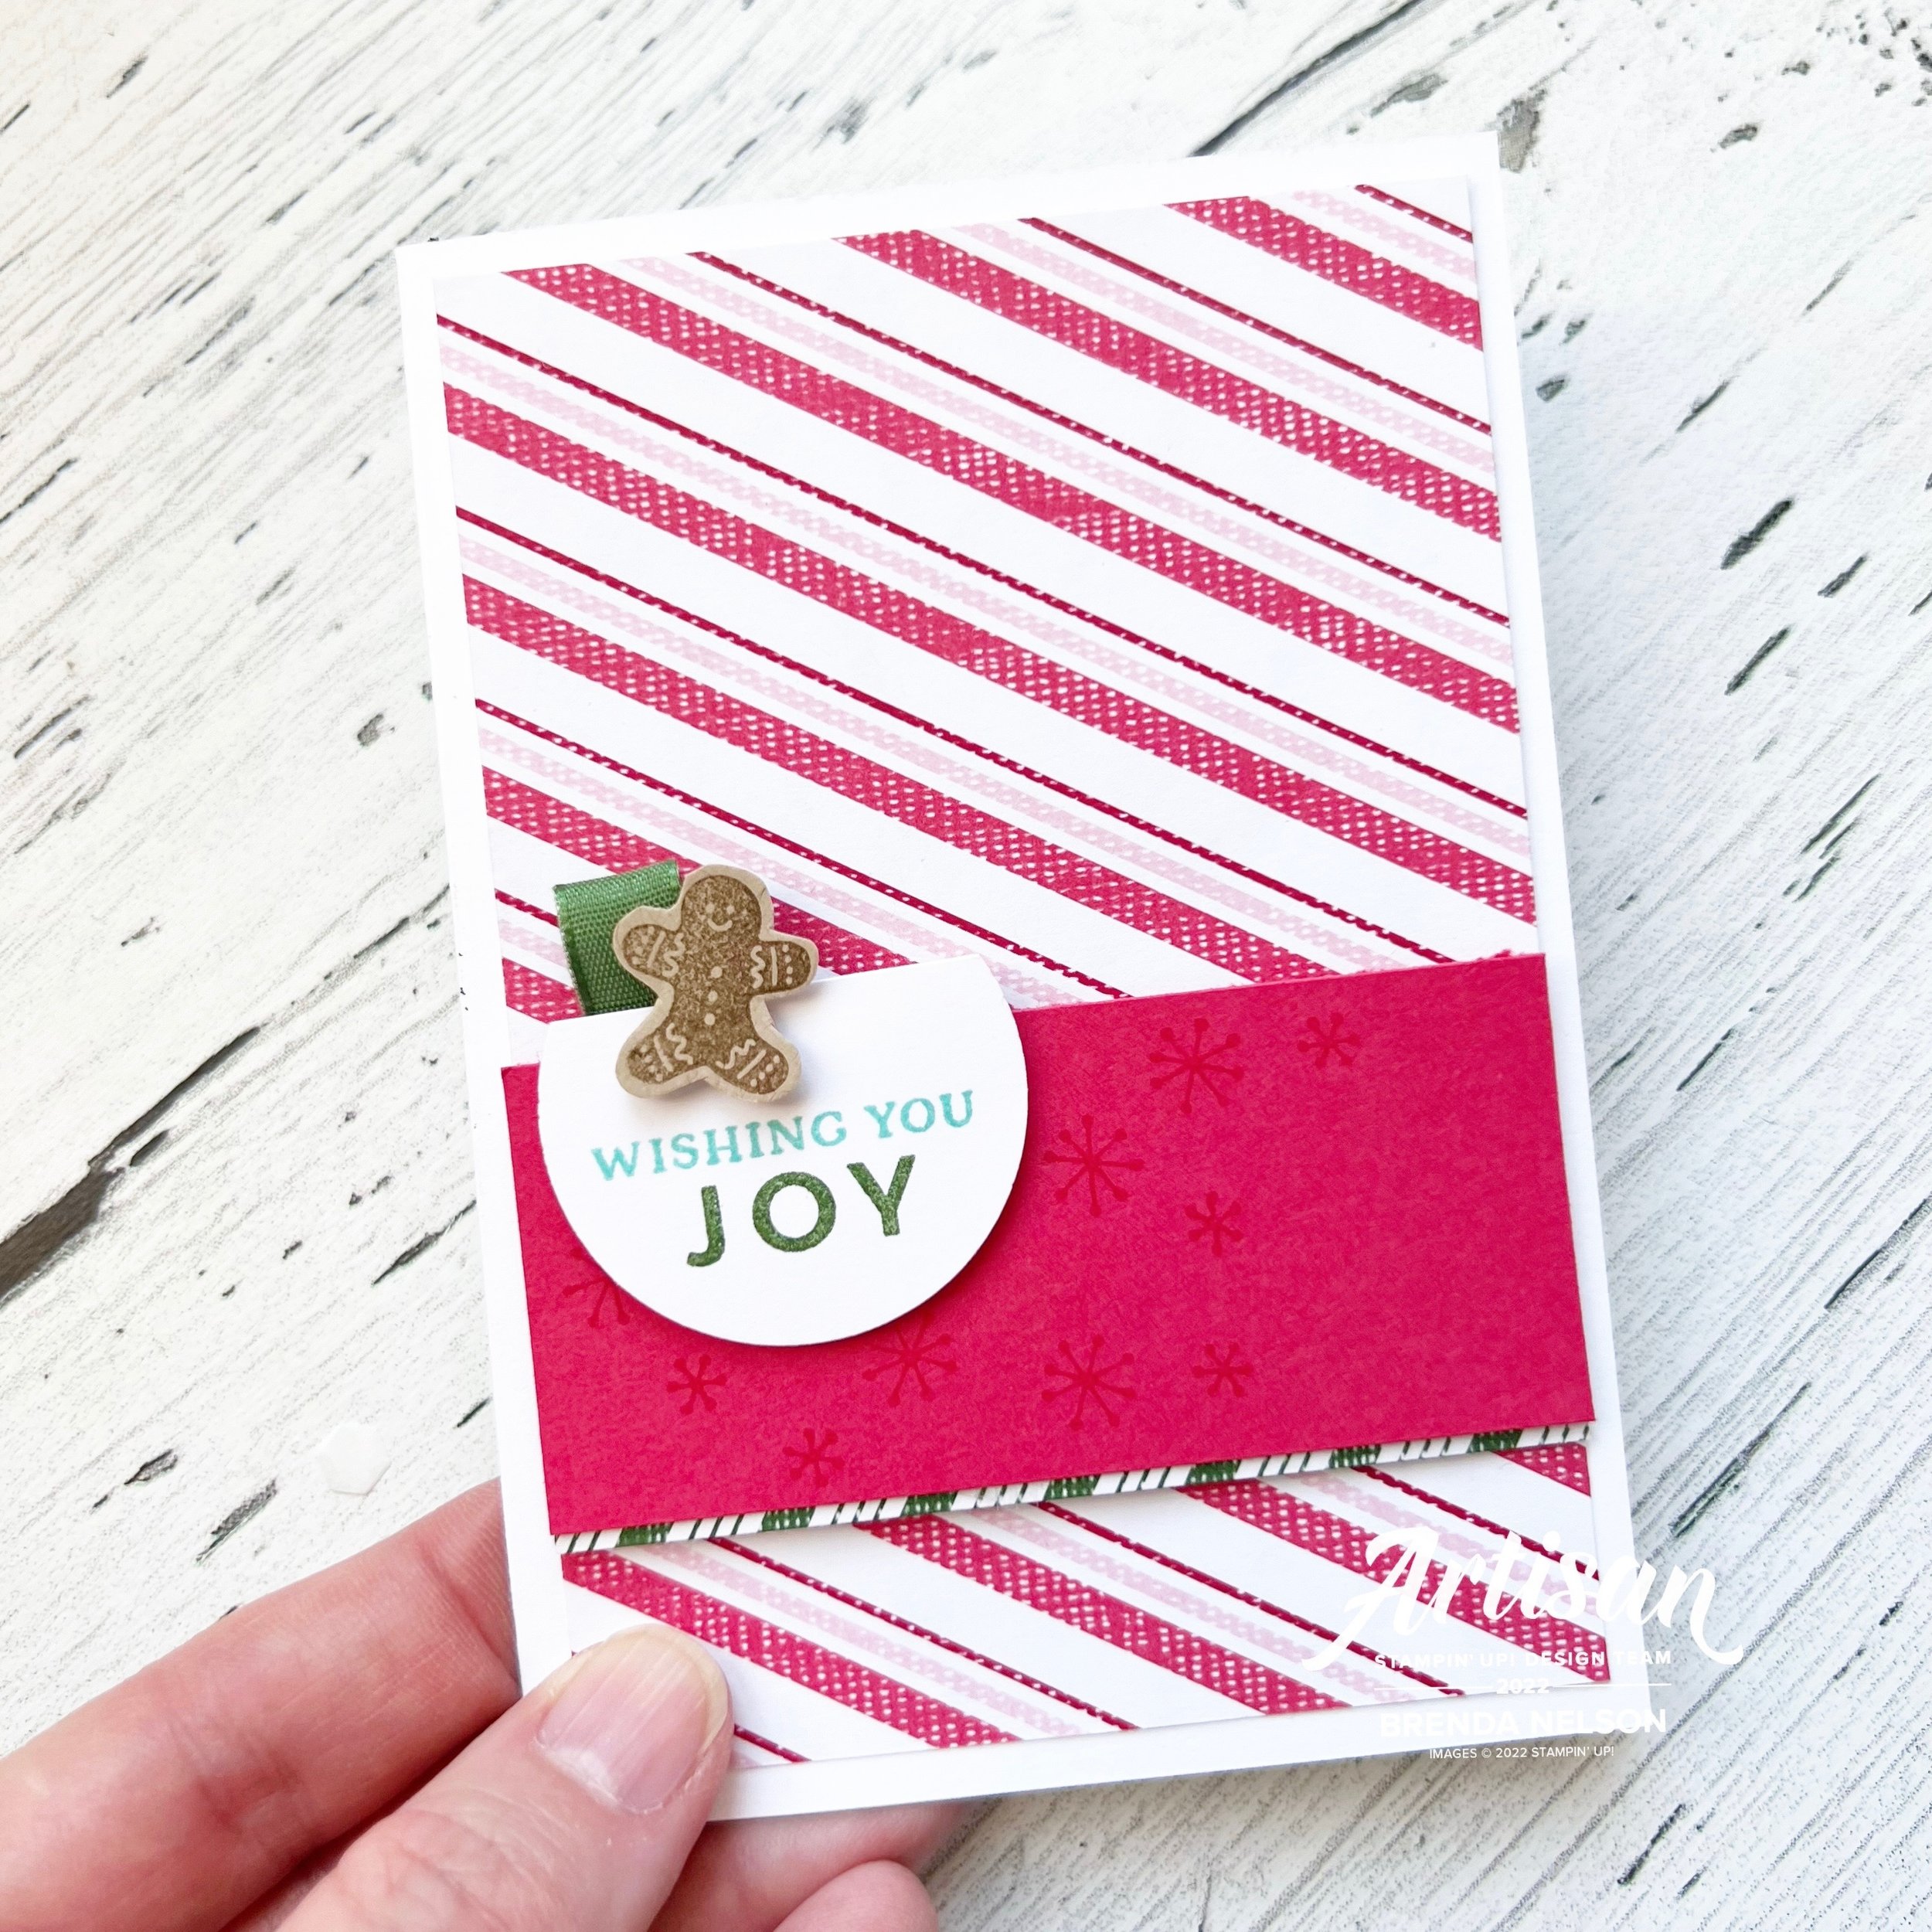
I love a good stripe pattern and this Sweet Sorbet/ Blushing Bride one is just perfect for a card front! I softened the front with a panel of card stock and a bit of stamping. The little gingerbread man was the perfect fun add on to this sentiment!


I love to stamp little hearts on my projects, they just make everything perfect. This little notecard has DSP with a ribbon border, the punch and sentiment and of course some Bakers Twine. This is such a ‘Good Card Design’!

The best part of this little notecard is the candy canes that are die cut, right from the DSP! Isn’t that brilliant? It makes creating this card so easy!

I hope you have fallen in love with this project as much as I have! I shared it with my team last month and it was so well received, I knew it would make the best project to kick off 12 days of Christmas. I have a few other 3D projects to share, some cards and of course some scrapbooking/mini album inspiration projects. I hope you will check back each day and go over to Melanie’s blog to see her awesome projects as well!

Click here to get to Melanie’s first 12 Days of Christmas post! I can’t wait to see what she made!


Be Inspired Blog Hop--Stamping with Red & Green!

Hello friends! It has been awhile! It isn’t that I haven’t been crafting, trust me I have! I have just been sharing more over on Instagram lately. However, I was very honored to be invited to join this amazing group of Stampin’ Up! demonstrators who make up the Be Inspired Design Team! I am so happy to be participating in this blog hop—this hop runs the last Wednesday of each month, so I hope you will come back again to visit!

The theme for this month Red & Green—pretty easy for Christmas crafting, especially when we have the amazing Sweetest Christmas Designer Series Paper to work with! Sweet Sorbet is my favorite holiday red this year and you simply cannot go wrong with Garden Green. It has been in the SU family of colors for quite some time, the whole 16 years that I have been crafting!

I just love cute candy canes, don’t you?

This is one of my favorite ‘fun folds’ that isn’t too complicated to create or remember how to create! I simply start with your standard card base, 4 1/4 x 5 1/2, and layered two 3/4 x 5 1/2 inch strips of the striped pattern from the DSP along the edges. I like to leave a little bit of the Sweet Sorbet card stock showing on either edge as well.

Next I cut a white layer (or whatever color you choose) for the ‘card’ aspect to open and close. It is 3 1/5 x 11, scored at 5 1/2. Easy peasy! I decided to run the top flap of the card through the Wintery 3D folder for a little textural interest. And if you look close, its actually the indented side of the folder showing on the front for even more of a twist.


I really love to use embossing folders in my designs. It is such an easy way to add interest to the background of your cards.

I decided to pair up 2 of the stamps from Framed & Festive —Falala and Merry Christmas to create one sentiment block and I die cut it using the Seasonal Label Dies.

The candy canes are of course stamped from the Sweet Candy Canes stamp set in Sweet Sorbet. You can add a bit of Wink of Stella to the larger section of the candy canes too if you want a bit of sparkle.

The greenery is die cut from the Candy Cane dies and the Christmas Banner dies and are just tucked in and behind the sentiment. A little bit of Sweet Sorbet twine and In Color Enamel Dots and I felt this card was complete.


The best part of using an embossing folder on the folded card is that when you flip it open you still get to enjoy a bit of design on the inside of the card too!

I am making this card with some of my stampin’ friends in an upcoming class and I am so happy to share it with you here as well. I hope you will give this fun fold a try in your own paper crafting too!

Next up on the hop we have my creative friend Janneke Dijkstra - de Jong! You can click on the button to go directly to her blog!

Color Fusers--July Blog Hop!

Hello friends! Where did the month of June go? I know I am asking myself that as my son graduated high school and my other two kids wrapped up grades 6 and 8. It was a busy month at our house! And here we are at summer holidays and I am kicking it off my sharing a CHRISTMAS CARD! I mean, it is Christmas in July right?

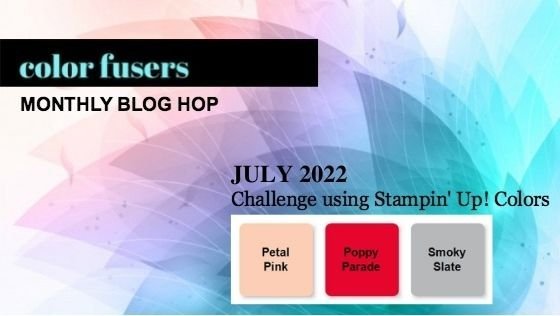
The Color Fusers Blog Hop this month is featuring Petal Pink, Poppy Parade and Smoky Slate and I think they make a pretty awesome color combo!

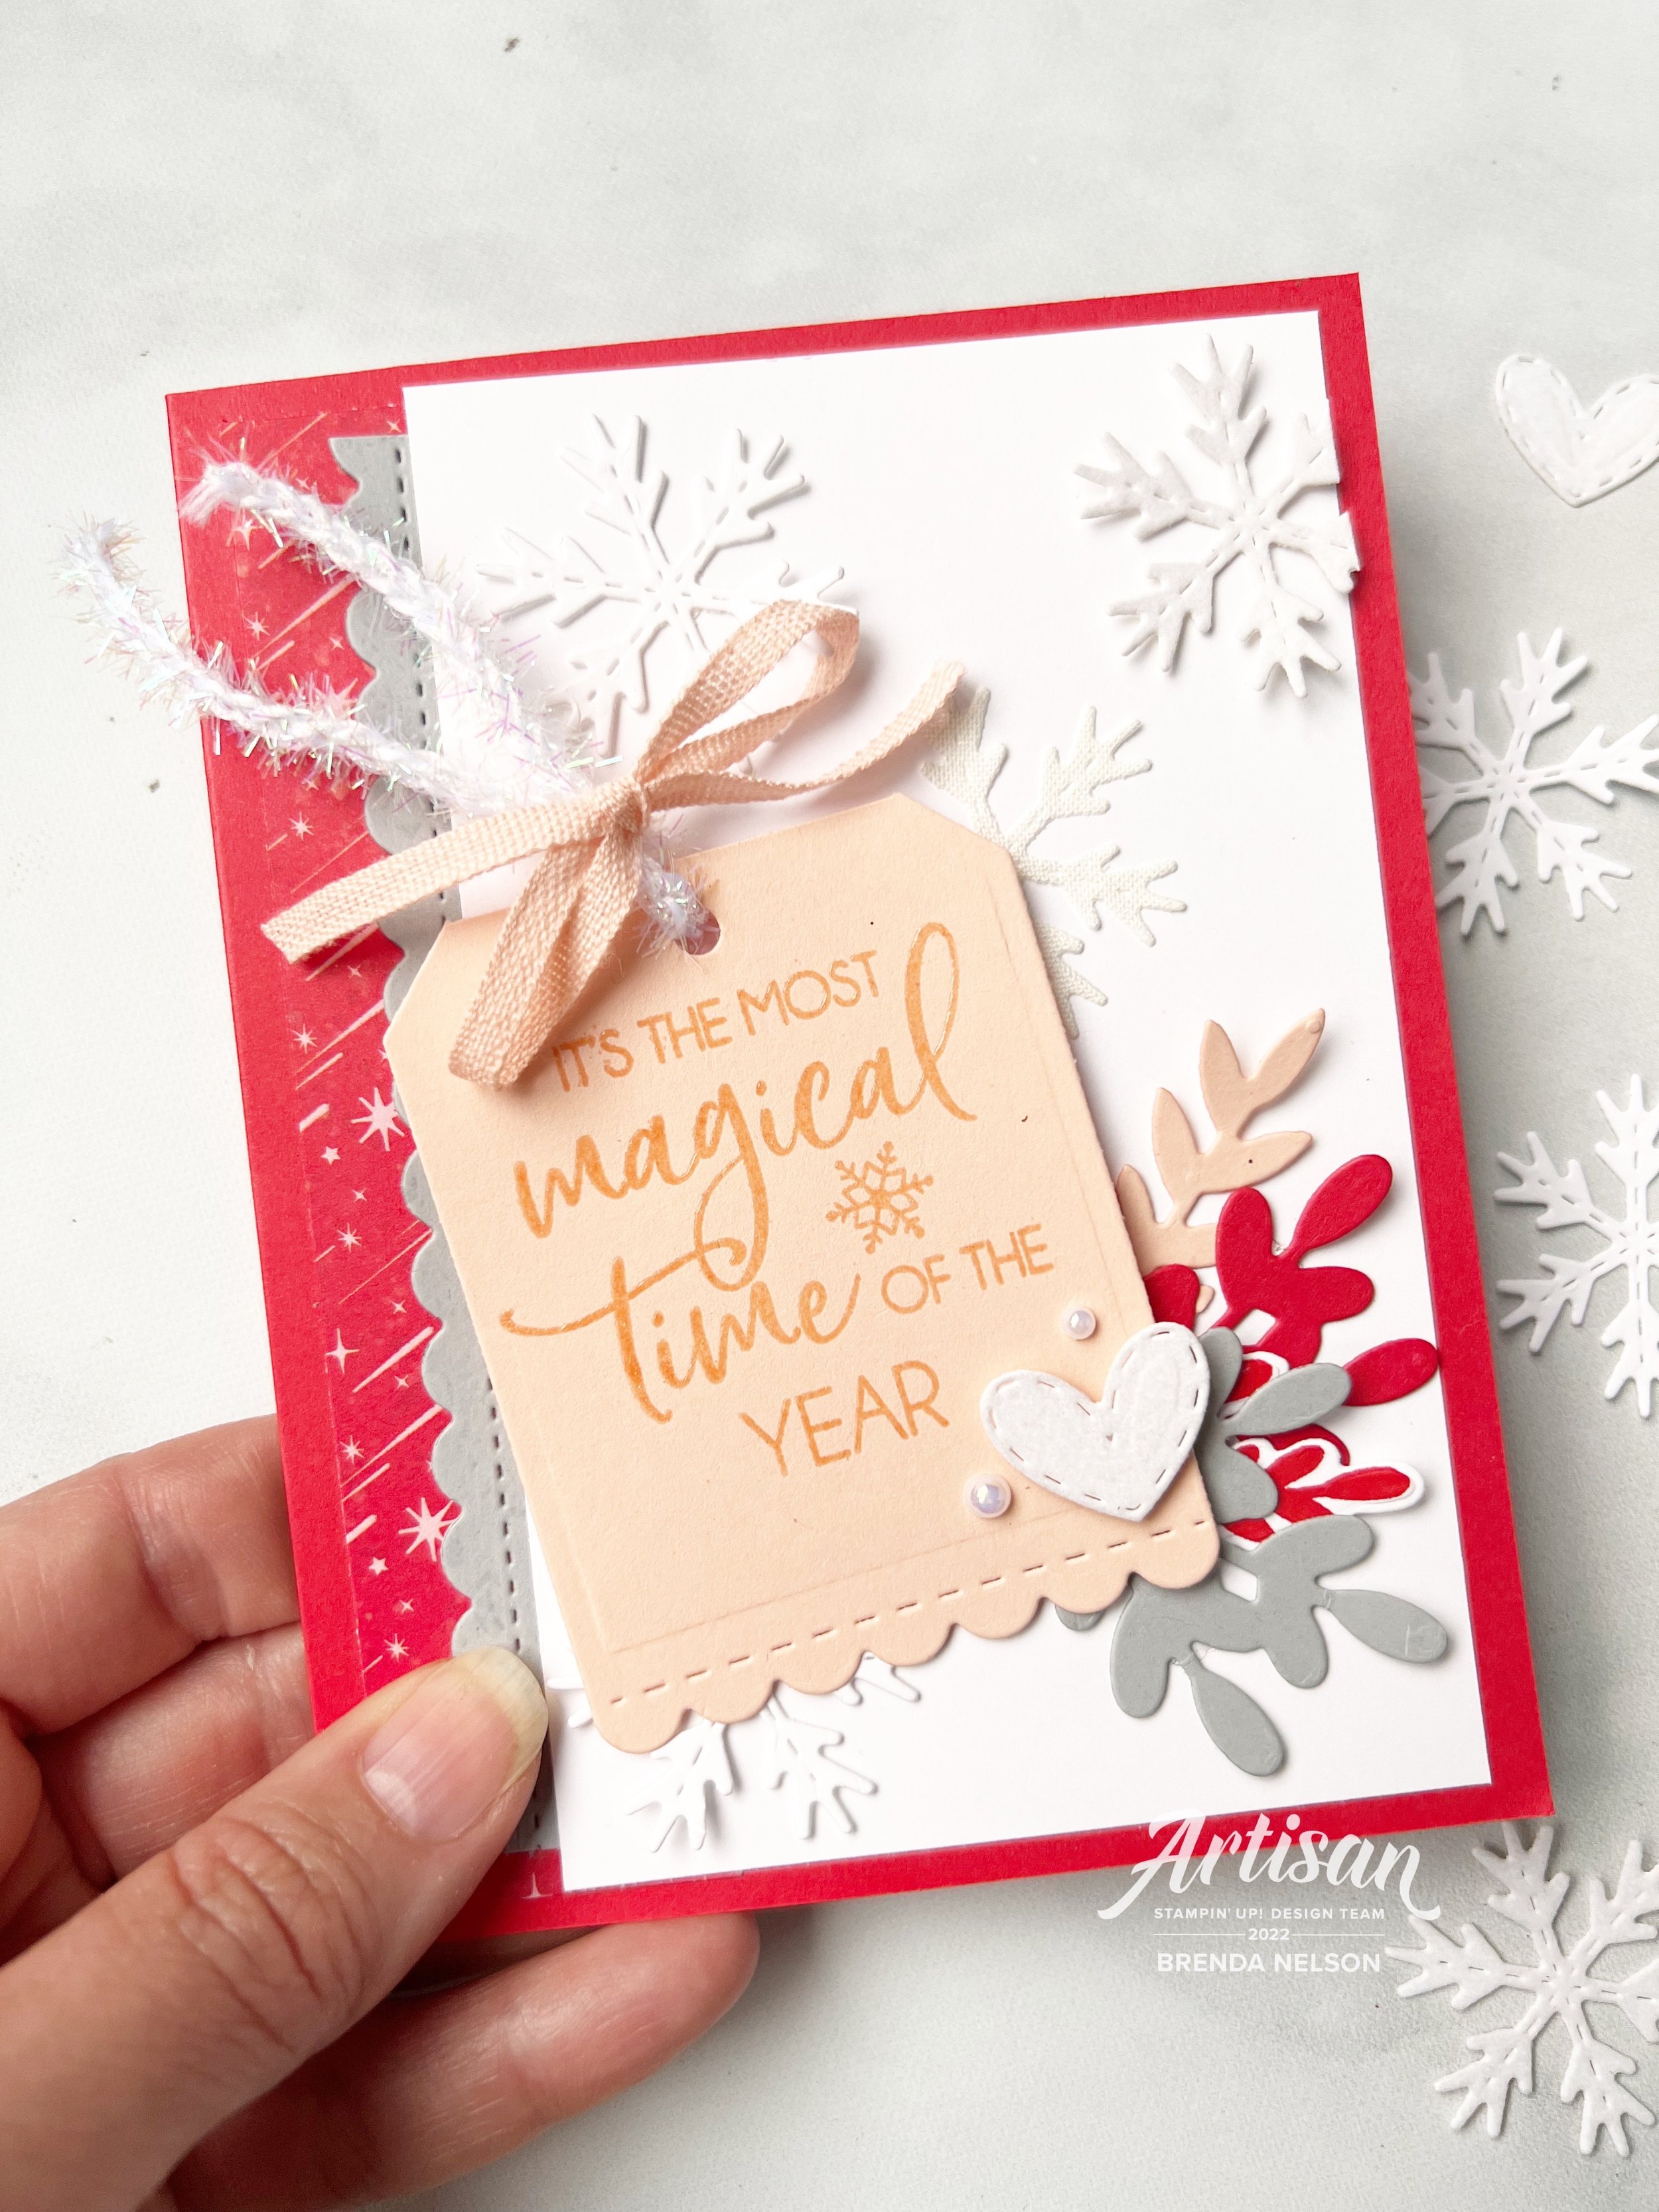
Stampin’ Up!’s Holiday catalogue also began on July 1st and there are so many amazing options for all of your holiday crafting. I didn’t even need to look too hard to find Designer Series Paper that had Poppy Parade and Petal Pink! I used a strip form the Santa Express DSP as my starting point for my card design!

I actually used a whole mash up of products on this card including Linen Paper and Snowy White Velvet Sheets for some of the snowflakes and the cute little heart!

The heart, tag and snowflakes all come from the Celebrations Tags Dies which is an awesome set. There is a coordinating stamp set of course but I pulled my sentiment from the Snowman Magic stamp set. I stamped it first in VERSAMARK, then Petal Pink ink and sprinkled some Clear Embossing Powder on top! I have discovered my love of heat embossing again lately. Now the dies cut a tag that is designed to open, so I just cut off the other side to use it in a more traditional sense.

The ribbon through top of the tag is the new Iridescent Trim with some retired Petal Pink Ribbon tied in a bow. I added the velvet heart and a couple Iridescent Pearls to the tag as well!

Is it really easy to add texture to a background by die cutting shapes in the same color but using different textures such as Linen Paper and Snowy White Velvet Sheets.

I love how the scallop die from the Hand Penned Flowers Dies coordinated with the bottom of my tag! I added in a spray of the colors using the Christmas Banners stamp set and coordinating Christmas Banner Die set. I think it worked really well to add in a different shape to the card design.

I am really curious to see what the other members of the Hop created this month…did they go Christmasy too or not? Make sure to follow all through Hop and visit demonstrators from around the globe! You can click on the button below to visit Bonnie O’Neill or you can click on Previous to see what Tami Hewlett has created this month!

Please feel free to shop my online store!

〰️

Please feel free to shop my online store! 〰️

Color Fusers December 2021

How can it be? How can it really be December 2021? One thing that does remain constant is the passing of time…and my love of stamping! I am really excited about the color combo our team has this month!

Isn’t this a unique color combo? I love pairing two dark deep colors with such a light soft pink! And because Petal Pink is one of my favorite pinks I decided to make it the base of my project and use the other two as accent colors!

I absolutely love this card and am excited to share it here and have some friends come over to make it too!

The base and first layer of my card are Petal Pink. I distressed the edges with my fingers and stamped a couple snowflakes from the Merry Snowflakes stamp set in the same color of ink on the background. I used the dies to cut out a snowflake in the same color. I love the stitched detailing on these snowflakes!

The sentiment is from the stamp set Encircled in Warmth and is stamped in Cherry Cobbler ink and die cut with the Layering Circles Dies. I brought attention to the sentiment by swiping my Blending Brush over “Christmas” with some Petal Pink ink to give it a little pop. It is probably my favorite aspect of this card!

The trio of trees is from the Cloche Dies and are now my favorite new thing! I can’t wait to incorporate them onto another project! They are die cut from Evening Evergreen card stock. I added this color in again behind the sentiment with the Evening Evergreen Chevron Weave Ribbon and some silver metallic cord from the Simply Elegant trim. A few little In Color Jewels and this fun whimsy Christmas card is complete!

Now aren’t you LOVING this color combo? I can’t wait too see how the rest of the gang incorporates these colors into their designs! You can go back to see what Melissa has designed and forward (next) to see what my friend Melanie has created! They are both so talented! Make sure to leave us some comments!

If anything catches your eye on my project and becomes a must have, please consider shopping my online store if you have not already! Thank you in advance! I love to do what I love!

Thank you for joining in and following along with our hop during 2021~ looking forward to sharing with you in the new year. Blessings to you and your family,

B.

Holly Jolly Santa

I was recently asked to be a guest designer for a super exciting Instagram account that I follow and many of you know and love! This is actually my OUTTAKE project as when they approached me and gave me a list of stamp sets to chose from, I choose this set—or so I thought! haha! Turns out I had my stamp sets mixed up! So this project is now going to be inspiration for you!

The best part is I spent quite a bit of time thinking about this card and the design, so I cannot let it go to waste! This was actually the first time I broke the seal on the Picture This Dies even though I have had them since June! Does that ever happen to you? You buy something and then get distracted from using it?

Well I do LOVE how this project came out in the end. I tried to create 3 little panels that felt unique. The base of the card is my favorite color Coastal Cabana. The first layer is black and then a layer of Basic White was added in after another layer of Coastal Cabana was die cut with the Picture This Die.

In the first panel I stamped the little star from the Be Jolly stamp set on the Basic White layer using Smoky Slate ink. My first Santa is stamped with Momento Ink and colored with the Stampin’ Blends markers in Real Red, Ivory, Basic Black and Petal Pink. I use the Petal Pink chubby tip to add a dot too each of Santa’s cheeks for a hit of rosy. I also use the light Smoky Slate Stampin’ Blend to add detail to his beard and hat pom pom.

I love how the Picture This Dies leave a stitched detail behind. And do throw away all the little bits that get cut out, those can definitely be used on a new project!

I like to add details to my sentiments so for this project I added a little bitty scalloped detail underneath the “A Merry Hello” by using a die from the Stitched So Sweetly Dies and a bit of white twine from the Bakers Twine Essentials Pack!

You can see just a hint of the bottom panel—I ran it though the Star-Crossed Embossing Folder, focusing just on the star half of the folder. I added a ton of Coastal Cabana Playing with Patterns Resin Dots to my card to play up the fun and whimsy feel! This Santa is colored with the same Stampin’ Blends and both are hand trimmed with paper snips to tuck into the little panels.

So even though this card is my OUTTAKE I think its pretty damn cute! And I am wondering why the heck it took me so long to use the Picture This Die set! You will definitely be seeing it in the future! I hope everyone has a merry day and if you are inspired to create your own project, please consider shopping my store if you live in Canada!


Comments are always welcome and appreciated!