Around the World On Wednesday--Switcharoo Fun!

Hello friends! Welcome to a new fantastic year…Cheers to YOU in 2022! Thank you for following along on my crafty journey and for checking out all of the fantastic projects on this month’s Hop! Our theme was “Switcharoo” fun! We chose a card to case for inspiration while changing up colors or other small details!

Personally, I was so happy to see rainbows back in the JJ catty! I hope they stick around for our Annual catalogue as they have so much potential. You can find the Rainbow of Happiness Bundle on page 18 of the JJ catty and the card I used for inspiration is right at the top—it is the Just Jade card that features the Cloud Punch—another new favorite product of mine! Fingers crossed it stays too!

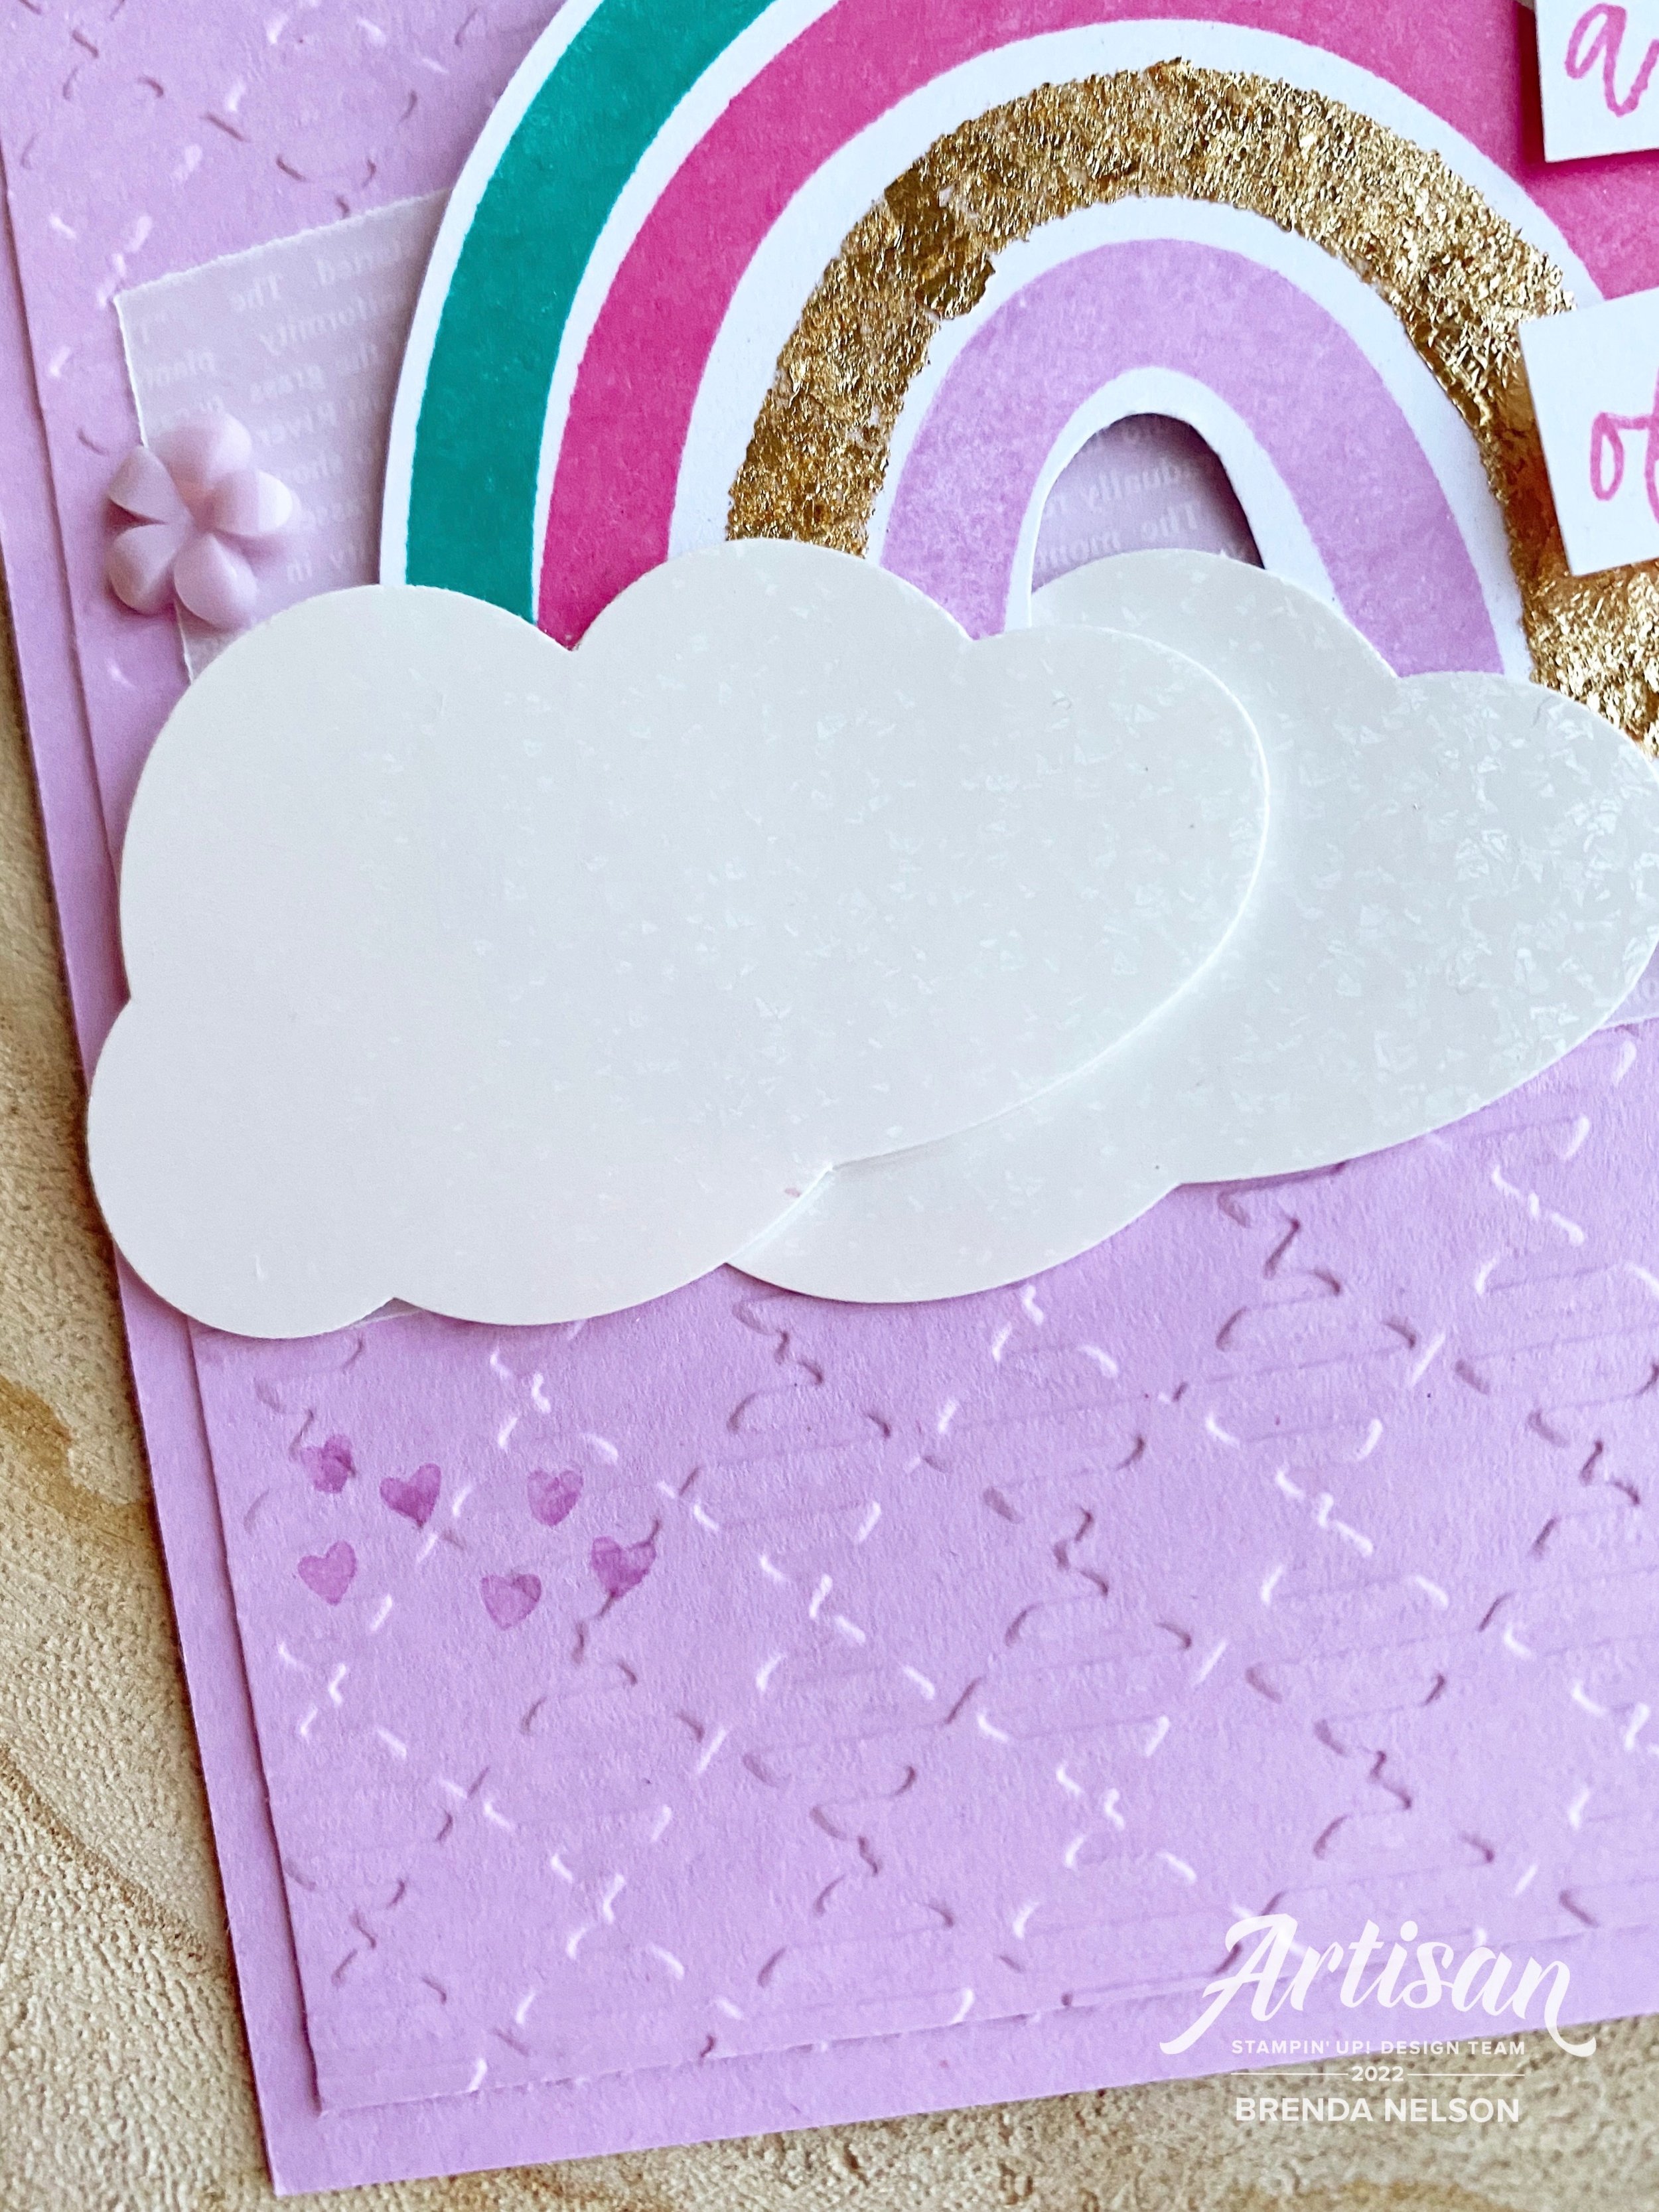
I decided to change the orientation of the card and mix up the color palette slightly! I landed on Fresh Freesia as my card base and I used a layer that I ran through the new Gingham Embossing Folder. Now I noticed that this photo makes it look like there is white on the base layer but its just the way the light was hitting the details of the impression left from the folder.

I did some stamping on the background similar to the catalogue sample using the Rainbow of Happiness stamp set. My rainbow itself is stamped in Bermuda Bay, Polished Pink, Versamark with Gilded Leafing (remember you need to use Versamark, Heat’n Stick Powder, and then the Gilded Leafing—rubbing the leafing into the powder), and Fresh Freesia!

The whole rainbow is on some of the new Vellum 12x12 Layering Designs which just gives it a subtle detail.

I also took the sentiment and layed it out FLAT on a long acrylic block—you may notice in the catalogue that this stamp set is arched. Because its designed used photopolymer we can manipulate these stamps somewhat. I was able to stamp it in Polished Pink ink on Basic White and then trim the words apart to create a new sentiment orientation. This is one of my favorite things to do with our sentiment stamps!

My absolute favorite part of this card are the clouds. I used the new Cloud Punch to create two clouds that are so AMAZING! They are from the Mother of Pearl 12x12 Specialty Paper which is so outstanding. It is completely smooth and has the most fantastic shimmer. Definitely hit ADD TO CART on this product!

I added a couple Fresh Freesia flower embellishments from the Loose Flower Flourishes—we always want people to shop or remember our Annual Catalogue too! I can’t wait to see what all the other gals in the Hop have created with this super fun theme to kick off the year!

Please visit Tricia’s blog next to see what she has designed and leave everyone some warm fuzzy comments!

Please consider shopping my online store if you live in Canada and my project inspired you! Your support allows me to keep doing what I love and I appreciate you for that! Click on any of the images below to be directed to my store!

Happy New Year!

Happy New Year 2022!

Hello everyone! Welcome to another amazing fantastic year! Yes, 2021 was a challenge. It was hard. I cried a lot, I worried about my kids and felt sad for what I thought they were missing out on but I have given up trying to make sense of things. I am however so blessed to have a fun supportive group of friends and a job/hobby that I truly love that helped give me purpose and direction!

I look forward to new creative direction and opportunity in 2022. I promise to always try something once! And maybe again if I find out I like it! You never know until you try (I am hearing my moms voice in my head at the moment, hahaha!).

So HAPPY NEW YEAR FRIENDS, let’s have some fun together this year!

Happy New Year friends! Blessing abound for you in 2022!

I created this card to mail out to some special friends and I thought it was a fun one to share! I have been loving my Blending Brushes lately and this is a fun technique that you can try with them—its known as the Bokeh Technique. In photography, Bokeh, is the aesthetic quality of the blur produced in ‘out of focus’ parts of an image. So we can imagine these ‘dots' or ‘circles’ as being out of focus on this card project. Fun right?

Here are the supplies you will need to create this card but keep in mind you can reproduce this Bokeh look with any colors! I just went for a color palette that felt like night time, when the clocks would turn over into a new year!

I used my trusty finger Daubers for the smaller circles and the Blending Brushes for the larger circles. You could always make yourself a stencil, but I didn’t feel the need because the Picture This Dies were so perfect! The die is easy to wipe off and move around the front of your card stock.

I started with Misty Moonlight card stock and use the die and Whisper White Craft Ink for the first layer. It is important to start with white dots and then build from there. I like to layer white over white too and have lots of overlap with the colors and dots. The other colors used were Misty Moonlight and Gorgeous Grape. It also looks more natural if you have a few dots off of the edge of the card stock too.

This is a really fun technique that gets you messy fingers and each card front will be unique!

Happy is die cut from the Christmas Cheer Dies and is from the Mother of Pearl 12 x 12 Specialty Paper. It is AMAZING! You can’t see the awesomeness of it in this photo, but trust me! It has a really solid texture and is so beautiful when it catches the light. I paired it up with ‘New Years’ which is from a set called A Wish for Everything, I tend to hang onto these sets that have more unique sentiments that we don’t see as often. I added a few random sequins from the Subtle Shimmer Sequins collection. They were the perfect touch!

I hope you will give this fun Bokeh technique a try and I wish you all the blessings of a year new. Lets go forward with the spirit of positivity and keep ourselves open to experiences new things!

Happy New Year!

If anything caught your eye please feel free to shop my online store by clicking any of the images below! Thank you in advance for letting me continue to love what I do!

Around the World on Wednesday--something old & something new!

Hello friends! I was really excited about our theme this month and its really open to interpretation so I can’t wait to see what the team designs! Make sure can go “Around the World” with us and check out everyone’s crafty creations! And thank you for being a part of our journey this past year and a special round of applause for Angie @naturesINKspirations for being our fearless leader!

Our theme is Something Old and Something New so I decided to NOT making a Christmas card, gasp I know! But I just got some new stuff and I needed to play!

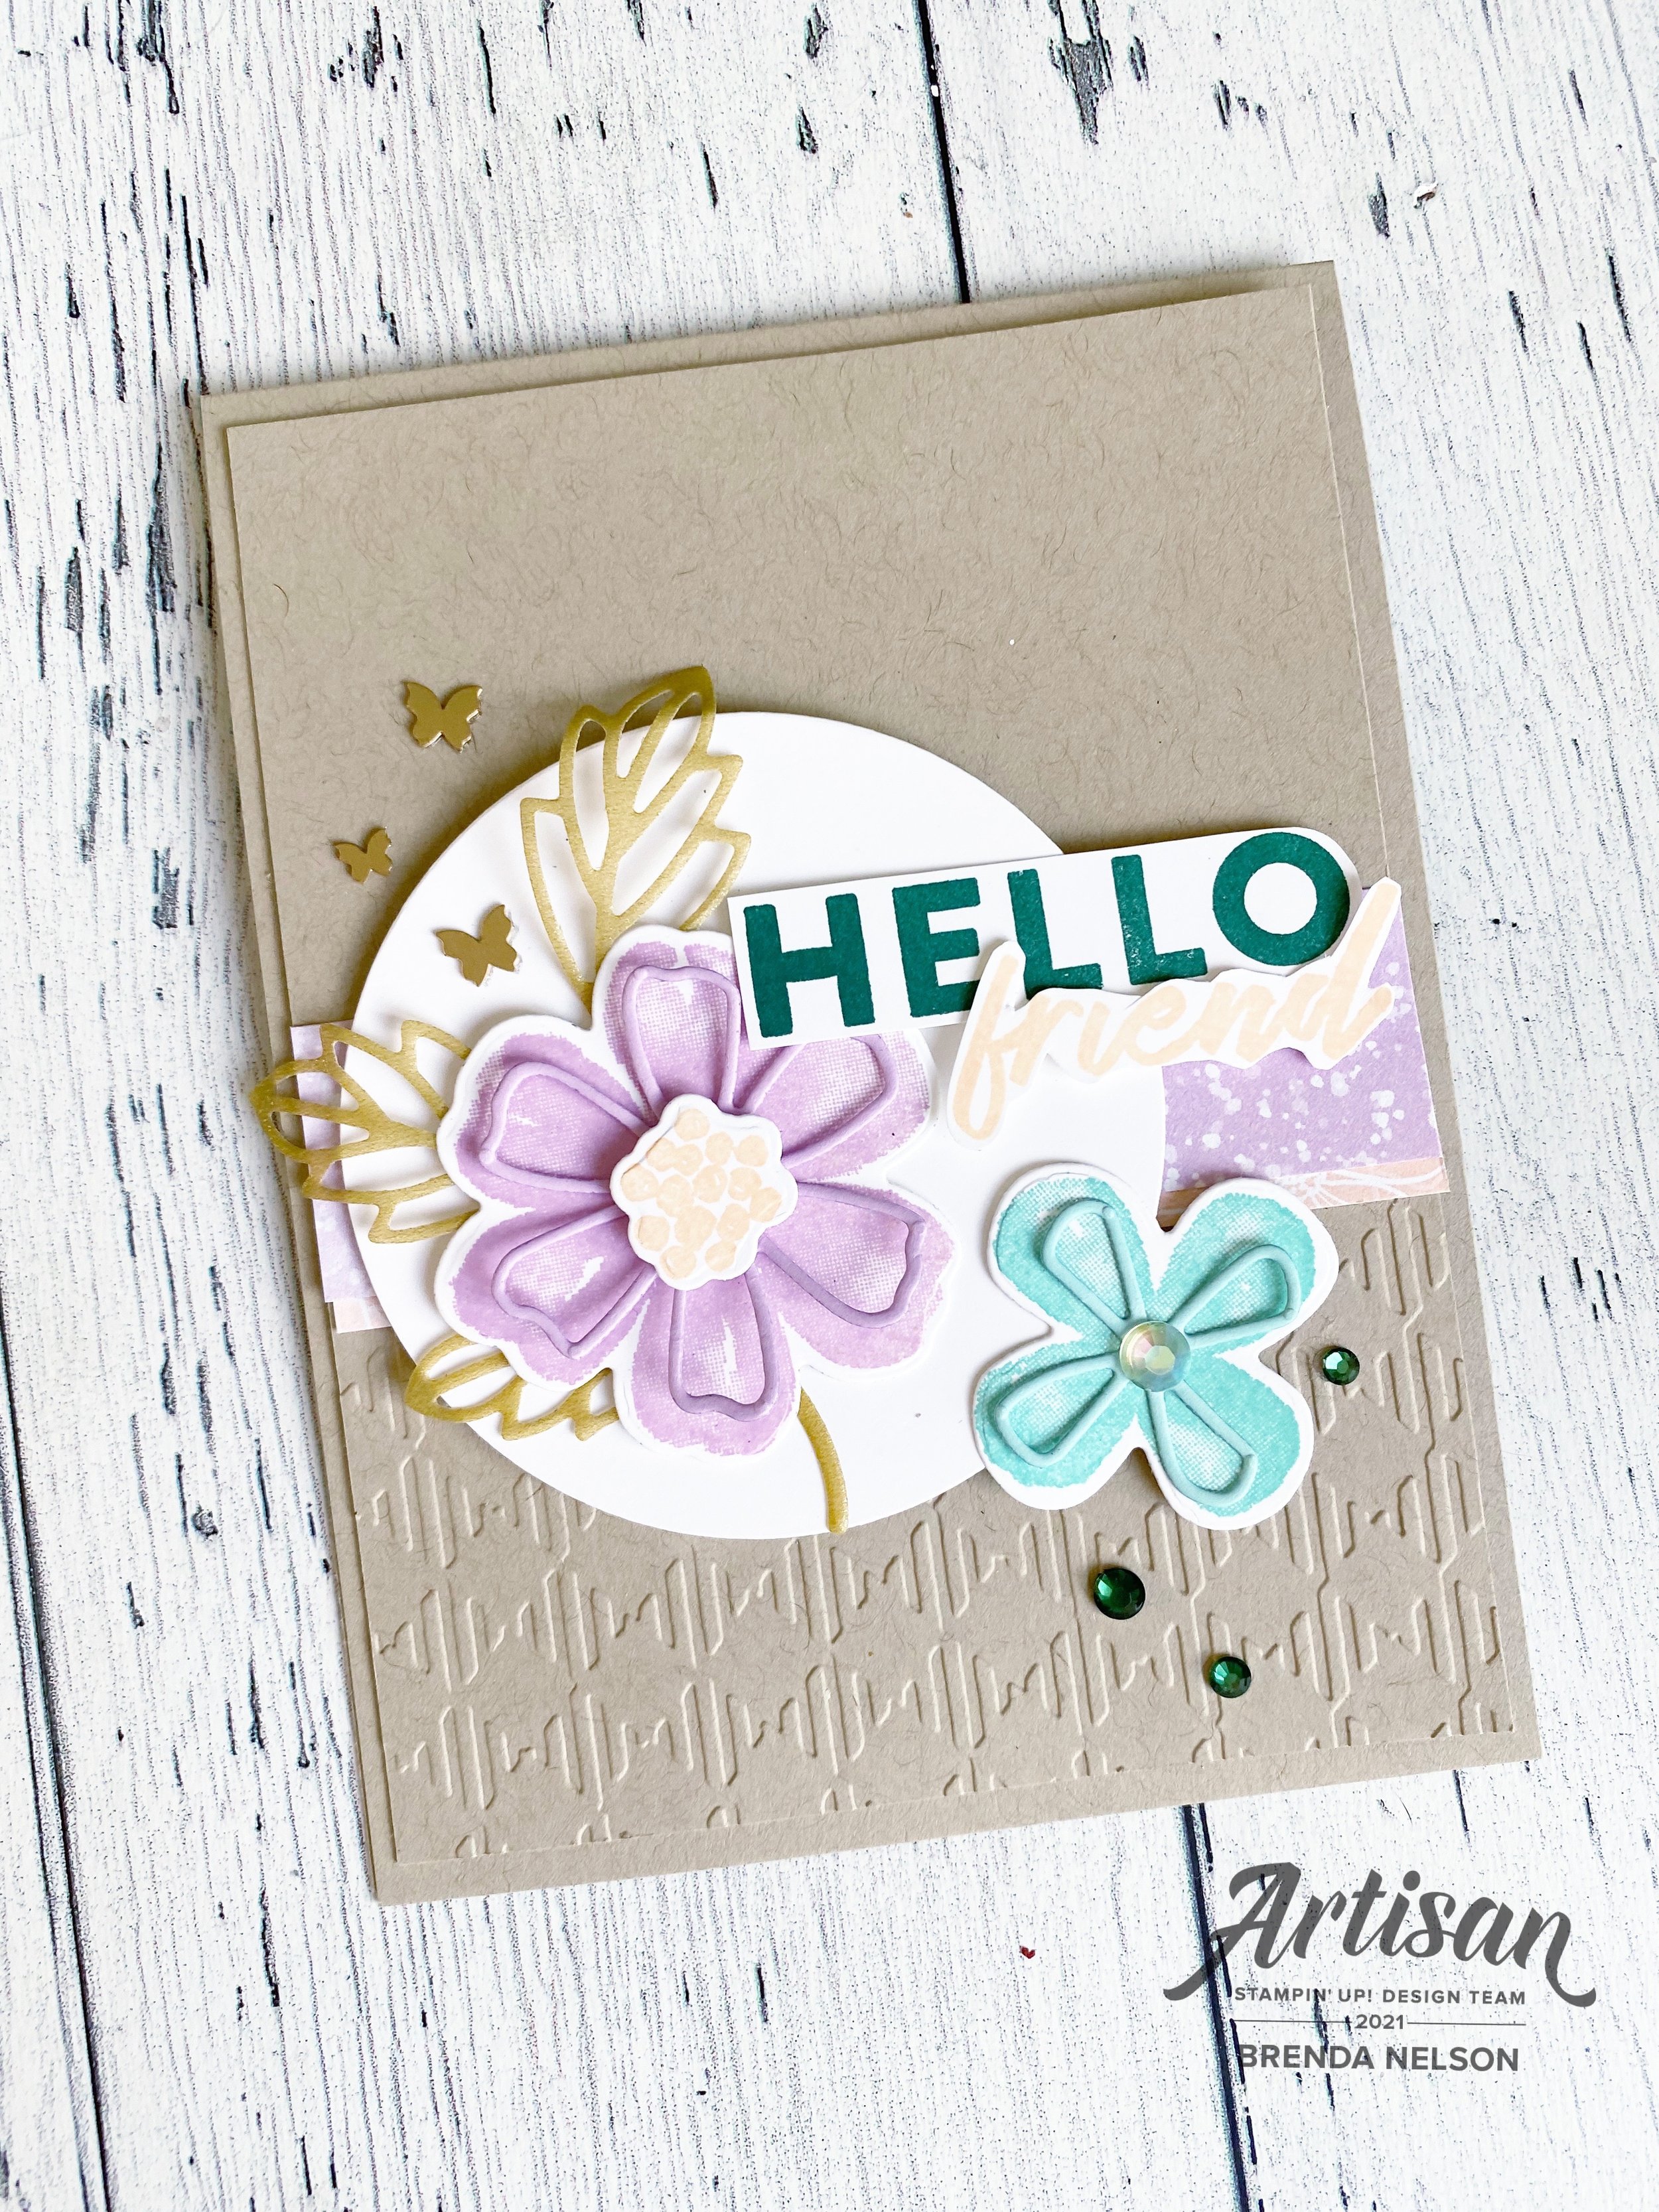
What you are seeing here is a sneak peek of a new Saleabration stamp set and Saleabration DSP paired with one of my favorite bundles from 2021! I absolutely LOVED the Pretty Perennials Bundle so I was really excited to have a chance to dust it off!

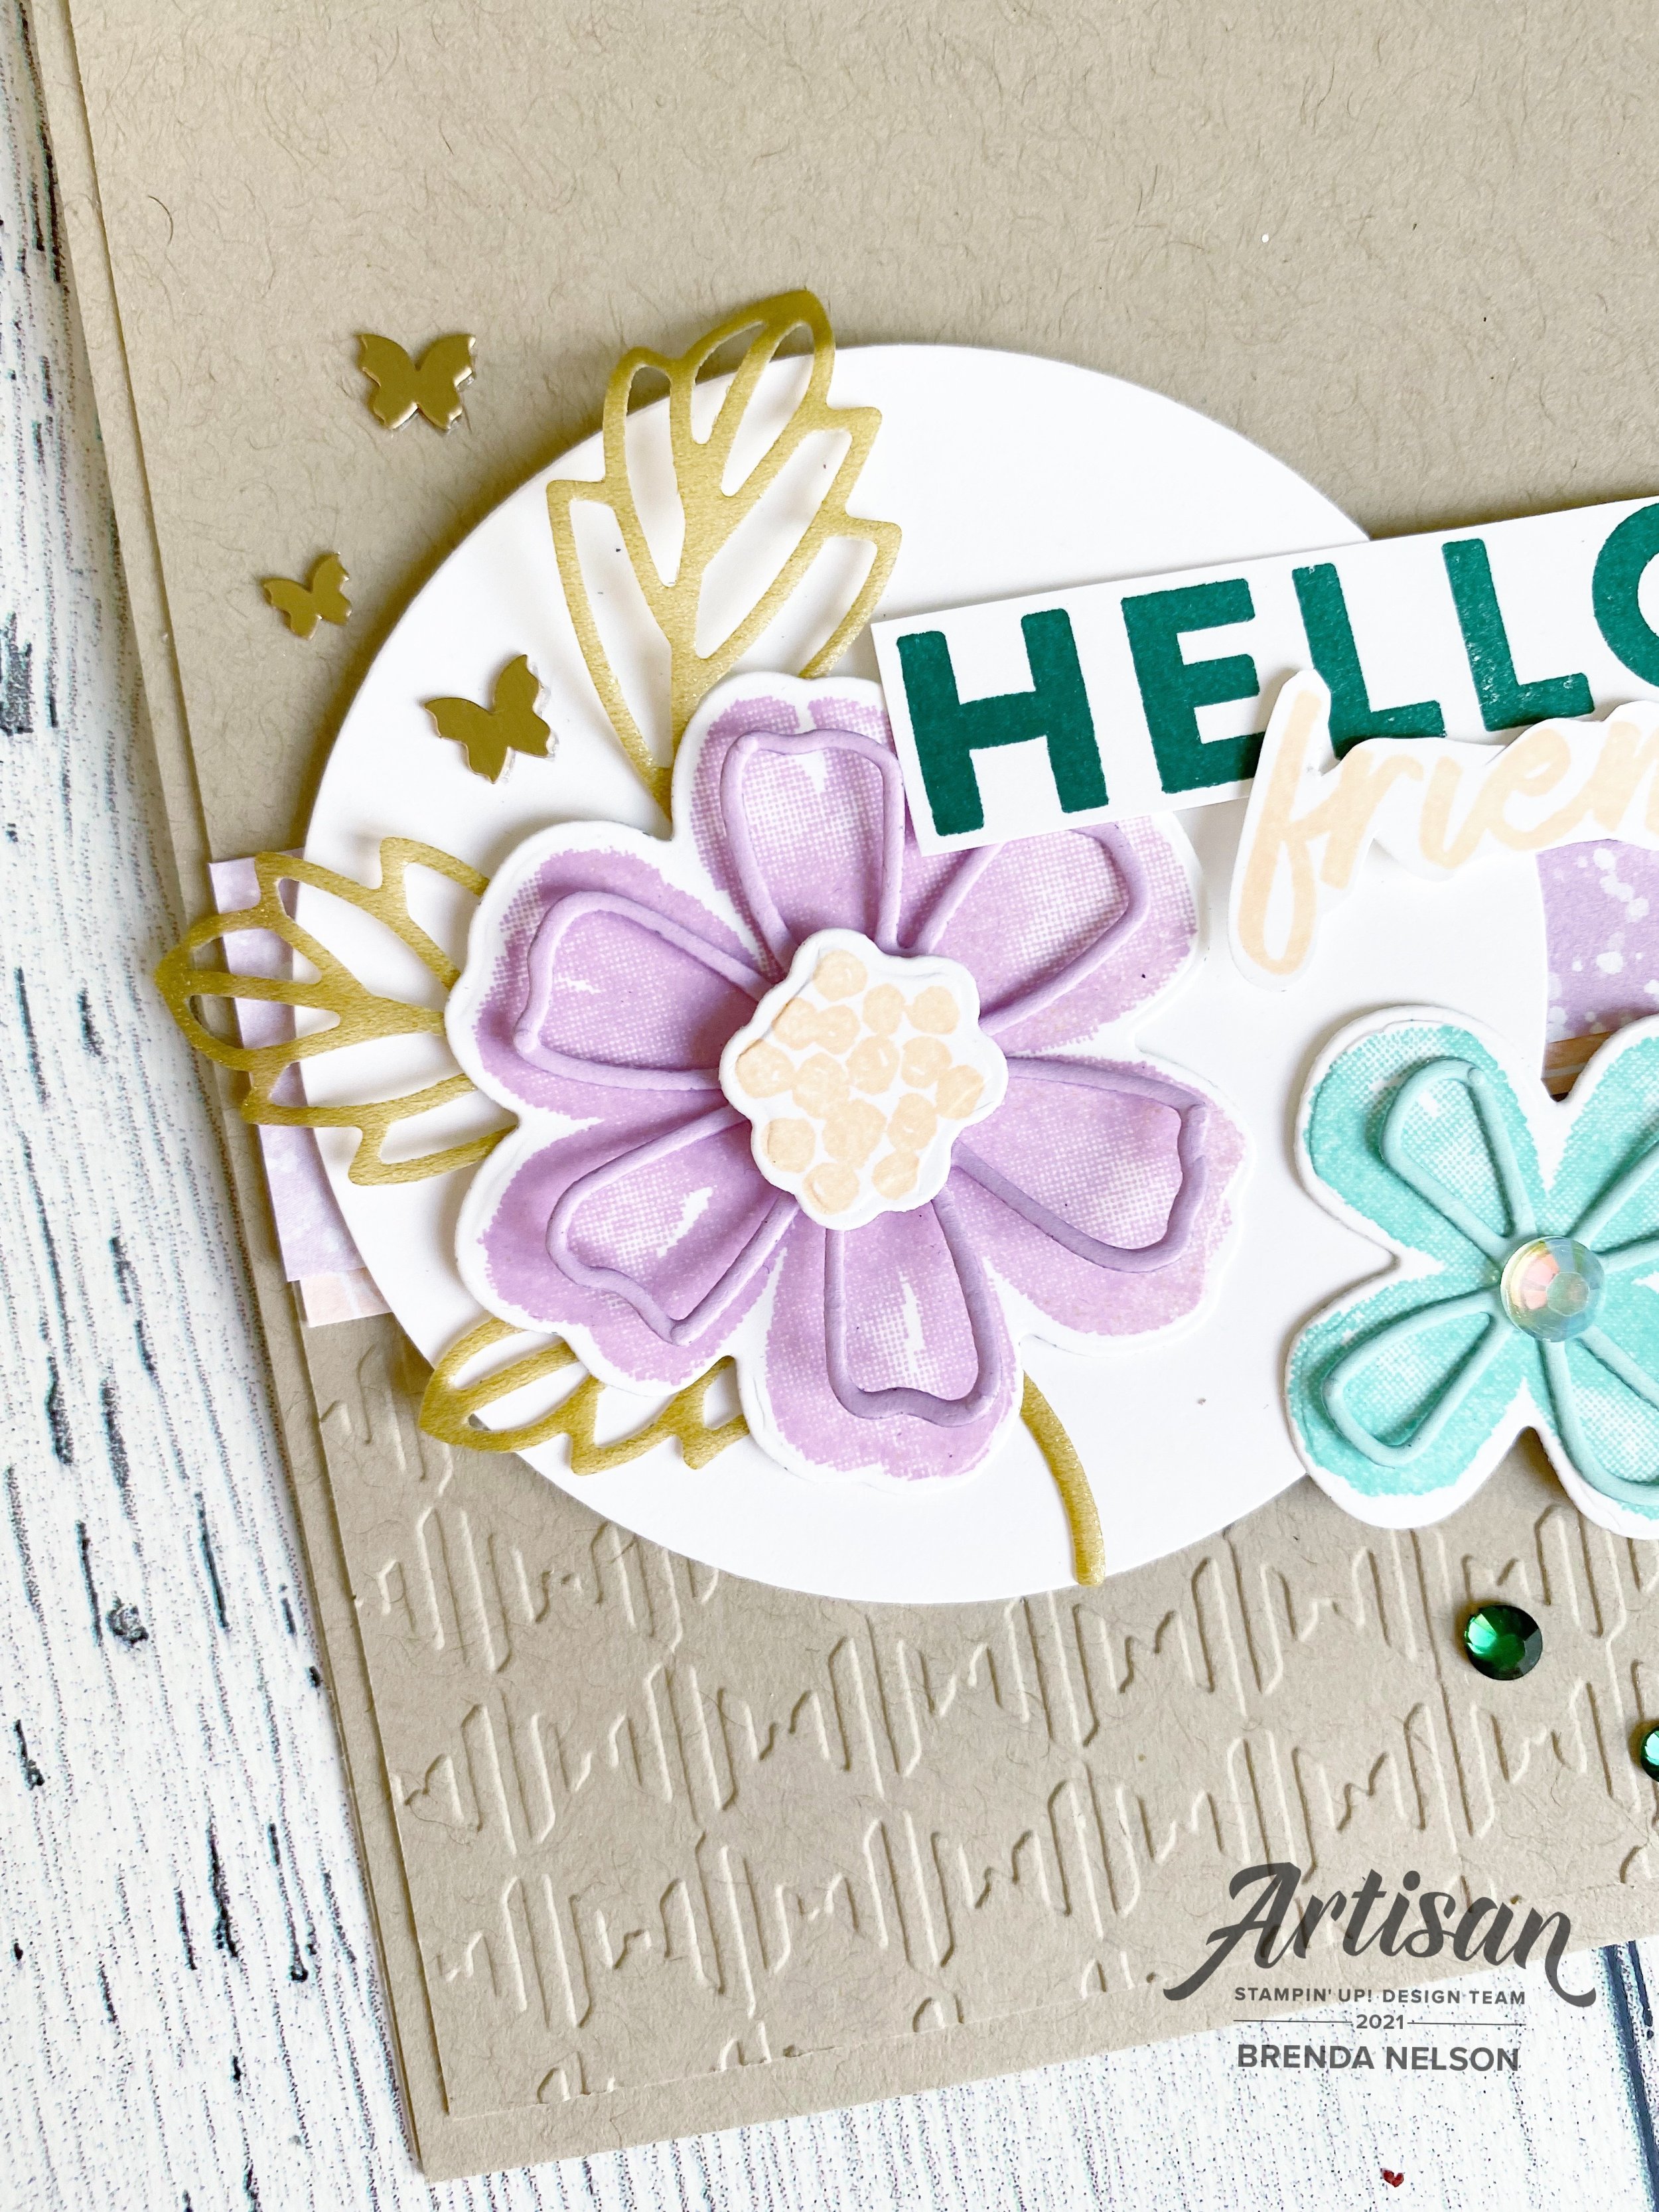
The color palette of my card is straight from the new Friendly Hello DSP! I love these soft pastel tones paired with the deepness of Shaded Spruce! The sentiment is from the SAB stamp set Friendly Hello (this is a level 2 bundle). This set has some great floral images and some awesome sentiments such as this one.

The base of my card is Crumb Cake (a classic don’t you think?) and I ran the top layer through a new gingham embossing folder that you will be seeing in the upcoming January to June catalogue. See those adorable brass butterflies? Also new and oh so fun!!!

I cut out the sprig from the Perennials Dies with the Gold Shimmer Vellum which was a Holiday Catalogue favorite of mine. I even added in some Holiday Rhinestones!

I am really happy with how this project turned out and I know I can recreate the design with ALL NEW stuff once the new year begins! I can’t wait to see what everyone else has made. You can go see what Tricia Butts has created this month! You are heading from Canada to the Unitied States!


Color Fusers December 2021

How can it be? How can it really be December 2021? One thing that does remain constant is the passing of time…and my love of stamping! I am really excited about the color combo our team has this month!

Isn’t this a unique color combo? I love pairing two dark deep colors with such a light soft pink! And because Petal Pink is one of my favorite pinks I decided to make it the base of my project and use the other two as accent colors!

I absolutely love this card and am excited to share it here and have some friends come over to make it too!

The base and first layer of my card are Petal Pink. I distressed the edges with my fingers and stamped a couple snowflakes from the Merry Snowflakes stamp set in the same color of ink on the background. I used the dies to cut out a snowflake in the same color. I love the stitched detailing on these snowflakes!

The sentiment is from the stamp set Encircled in Warmth and is stamped in Cherry Cobbler ink and die cut with the Layering Circles Dies. I brought attention to the sentiment by swiping my Blending Brush over “Christmas” with some Petal Pink ink to give it a little pop. It is probably my favorite aspect of this card!

The trio of trees is from the Cloche Dies and are now my favorite new thing! I can’t wait to incorporate them onto another project! They are die cut from Evening Evergreen card stock. I added this color in again behind the sentiment with the Evening Evergreen Chevron Weave Ribbon and some silver metallic cord from the Simply Elegant trim. A few little In Color Jewels and this fun whimsy Christmas card is complete!

Now aren’t you LOVING this color combo? I can’t wait too see how the rest of the gang incorporates these colors into their designs! You can go back to see what Melissa has designed and forward (next) to see what my friend Melanie has created! They are both so talented! Make sure to leave us some comments!

If anything catches your eye on my project and becomes a must have, please consider shopping my online store if you have not already! Thank you in advance! I love to do what I love!

Thank you for joining in and following along with our hop during 2021~ looking forward to sharing with you in the new year. Blessings to you and your family,

B.

Holly Jolly Santa

I was recently asked to be a guest designer for a super exciting Instagram account that I follow and many of you know and love! This is actually my OUTTAKE project as when they approached me and gave me a list of stamp sets to chose from, I choose this set—or so I thought! haha! Turns out I had my stamp sets mixed up! So this project is now going to be inspiration for you!

The best part is I spent quite a bit of time thinking about this card and the design, so I cannot let it go to waste! This was actually the first time I broke the seal on the Picture This Dies even though I have had them since June! Does that ever happen to you? You buy something and then get distracted from using it?

Well I do LOVE how this project came out in the end. I tried to create 3 little panels that felt unique. The base of the card is my favorite color Coastal Cabana. The first layer is black and then a layer of Basic White was added in after another layer of Coastal Cabana was die cut with the Picture This Die.

In the first panel I stamped the little star from the Be Jolly stamp set on the Basic White layer using Smoky Slate ink. My first Santa is stamped with Momento Ink and colored with the Stampin’ Blends markers in Real Red, Ivory, Basic Black and Petal Pink. I use the Petal Pink chubby tip to add a dot too each of Santa’s cheeks for a hit of rosy. I also use the light Smoky Slate Stampin’ Blend to add detail to his beard and hat pom pom.

I love how the Picture This Dies leave a stitched detail behind. And do throw away all the little bits that get cut out, those can definitely be used on a new project!

I like to add details to my sentiments so for this project I added a little bitty scalloped detail underneath the “A Merry Hello” by using a die from the Stitched So Sweetly Dies and a bit of white twine from the Bakers Twine Essentials Pack!

You can see just a hint of the bottom panel—I ran it though the Star-Crossed Embossing Folder, focusing just on the star half of the folder. I added a ton of Coastal Cabana Playing with Patterns Resin Dots to my card to play up the fun and whimsy feel! This Santa is colored with the same Stampin’ Blends and both are hand trimmed with paper snips to tuck into the little panels.

So even though this card is my OUTTAKE I think its pretty damn cute! And I am wondering why the heck it took me so long to use the Picture This Die set! You will definitely be seeing it in the future! I hope everyone has a merry day and if you are inspired to create your own project, please consider shopping my store if you live in Canada!


Comments are always welcome and appreciated!