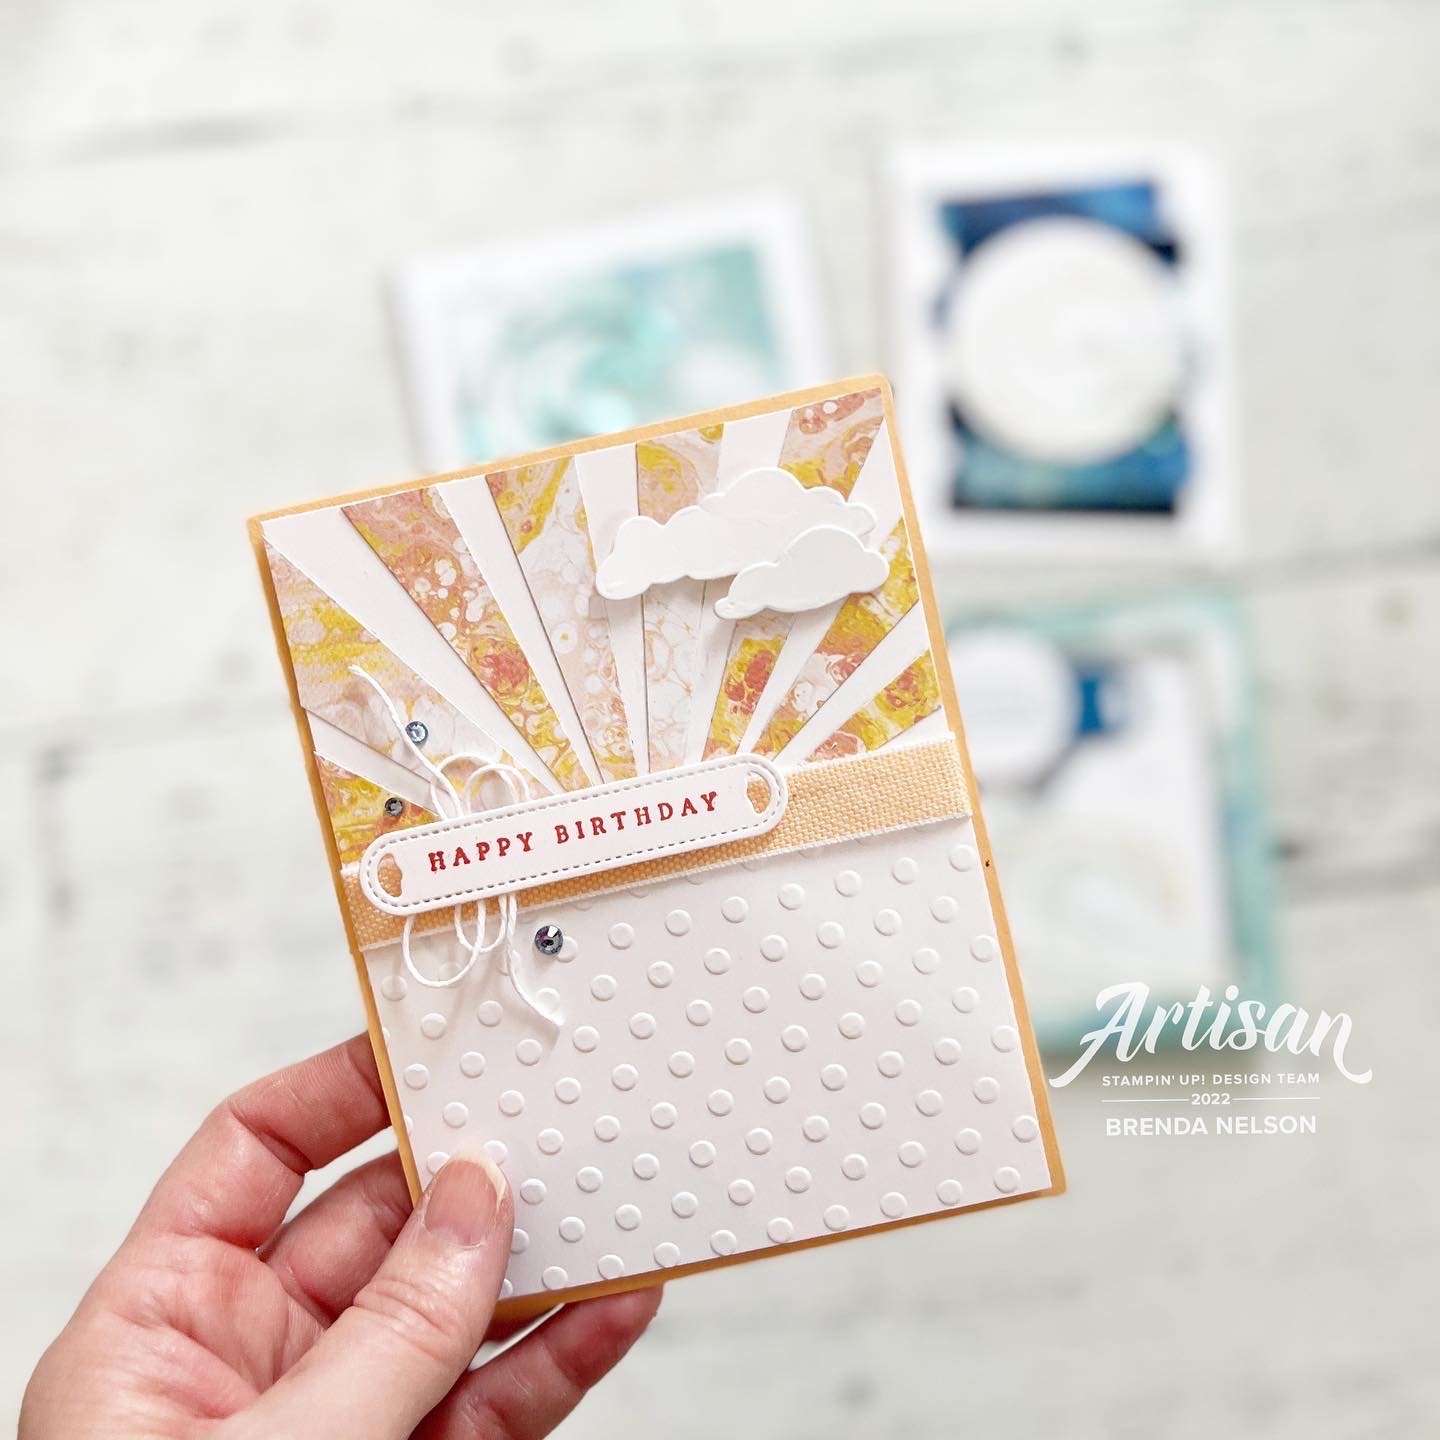
A Card a Day in May--Day 2!

Hello friends! Thank you for coming back to another A Card a Day in May project share! Today I wanted to share a card that I made for a recent Waves of the Ocean class as my favorite thing about it is actually the starburst technique!

This card was created featuring the Waves of the Ocean DSP which I don’t believe is available any longer however you can easily recreate this card using any DSP that catches your eye!

This project features the Waves of Inspiration bundle which was an early release bundle and I was lucky enough to receive it as a member of the Artisan Design Team so I had a lot of fun creating with it. Not only did I used it to create some Design Team projects but I also used this bundle for an online class.

However I wanted to share it with you because this card just feel so relaxing and serene to me and I love how fun and easy it is to create a starburst pattern or detail.

I also like how adding the embossed panel at the bottom and hiding the seam with ribbon can disguise the weird center that develops from laying down the strips to make the starbust. I just randomly angle but strips of DSP (great way too use up those scraps) and lay the skinny point along a center point. I do not get technical and measure, I honestly just eyeball it. You will have paper hanging off of the base so simply snip that away!

Add a few clouds to the starburst section using the dies, a sentiment, twine and some rhinestones and voila!

Create with Connie and Mary--My Favorite Pre-Order Bundle!

This was a good challenge as I had a hard time actually DECIDING on what was my favorite. In the end, I think a good punch wins every time so I have landed on the Flowers of Friendship Bundle as my Favorite Pre-Order Bundle!

21DesignTeamBadge.png

And of course I needed to use some of our NEW upcoming In Colors on this project as I just LOVE them. I love how they all look amazing together and blend so well with our existing colors. They just feel fresh and lovely.

final (2) 11.jpg

Nothing beats a crisp Basic White card base and layer. It’s a win every time especially when you pair it with such an awesome floral stamp set such as Flowers of Friendship. This set has 4 floral images and such as great mix of fonts on the sentiments. Of the 4 sentiments, 3 are ‘Thank You’ which is fantastic. Other than birthday, I send more thank you cards than any other. I love how each of the sentiments is unique.

The perk of this stamp set is that is is PUNCH BUNDLE! Yay! I always love a punch as it is more efficient than die cutting. The Flowers & Leaves Punch is designed to cut the two individual flowers, large and small, plus the two leafs in the stamp set.

Nothing beats a flick of your Stampin’ Write Marker or Stampin’ Blends across your project for a spray of color.  It’s literally one of my favorite tricks! I flicked my Evening Evergreen Blend on this card concentrated at the bottom.  This adds to t…

Nothing beats a flick of your Stampin’ Write Marker or Stampin’ Blends across your project for a spray of color. It’s literally one of my favorite tricks! I flicked my Evening Evergreen Blend on this card concentrated at the bottom. This adds to the crisp white feel of the top of the card.

I felt that stamping in black ink felt to stark against the white, so I chose to stamp my floral images in Grey Granite ink. I stamped the large floral stem three times on the Basic White and then colored the flower buds and leaves in with my Stampin’ Blends in Pale Papaya (with a hint of Calypso Coral), Petal Pink (with a hint of Pale Papaya) and Fresh Freesia. The leaves were colored in with Soft Succulent Blends.

The punched flowers were colored in Soft Seafoam (with a hint of Soft Succulent), Pale Papaya (with a hint of Calypso Coral) and Fresh Freesia. In the center of each of these flowers I added an Opal Round.

final+%281%29+13.jpg

The sentiment is stamped in Evening Evergreen—-I really love this color as an alternative to black!

And finally I added my favorite new embellishment, Loose Flower Flourishes! You get two sizes and three colors with this amazing embellishment—Pale Papaya, Fresh Freesia and Polished Pink.

I can’t wait to see what the other members of the Design Team chose as their favorite pre-order item. Honestly, early access is one of the things that I LOVE the most about being a Demonstrator. Haha! We all have our thing right?

You can go BACK to see what Melissa has designed and NEXT to see what Connie has created.

Etched in Nature--Card Inspiration for On Tour!

Yesterday my team and I participated in some virtual training provided by Stampin’ Up!. They are hosting sessions over the course of a week to demonstrators all over the world which is really exciting. As part of our event registration, we were given the stamp set Etched in Nature and I decided to use this set as part of my team’s Afterparty event that I hosted virtually.

It is always more fun to stamp together and even better when we all have the same stamp set to use. I designed 3 Make’n Takes to work on with my team. Now, I will be totally honest, this stamp set was not a style I would normally gravitate towards so it was a pretty good challenge for me to create cards that had a design and a feel that I loved. However, playing with the NEW In Colors, some ribbon and embellishments and the new Hand Penned Designer Series Paper made this a much easier project than I was anticipating!

final (1) 5.jpg

I think these cards look fabulous as a trio and all have a really unique feel to them as individual projects. By designing them with the same color palette and using the Hand Penned DSP as the anchor, they work as a group. This stamp set doesn’t have coordinating dies or punches so I had to pull in a couple favorite options to help accentuate the design.

final (2) 4.jpg

The base of this card is the new Pale Papaya. This is a really interesting color for me as it leans yellow and it leans orange based on the colors that you pair it with. This color is one featured in the Hand Penned DSP. I punched out a circle that highlighted the color. This swatch also allowed me to pull in coordinating colors such as the Mint Macaron and Misty Moonlight circles. Both of the card stock circles are stamped with images in Momento Ink from the Etched in Nature stamp set.

I added a die cut sprig in Basic White from the Forever Flourishing Die set to add to that natural feel. Thank You is also stamped in Momento Ink and behind the sentiment I added some of the Pale Papaya Open Weave Ribbon and Basic White Thread. A few Matte Black Dots finished off this card perfectly!

This next card is an example of #goodcarddesign and was a feature project design of our team meeting. I briefly touched on this topic on a previous blog post and I will be adding to my #goodcarddesign concept with more examples later this week—so make sure you check back if you are interested in this concept!

final (4) 5.jpg

The base of this card is the new Soft Succulent color and its just such a warm green with a nice grey undertone to it. It definitely has a ‘neutral’ feel to it and I can imagine it pairing so well with our other 50+ colors!

I added a scallop detail in Misty Moonlight along the edge using the Peony Die and layed a strip of DSP from the Hand Penned collection. I did a bit of background stamping and stamped the sentiment out twice so I could pop up and isolate the word Happy Moments.

Between the two circles I added some of the Soft Succulent Open Weave Ribbon and some Basic White twine. A few Opal Rounds to add some glitz to this card was the perfect touch.

final (6) 3.jpg

The final card in this trio is on a crisp Basic White card stock base. I added a middle panel that I ran through the Tasteful Textile 3D folder and added two strips of DSP from the Hand Penned Collection.

I wanted to focus on the butterflies from the stamp set on this project. Underneath the sentiment, stamped on Pale Papaya, I added a little strip of Polished Pink as scallop accent using the Stitched Be MIne Dies. The ribbon is amazing—I LOVE IT! It is the new Pale Papaya & White 1/2 Ribbon. A few In Color Jewels just finished things off perfectly!

Overall, I really really love how these cards turned out and believe that you can recreate them with ANY stamp set you might have that combines images and sentiments!

final 9.jpg