Bountiful Blessings--Create with Connie and Mary!

Welcome to another Saturday edition of Create with Connie and Mary! This week our theme is Bountiful Blessings so I reached for a ‘tried and true’ stamp set from my collection, Country Home. Sometimes it is easy to get caught up in the ‘new’ stamp sets we have because they are fresh and feel exciting, but we still have fabulous returning favorites in our annual catalogue!


You can make these sets feel ‘fresh and new’ by pairing them up with new colors, embellishments and designer series papers like I have done here.

And sharing items from both of our catalogue publications is key to making sure people know about all of the fabulous products we offer!

fullsizeoutput_12d57.jpeg
final.jpg

I love to color and this set totally fills that need! I used a color palette of Cinnamon Cider, Mint Macaron, Pumpkin Pie, Mango Melody and Old Olive to color and develop this card.

The Mint Macaron layer has the tile image from the stamp set stamped in the coordinating ink color so you just get a glimpse. The main layer of the card is from the In Good Taste DSP collection. LOVE IT!

I wanted to fill out the milk jug a bit with extra foliage so I reached for the Forever Flourishing Dies (pg 110) to add in the little sprigs, they are the perfect itty bitty size to keep in scale with the stamped image!

I wanted to fill out the milk jug a bit with extra foliage so I reached for the Forever Flourishing Dies (pg 110) to add in the little sprigs, they are the perfect itty bitty size to keep in scale with the stamped image!


I wanted to add some gold accents to this card, as gold feels like a fall color to me. I used the Gilded Gems and some Gold Foil paper that I cut with a border die from the Autumn Essentials Die set. I really love die sets that have border options as I find I use them a lot to help highlight a sentiment or photo. And borders with a unique shape can be a great way to add in a subtle pop of color too!

A little Linen Thread bow finishes off the milk jug perfectly!

I really love the color palette of this card so you might see it in an upcoming scrapbook page too!

final.jpg

I hope everyone is soaking up the last few days of September! It went by so fast and now we are into a new month with my favorite holiday! Unless my own birthday can count as a holiday! hahaha!

Make sure you either hop forward to Connie’s blog (NEXT) or backwards to Melissa’s blog (BACK) to see what amazing creations they are sharing with us this week! And if this is your first time joining us, feel free to go back through my blog and see what we have been creating!
Create with Connie and Mary--Welcome Fall!

I believe the first official day of fall is September 21st, so we are almost there officially! Unofficially, I think as soon as September ONE hits we are bringing out blanket scarves, drinking our Pumpkin Spice Lattes and crafting with all things fall colors and pumpkins! At least that is what I am doing as there has been a definite chill in the air, especially on those early morning school drop offs!

That is why this weeks theme is Welcome Fall! I hope you don’t mind but I am on a scrapbooking ROLL so be prepared to see another page layout this week from me!

fullsizeoutput_12d57.jpeg
 
final.jpg
 

Out of all the seasons, crafting and home decorating for Fall and Halloween, are my absolute favourites! I especially love making layouts because there are just so many awesome ways to stamp and cut out leaves. This page looks so crisp with the white background and the medley of leaves, pumpkins. leaves and wheat sheaves.

For the color palette I cut or stamped leaves out in Crushed Curry, Soft Suede, Crumb Cake, Old Olive with Mossy Meadow edges, Cajun Craze with Merry Merlot edges, Crushed Curry with Merry Merlot edges, Terracotta Tile and of course, Pumpkin Pie.

We have so many fantastic options for fall creating! I used the Love of Leaves Bundle, Gather Together Bundle and the Autumn Essentials dies from the Handmade for You catalogue. I did sneak in one retired leaf too as I just can’t part with it…can you see it?

Notice that big leaf on the left? I cut it from the Festive Felt and then spritzed it with a mix of Crushed Curry and rubbing alcohol. I quick blast with my heat tool and it was dry.

Notice that big leaf on the left? I cut it from the Festive Felt and then spritzed it with a mix of Crushed Curry and rubbing alcohol. I quick blast with my heat tool and it was dry.

I wanted to create sort of a fun boarder running underneath my pictures with all my favourite fall images, leaves, pumpkins and wheat sheaves. When I was mixing two colors together, like on the green leaves, I stamped in Old Olive first and then used a finger dauber in Mossy Meadow around the edges. I used the same technique with the Cajun Craze, Crushed Curry and Merry Merlot leaves. And I want to give a shout out to Merry Merlot, its definitely getting a good work out in my craft room as it is perfect leaf tone!

I added in a little splatter with Crushed Curry ink and my Water Painter across the background of both pages. I love the feel it gave, softening up the crisp white a bit.

I added in a little splatter with Crushed Curry ink and my Water Painter across the background of both pages. I love the feel it gave, softening up the crisp white a bit.

This page had so many highlights with the leaves and pumpkins that I found it didn’t need much in the way of embellishments. I bit of Bumblebee Gingham ribbon and some Gilded Gems were all I added to this page.

I like to create little focal points on my pages, I often say “Its all in the details”, which is reflected here with the ‘friendship’ and ‘So glad to have you in my life’ areas. I used the same maple leaf on each, with a gem, and twine to create continuity between the pages.

I hope you have enjoyed my fall pages! I will probably have more to share with you over the coming weeks so make sure you check back! And if you are in Canada and need to shop for any supplies you can follow the link on the side bar to my store!

If you are starting here on our blog hop you can go BACK to see what Melissa has designed for us this week and NEXT to see what Connie has created for us! Thank you for hopping by!

Just Saying Hello...

I have to admit that the temptation to play with NEW stuff is so strong! So I could not help myself by making a card with all new products for card #14 in my “A Card a Day in May” challenge!

This card features the Tasteful Touches stamp set which is a new offering. The flower is stamped twice and hand cut. The dies for this bundle do not cut out the images in the stamp set. I coloured the flowers with the Purple Posy and Highland Heather Stampin’ Blends. I went over top of the flowers with the Wink of Stella Pen. I really wish I could capture the sparkle it adds in a photo!

I used the Scallop Tag Topper punch to create the vellum tag and embossed the sentiment in white. The foliage is cut with the Sunflowers dies in Mossy Meadow and Old Olive. The base layer of the card is embossed with the new Old World Paper 3D folder. The texture it gives is just unbelievable!

Finally I added some Gilded Gems and gold metallic trim from the Forever Greenery Combo Pack!

If you are like me and cannot wait for new stuff, then consider that I got ALL OF THIS product on the demonstrator pre-order! You can join my Glitter Girls team NOW and get all of this in your Starter Kit too!


final 22.JPG
 
final 21.JPG
Aren’t these blooms just gorgeous on this Old World embossed background? LOVE LOVE LOVE!

Aren’t these blooms just gorgeous on this Old World embossed background? LOVE LOVE LOVE!

Joy of Sets Blog Hop--April!

fullsizeoutput_11638.jpeg

Welcome to the Joy of Sets Blog Hop for April! Thank you so much for hopping on over to see what we are all up to this month—the theme is BIRTHDAY! Now I could have made a birthday card, but instead I decided to create a scrapbook page of my most recent birthday in January. I had a fun girls night in playing games, eating and drinking Prosecco!

The color pallet for this page was inspired by my birthday cake, however I knew that I also needed to keep it neutral to coordinate with what we are all wearing. And YES, I design my pages around my photos. I typically do not create a page without a photo and I use the subject matter and colors to dictate my color pallet choices. stamps and embellishments.

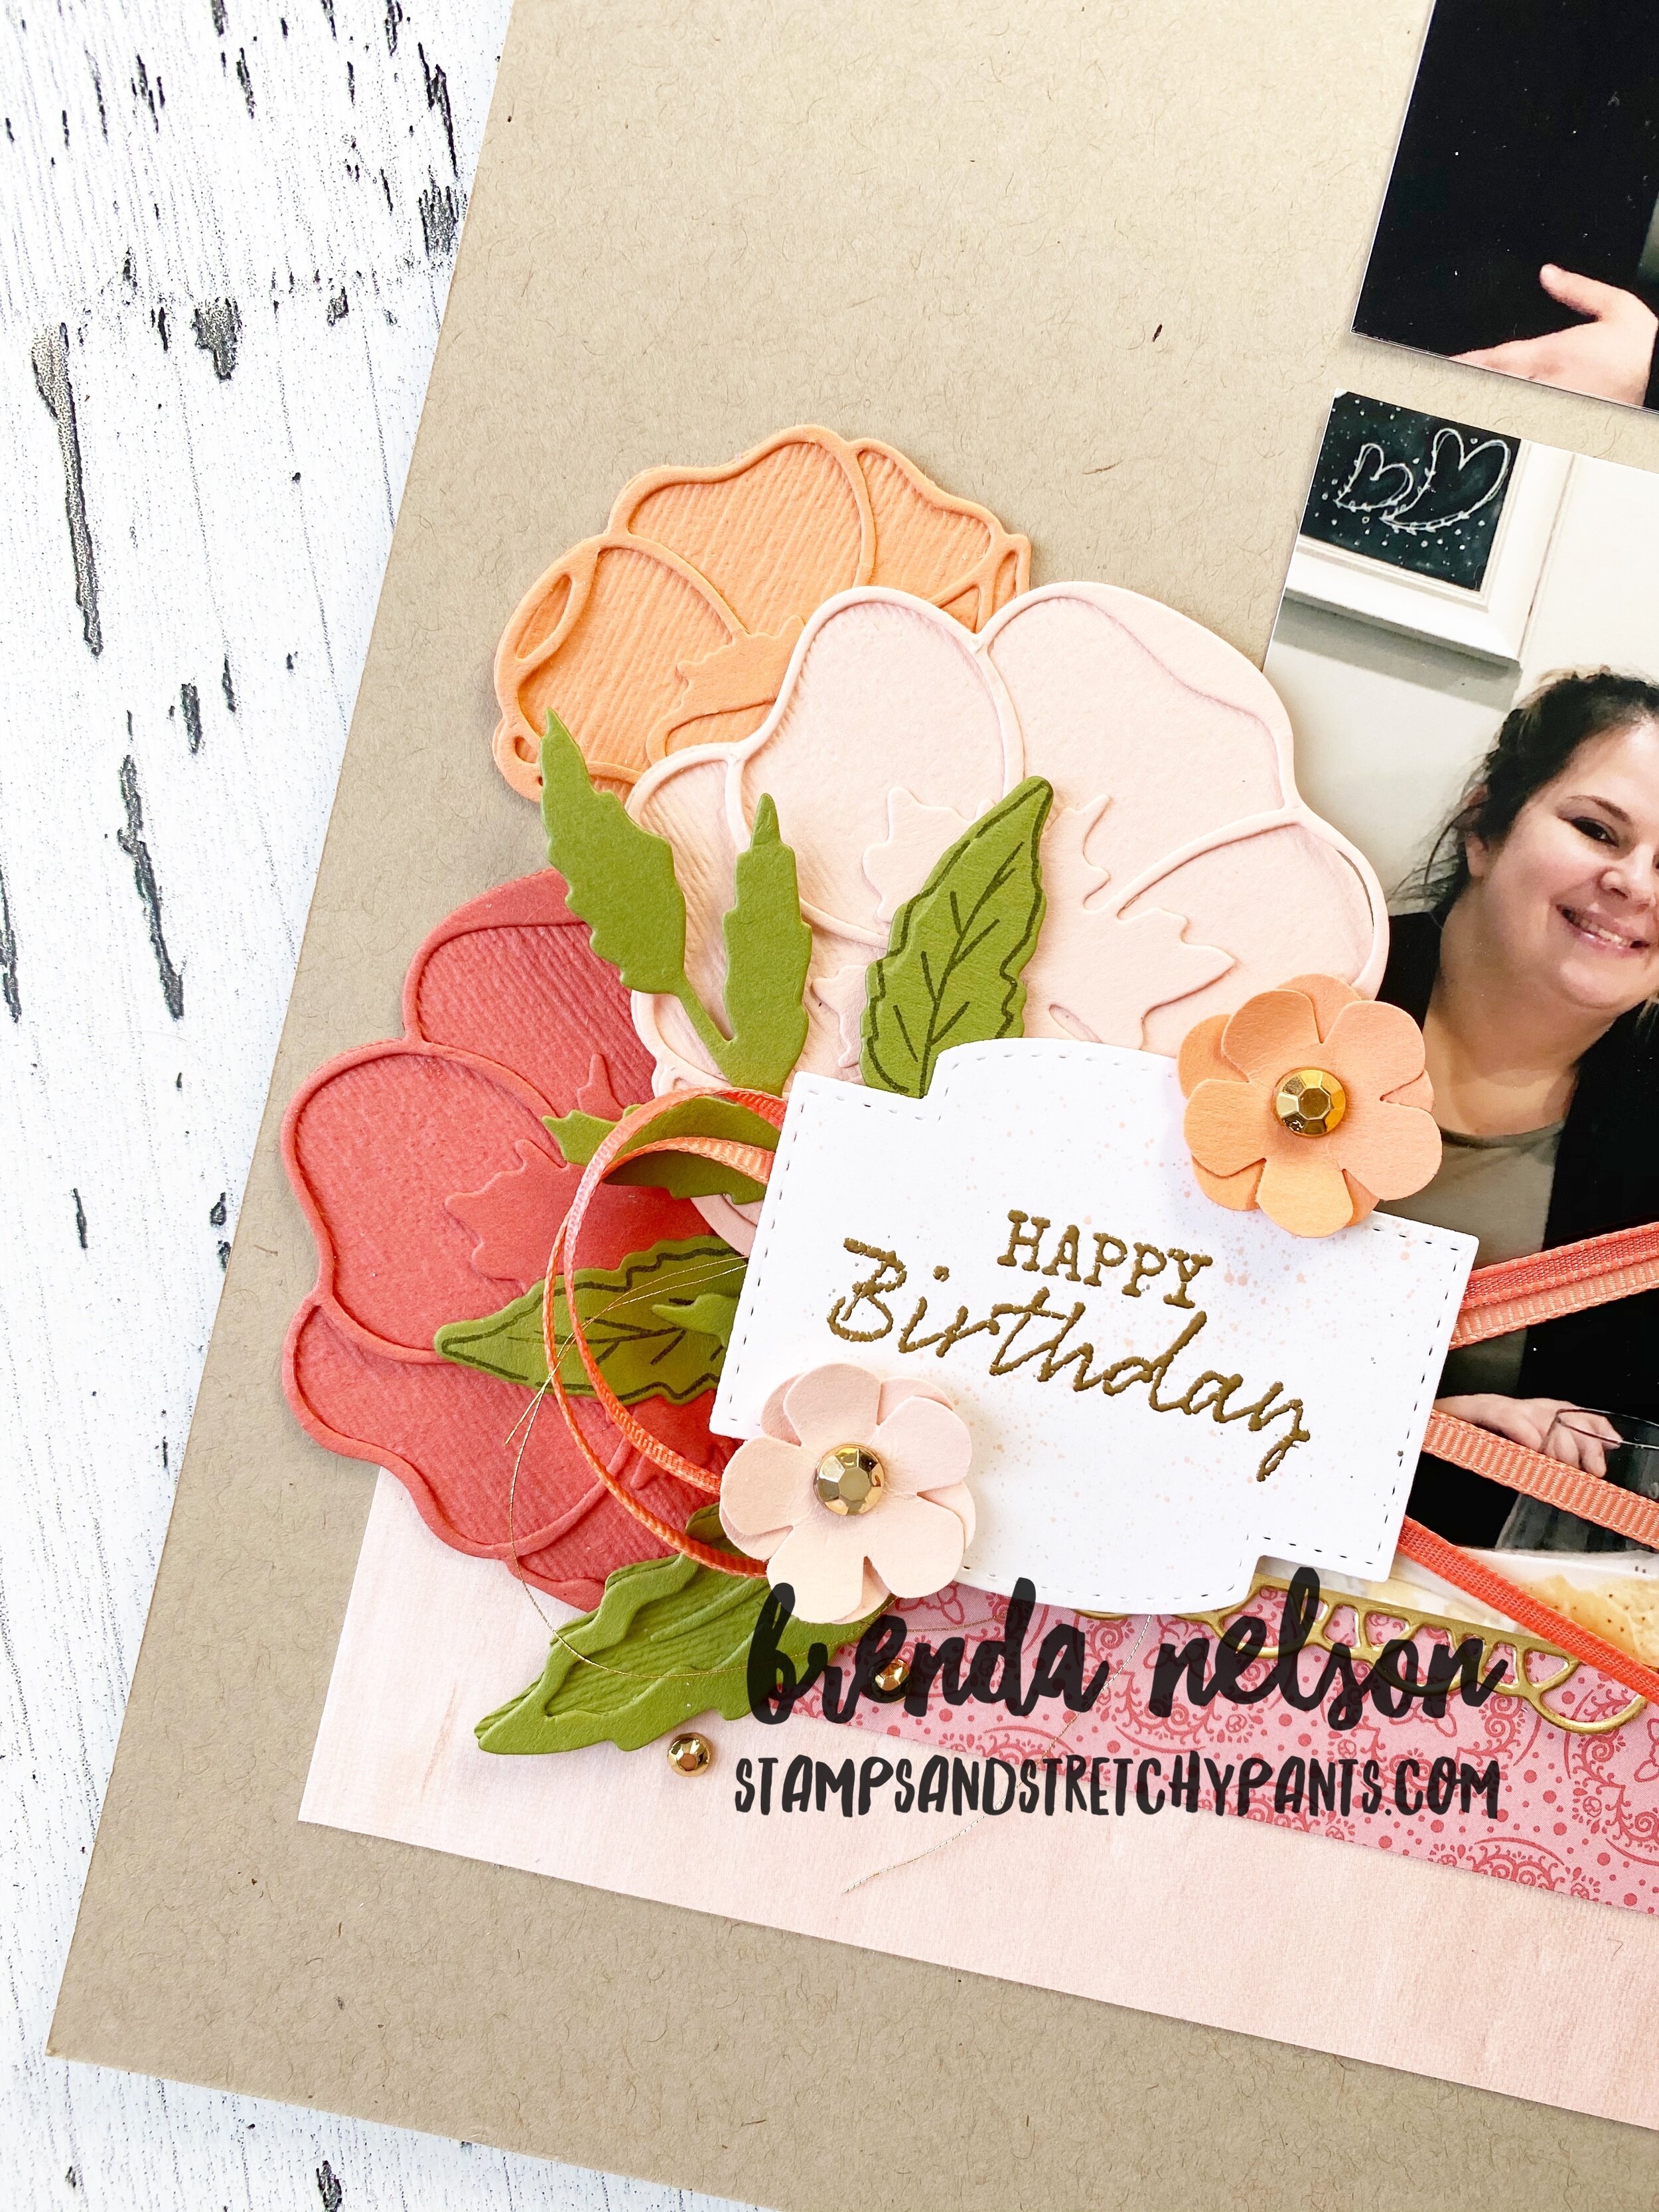
On this page I have used some current popular product, the Poppy Moments Dies, along with a stamp set from the Annual Idea Book & Catalogue—Seaside Notions. I used some up and coming new products too—the DSP strip right below the bottom photo is the new Ornate Gardens Specialty Designer Paper and I added in some Gilded Gems from this product suite as well.

One fun tip for when using the Poppy Moments Dies is to keep them tone on tone. I ran the base of the flowers through the Subtles Embossing Folder (found in the Idea Book & Catalogue) and it gives it just the right amount of texture.

The colors I used on this page are Crumb Cake, Petal Pink, Grapefruit Grove and Terracotta Tile with gold accents.

This page didn’t not take long to put together and can easily be recreated using different DSP and even different flower dies! I hope it inspires you!

Happy 44th birthday to me!

Happy 44th birthday to me!

In this photo you can see the detail the Subtles Embossing folder gives to the flowers, I think is perfect! And those new Gilded Gems—on point!

In this photo you can see the detail the Subtles Embossing folder gives to the flowers, I think is perfect! And those new Gilded Gems—on point!

Please visit Sue Allen’s blog next on the hop!