Merry 'Slimline' Wishes
/Hello friends! Have you seen the new card trend that is circulating around? This design style is called “slimline’ and there are several size and dimension variations. I designed this ‘slimline’ card to showcase the In the Pines Bundle from the Handmade for You catalogue.

I absolutely LOVE the color palette on this card. It isn’t what you would call traditional in the holiday color scheme sense, but I love the soft colors and the idea of the trees transitioning from fall into winter colors.
I started with Calypso Coral, then Pumpkin Pie and moved into the blue green family of colors with Pool Party, Coastal Cabana and finally Just Jade which is also the base color of this card.
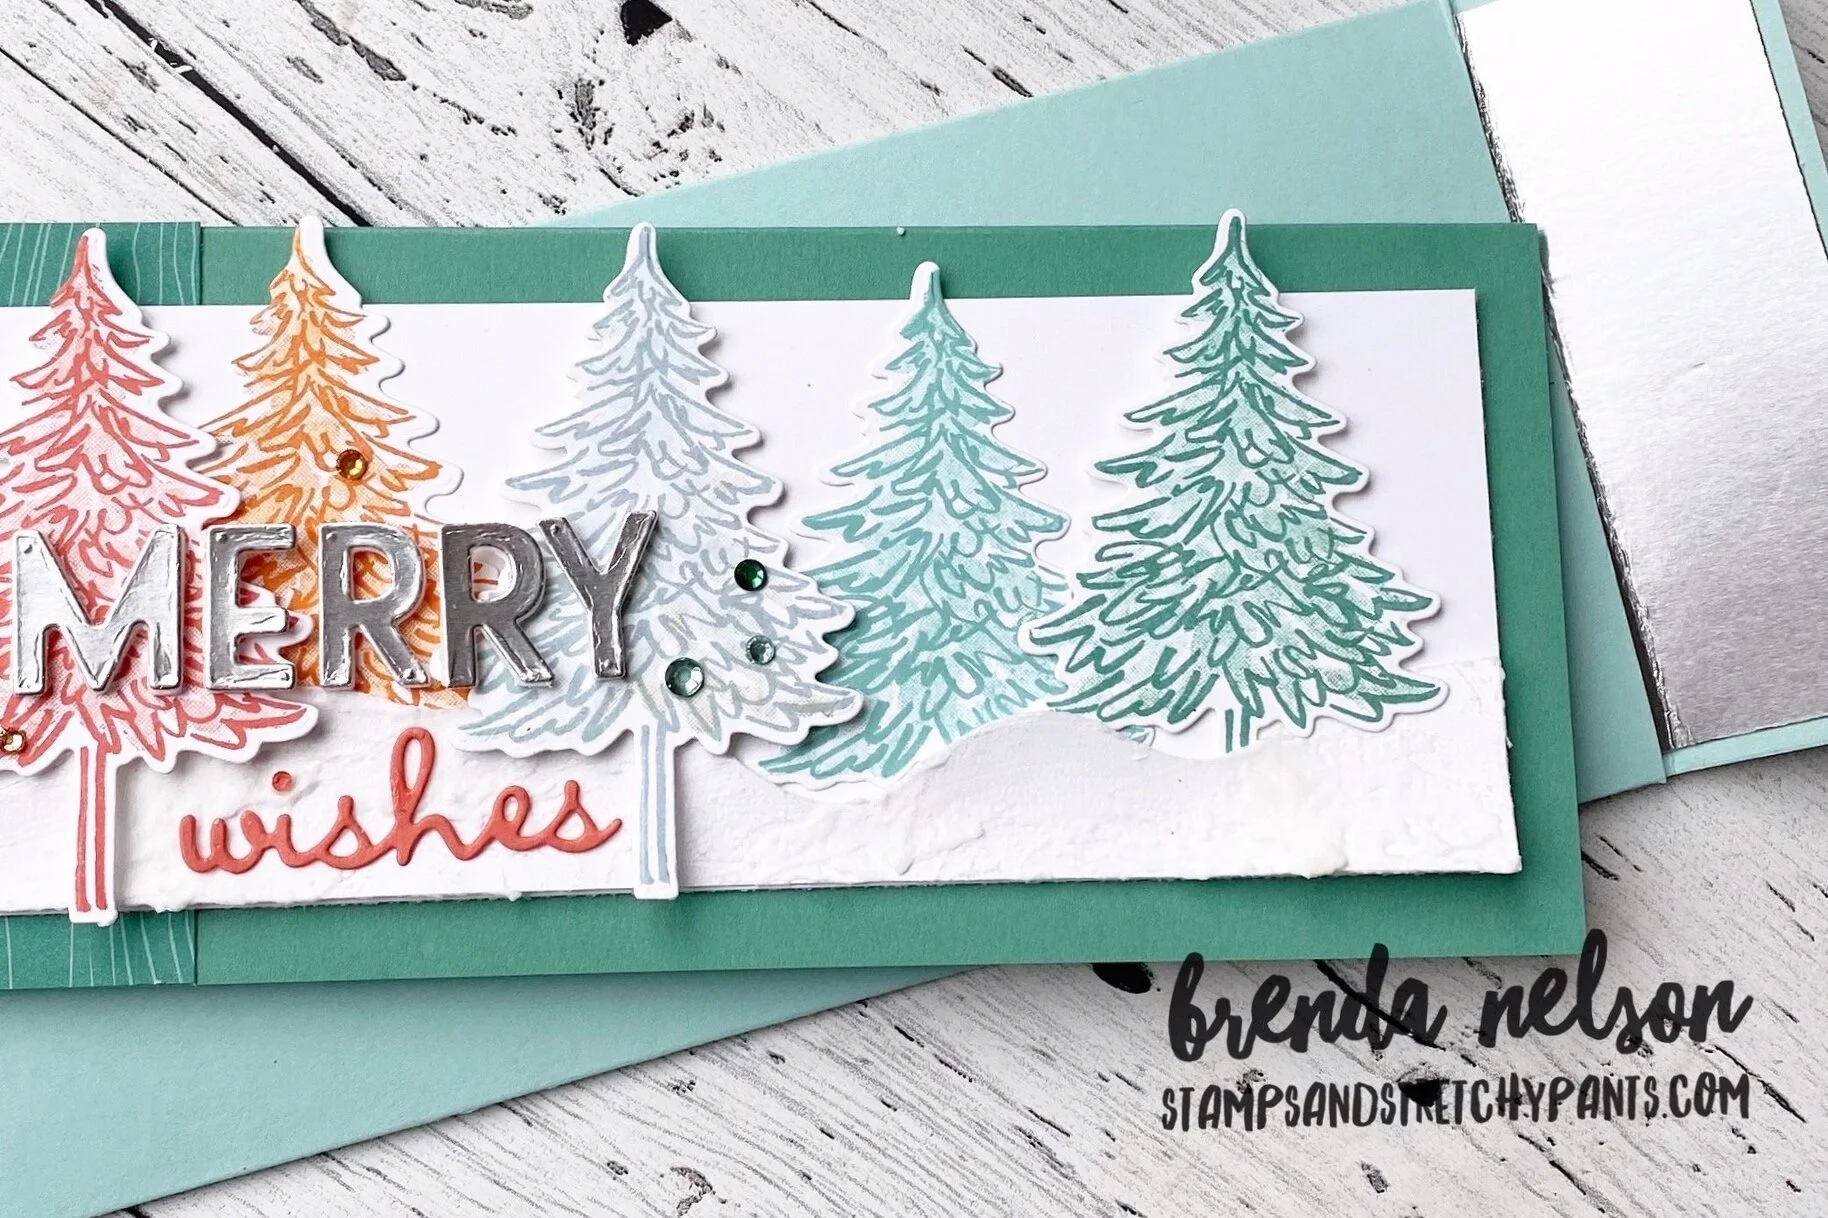
I stamped the outline of each tree in full strength ink and the ‘filler’ of the tree I stamped ‘off’ on my scratch pad so the ink was a tone lighter.
I wanted a snow drift so I used the curved snow drift die from the Pine Wood Dies and added some embossing paste on top to give it some texture and to help it mimic snow. I actually know a lot about snow because where I live, we have snow for at least 5 months of the year! Haha! Unofficial expert over here!
The base of my card is 7 x 8 1/2 and on the 7 inch side you are going to score at 3 1/2. There are several size variations to this card style so there is lots of room to play around and have fun. The Whisper White layer is 2 3/4 x 7 3/4 .
Naturally a card of this size needs a custom envelop too! I stamped the trees on the left corner and did a little marker spritzing. And on the inside flap, I added a piece of silver foil paper to play off of the silver Merry on the front of the card.
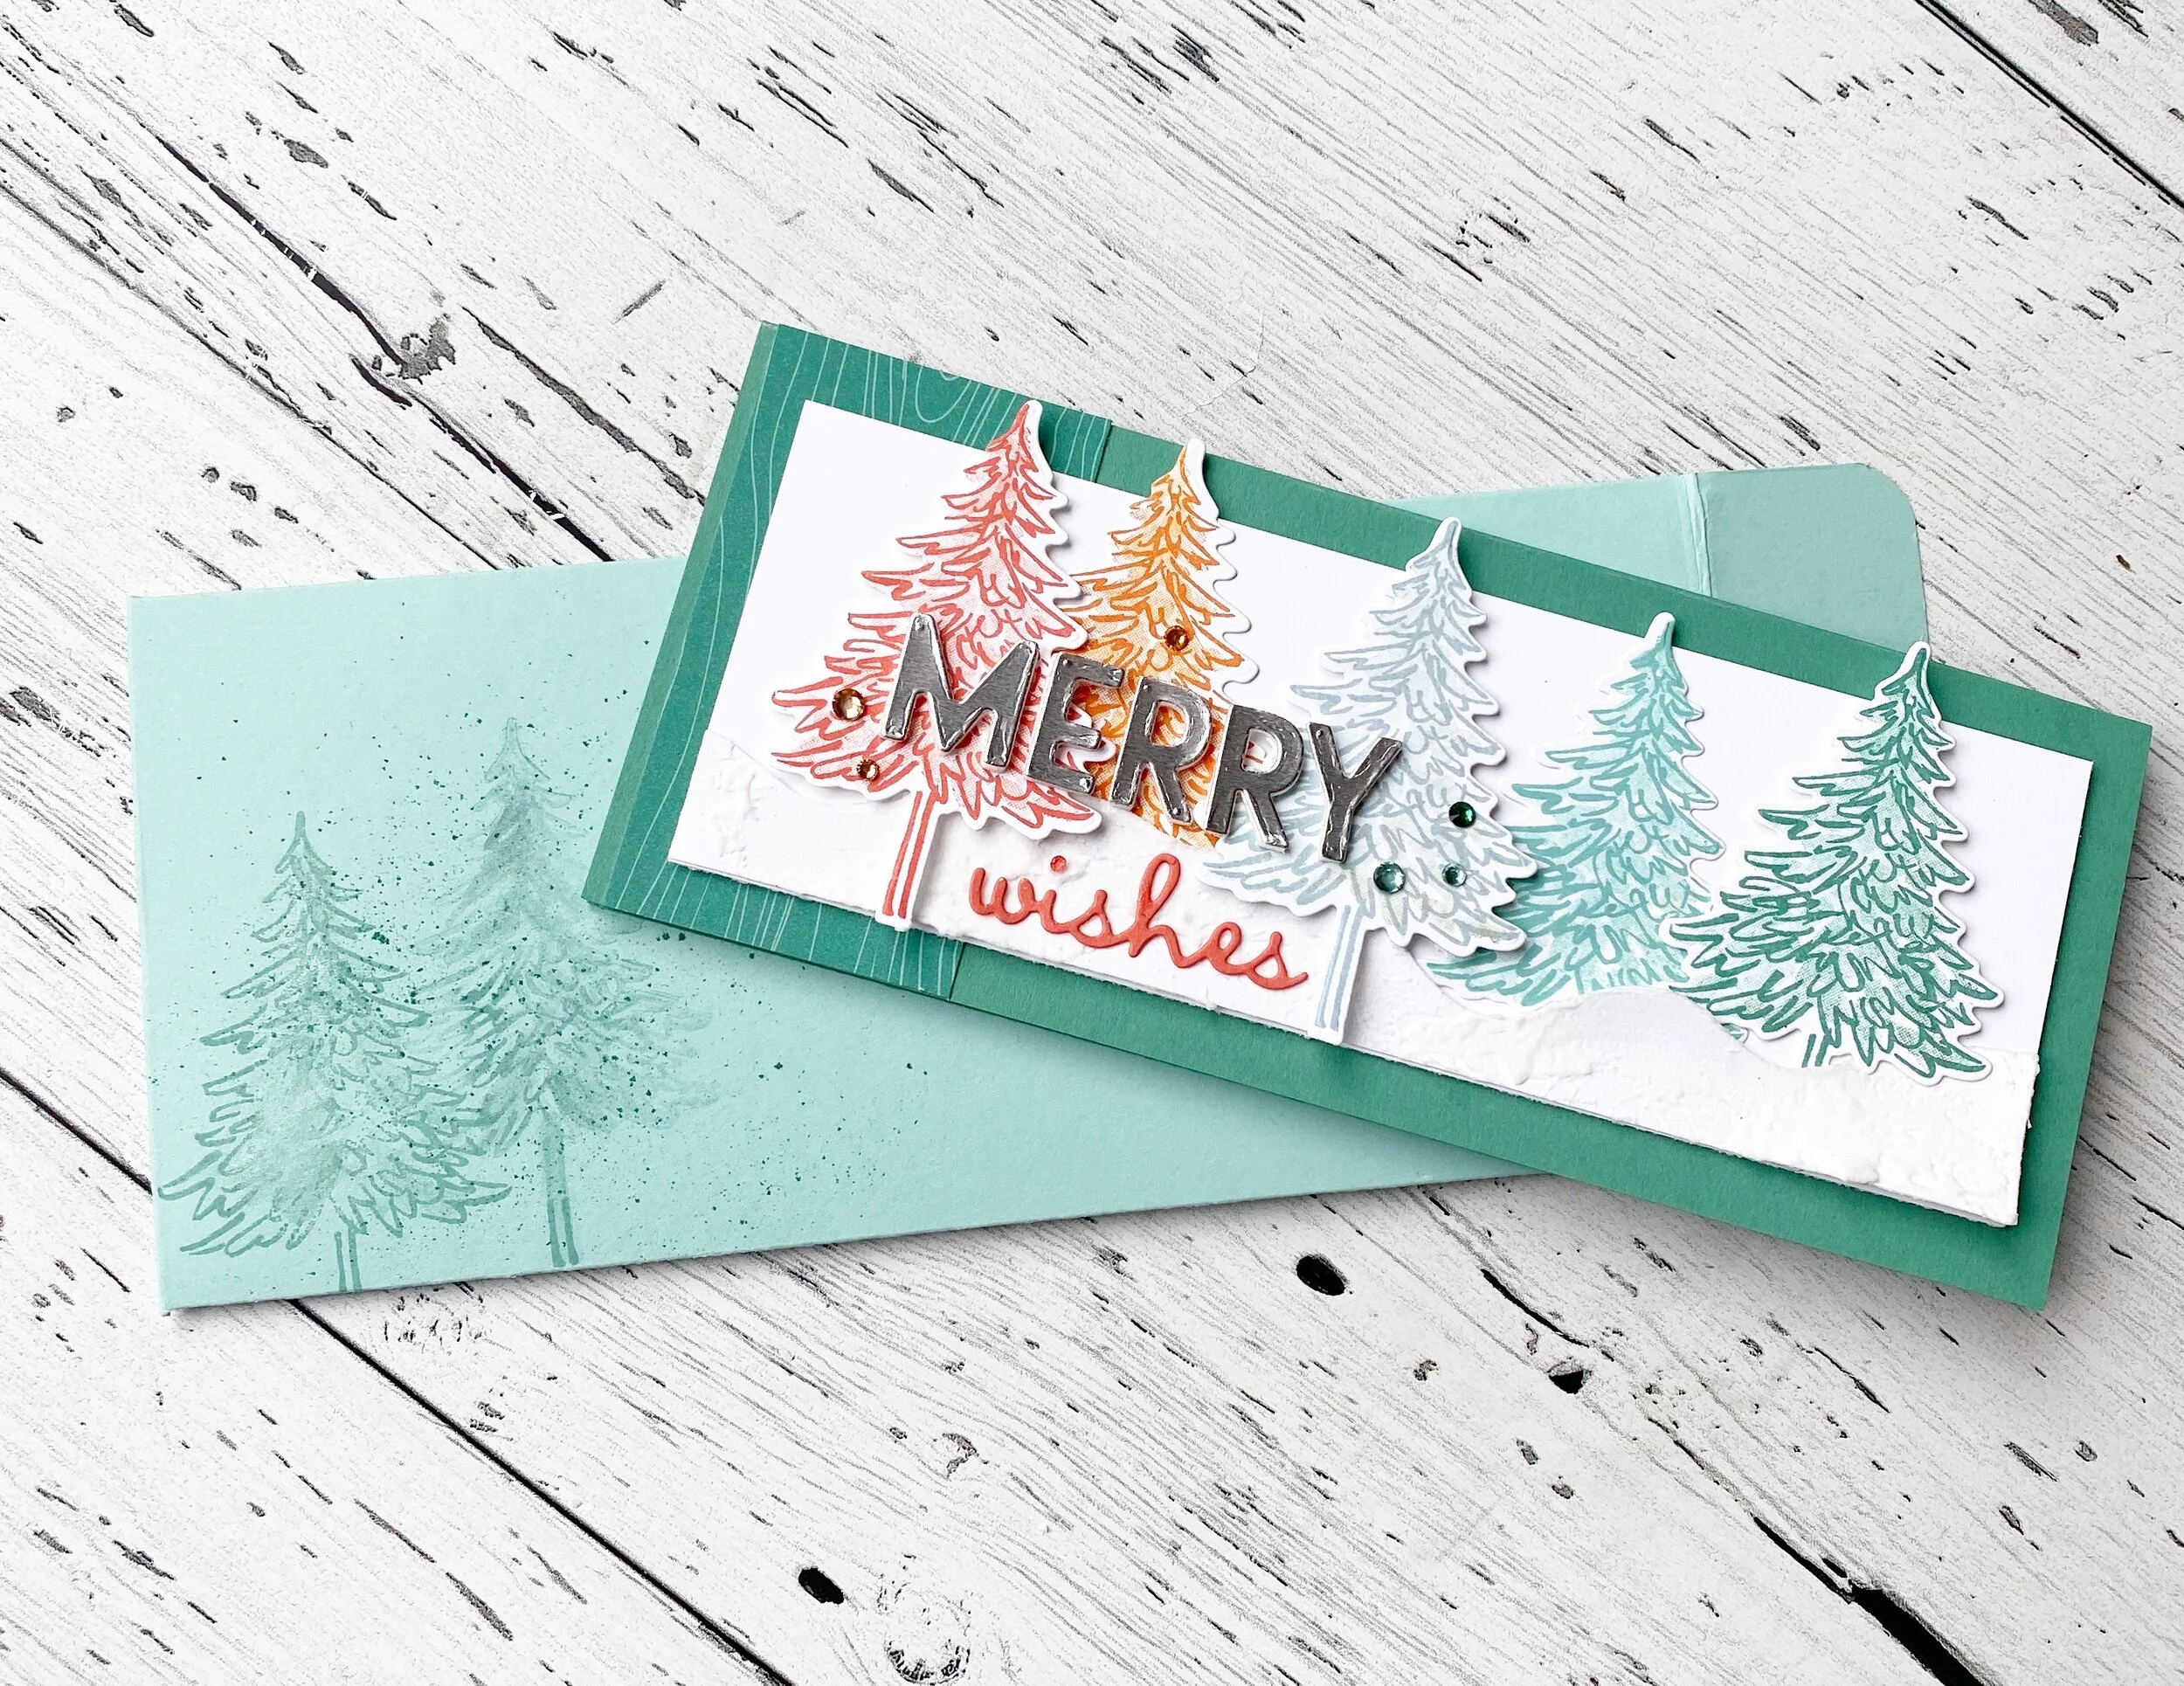
The create both this card and envelop you will need a full sheet of card stock to start. So just keep that in mind if you are planning to offer the slimline card as a class.
To create the envelop score your 8 1/2 x 11 on the 8 1/2 (vertical side) at 2 1/2 and 6 1/2. Rotate and on the long (horizontal) side score at 1 1/2 and 10 1/2. Now you want to trim away the 4 little side pieces as shown in the photo below. I then rounded the panels at the top and bottom using the Detailed Trio punch. It can round your edges, punch out a little flower detail as shown and small oval hole perfect to turn your project into a tag!


I cut the word ‘Merry’ using the Playful Alphabet dies with Silver Foil paper and the Foam Adhesive Sheets. ‘Wishes’ is cut from Calypso Coral card stock using the Well Written dies. I added on some fun bling using the Holiday Rhinestone Basic Jewels and the Champagne Rhinestones. And a little strip of the In Color 6x6 Designer Paper on the left edge helps ground the card and the wood grain pattern plays off of the trees.
I hope you are excited to give this card style a try! I absolutely LOVE it!


