Create with Connie and Mary-Favorite NEW In Color!
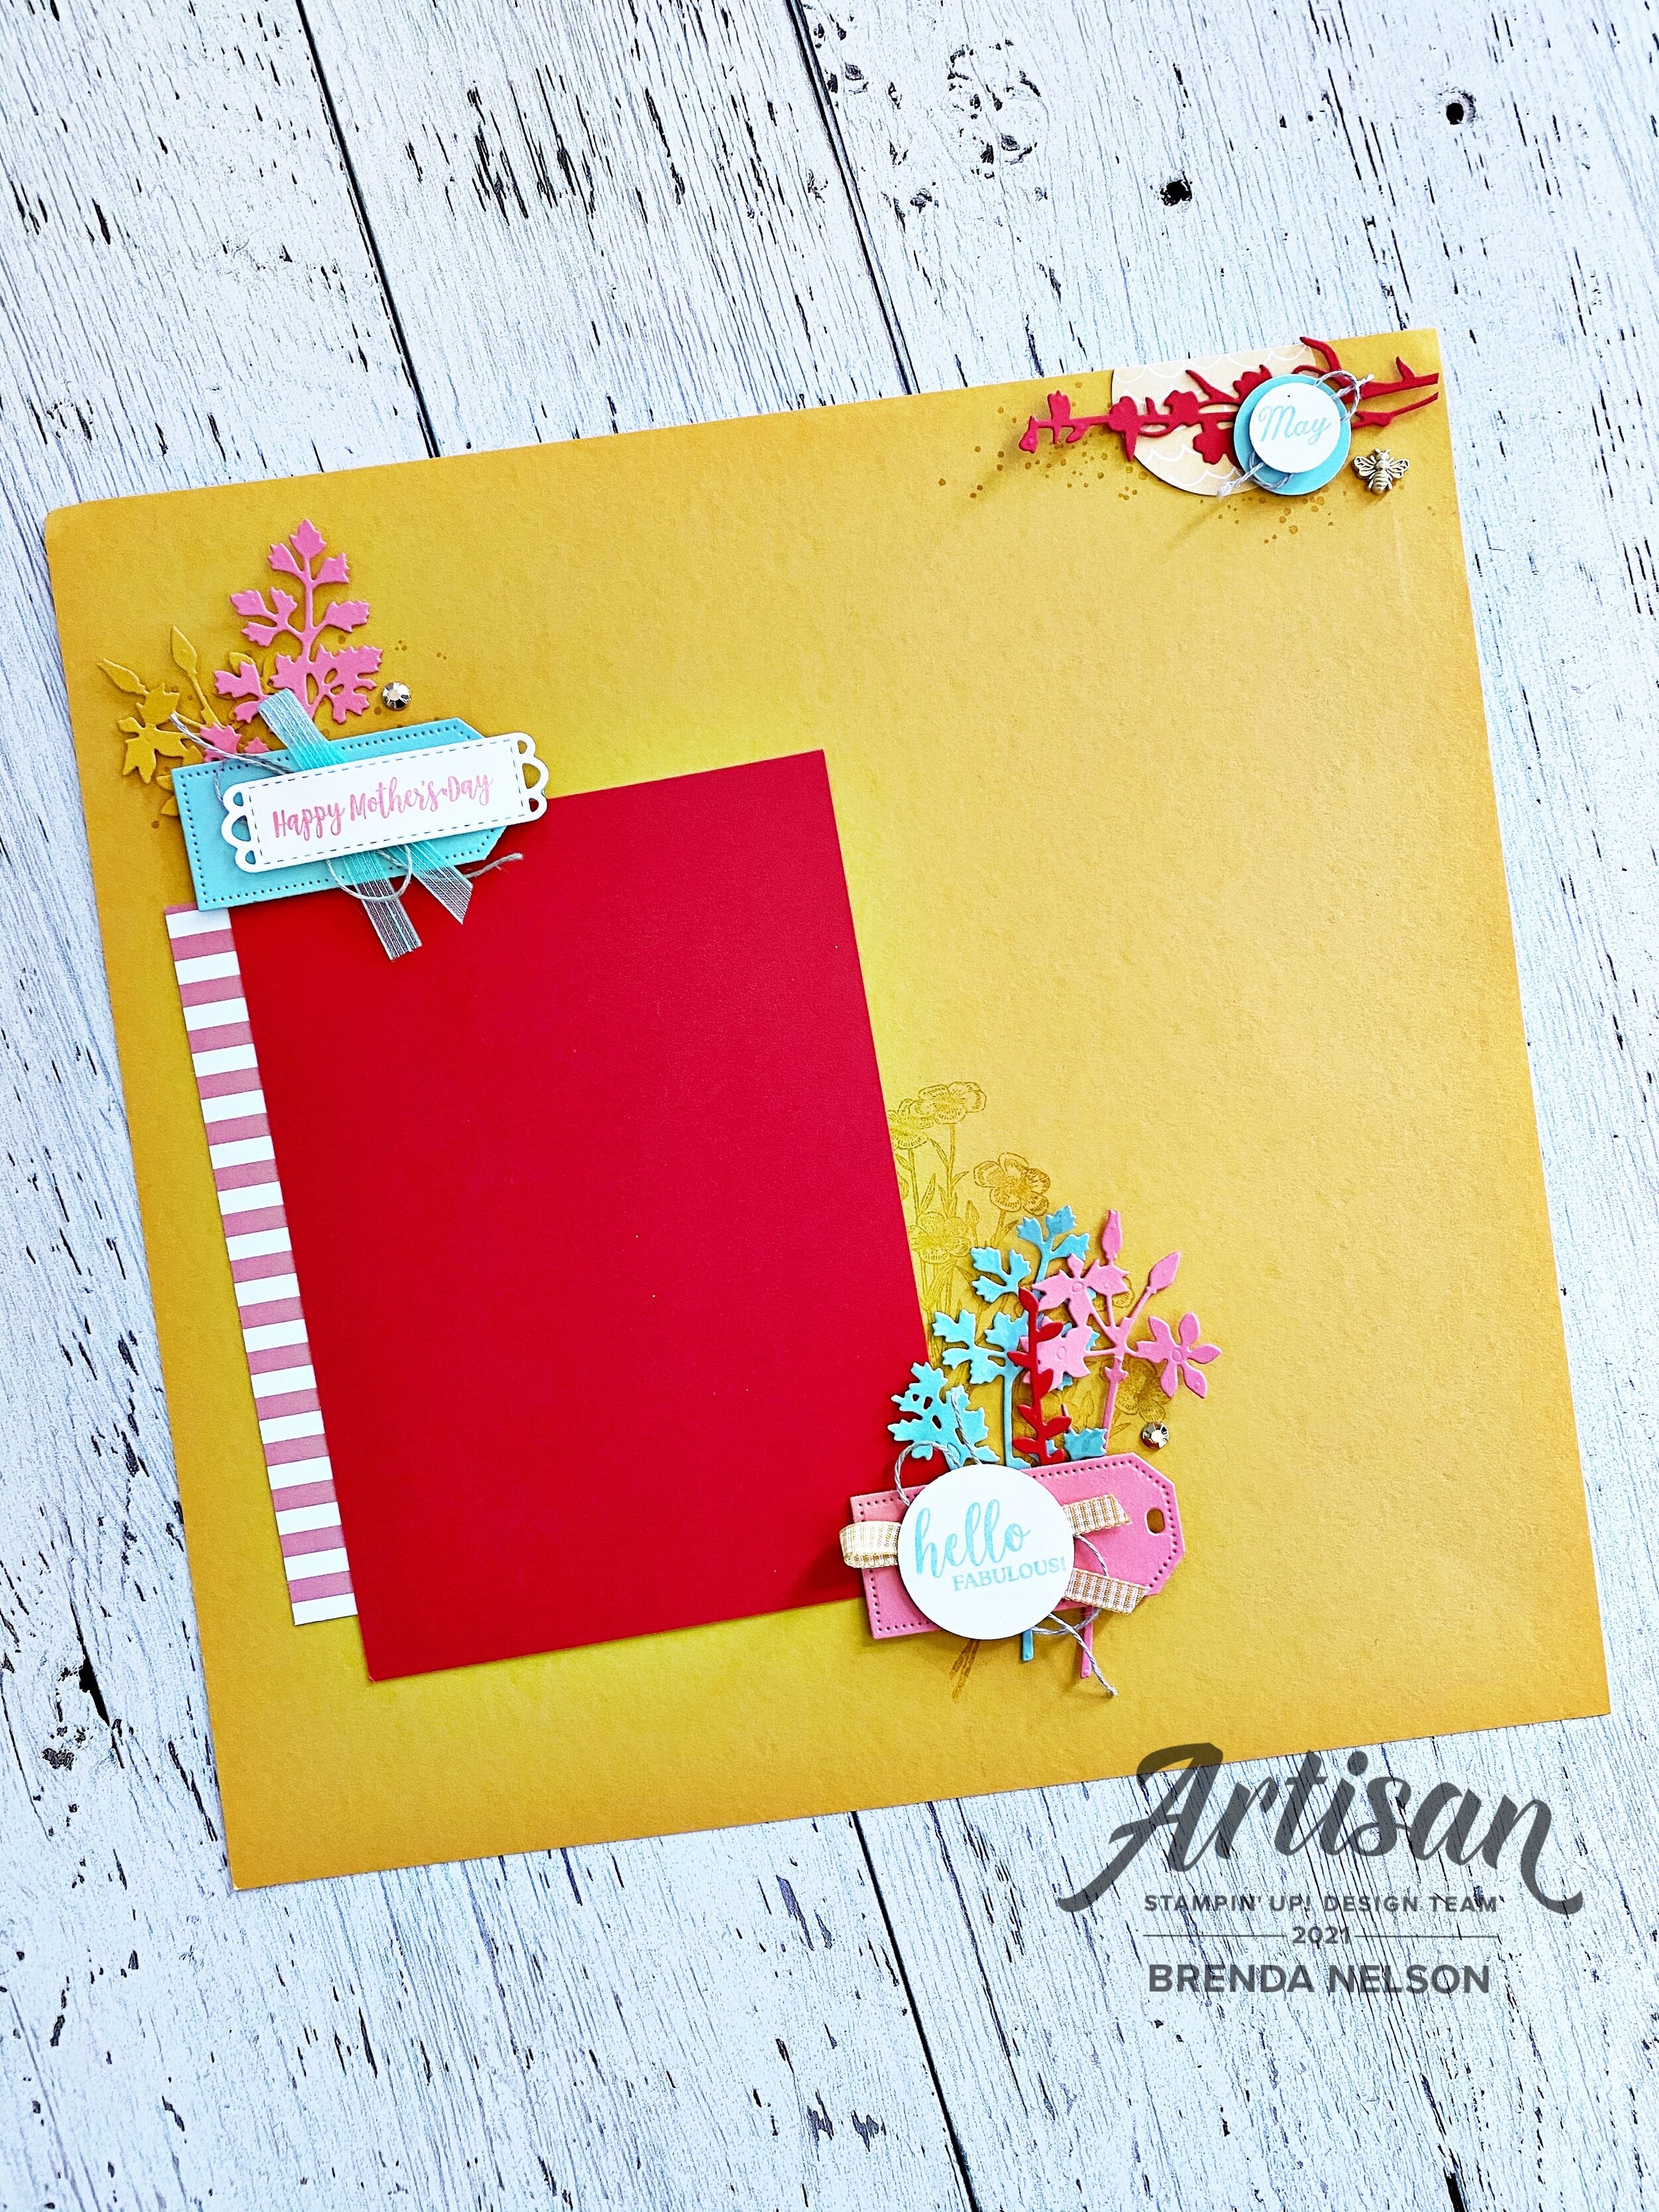
I don’t even KNOW if its possible to pick just one color…so I am going to go with the first color I chose to create a scrapbook layout! Obviously that color was really speaking to me and I have to say I LOVE how it turned out. I hope it inspires you too!

21DesignTeamBadge.png

I am also curious to see if the Design team has similar favorites or if we have quite the spread! Its always so fun to see each week how we incorporate the challenge!

final (4) 15.jpg

The base of my page is the new Evening Evergreen and I just love it! It is such a nice rich green that looks fantastic with these lighter colors. I added interest and texture to my page by just punching a bunch of 1 inch circles and adhering them flat to the layout. This is a great way to add a design element without any background stamping.

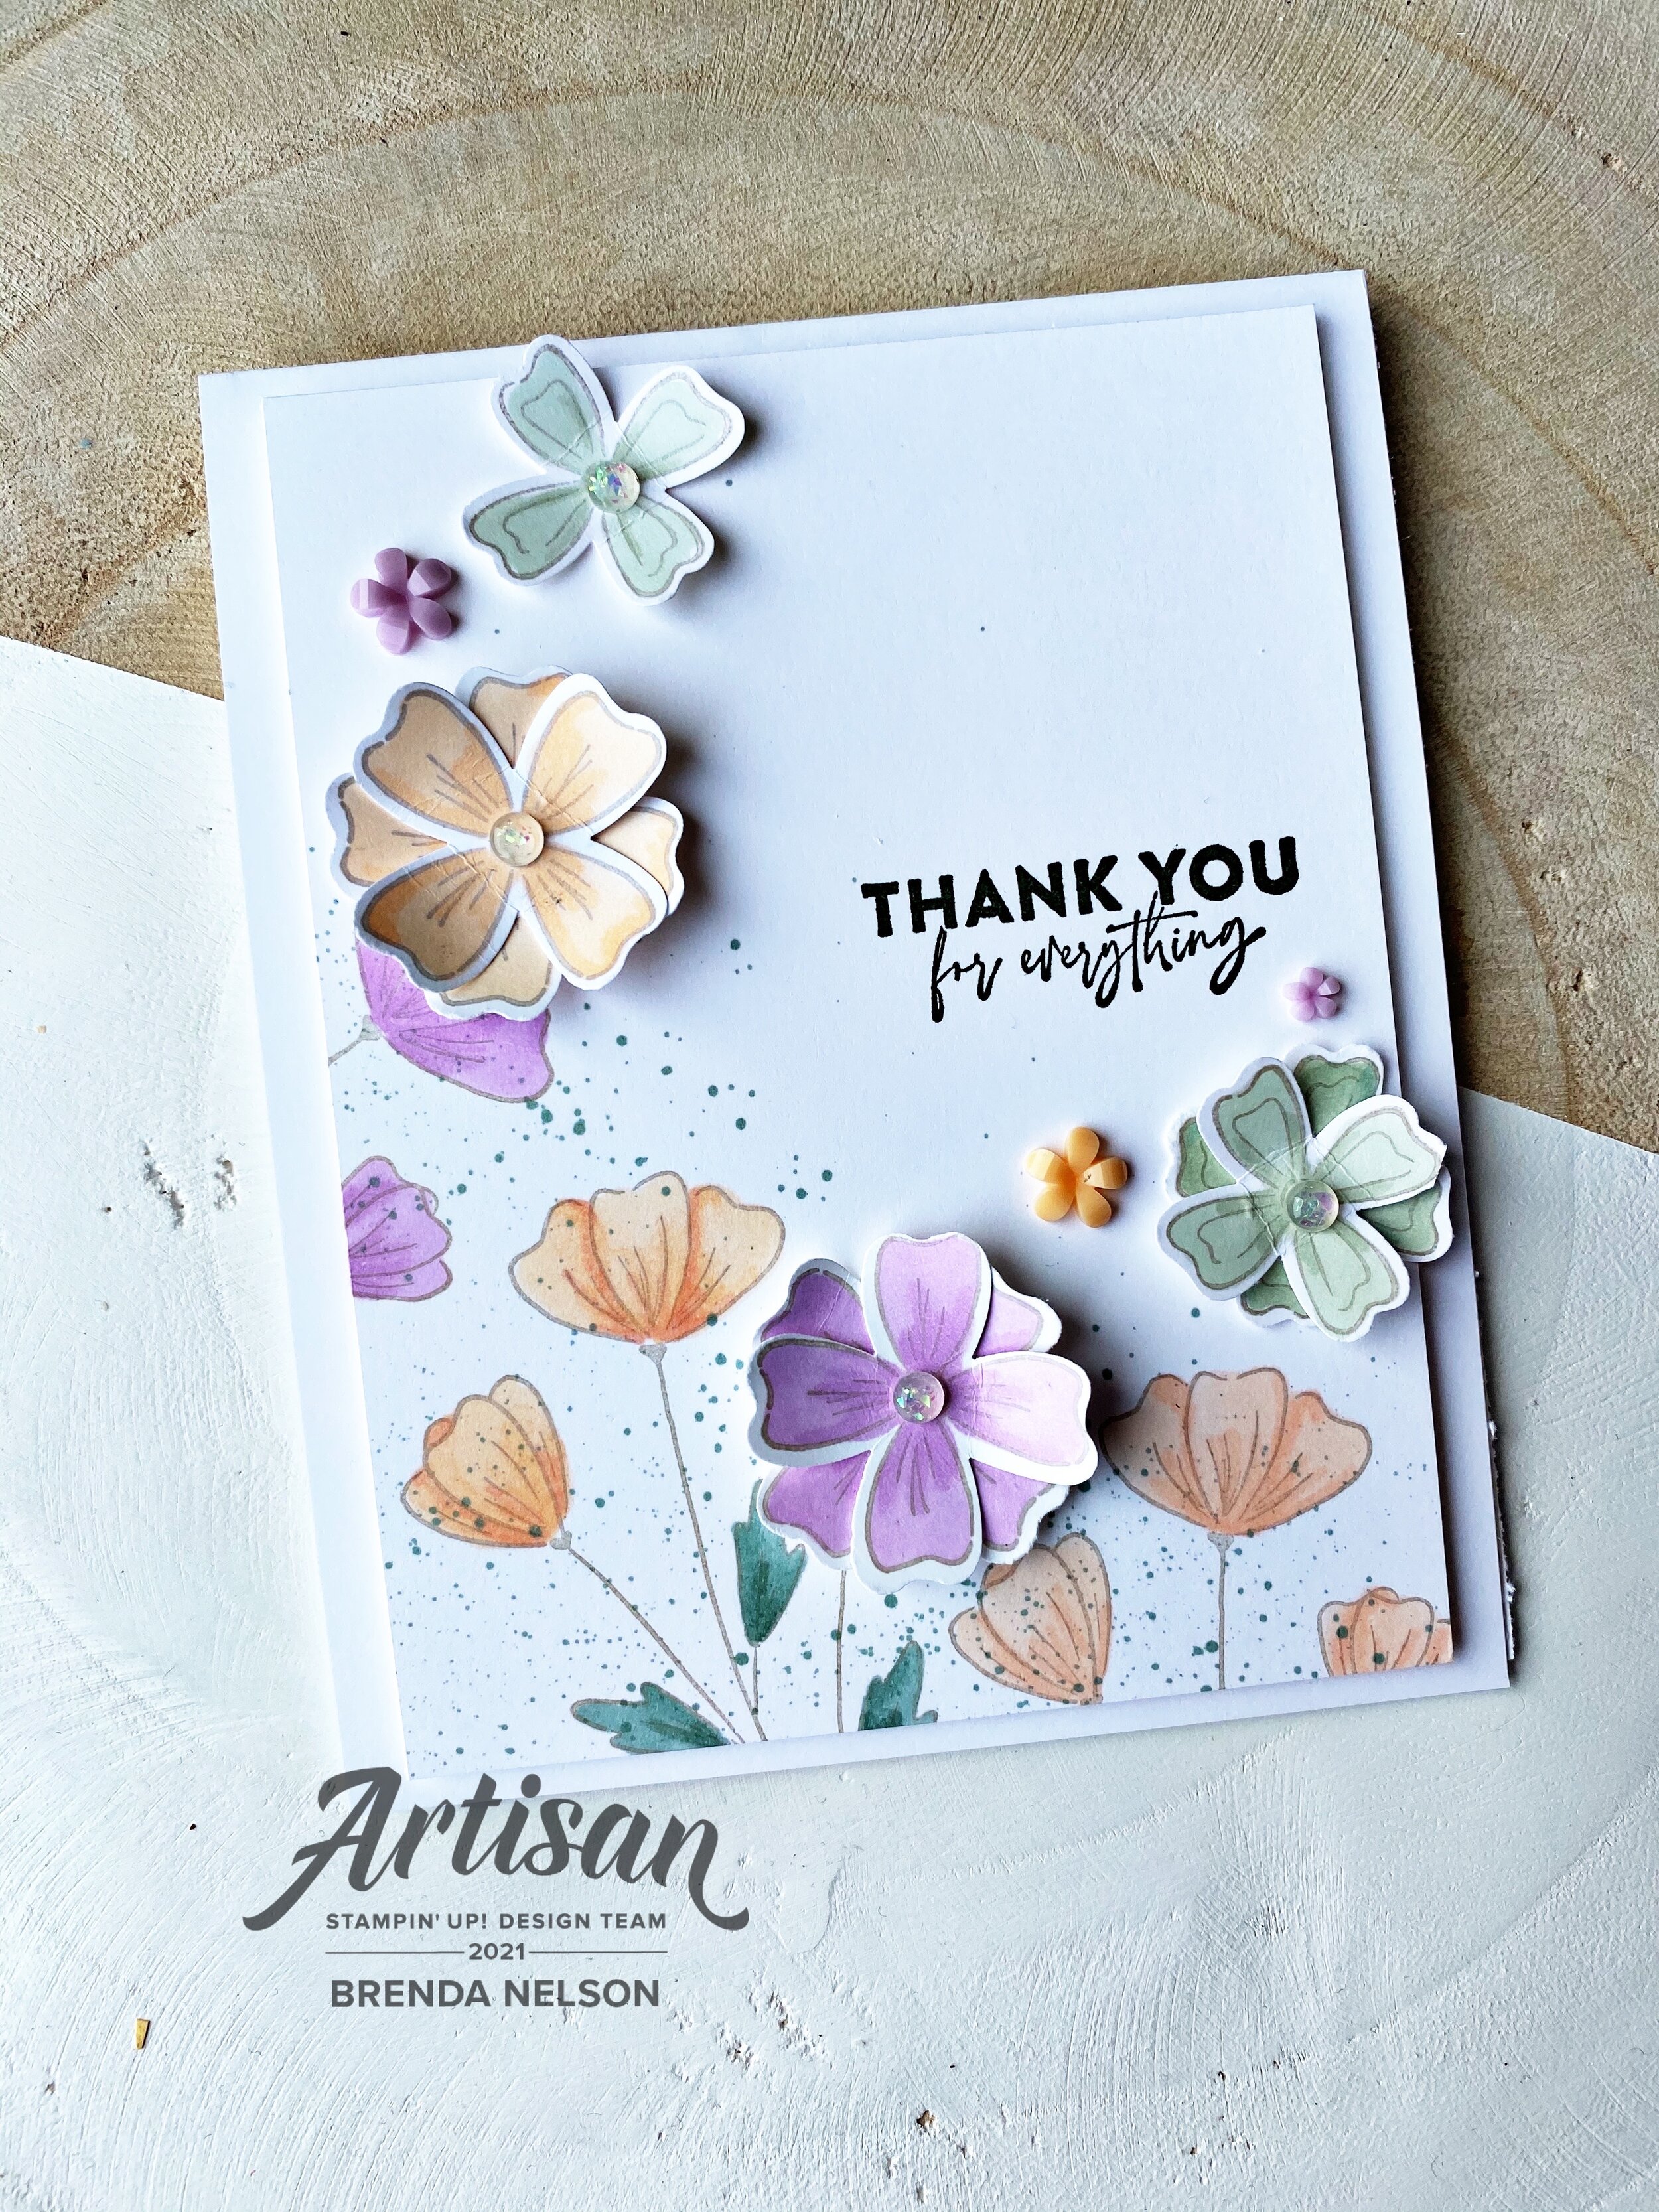
I used the flowers from the True Love Designer Series Paper and colored them in with a variety of Stampin’ Blends.

final (1) 19.jpg

Evening Evergreen is such a nice base to showcase some brighter colors and make them really pop on your page. Here is stamped the sentiment with Fresh Freesia ink on the coordinating card stock. The sentiment is from the Color & Contour stamp set. Flowers in Calypso Coral, Polished Pink and Fresh Freesia look so awesome on this rich dark background. The leaves are colored with the new Soft Succulent Stampin’ Blend.

final (2) 16.jpg

These flowers are colored with the Pale Papaya Stampin’ Blends. I brought in a Pale Papaya photo mat and some of the new Pale Papaya and White Ribbon too. It is such a lovely color that really fills a gap in our standard color offering.

final (6) 8.jpg

You will notice in my paper crafting that I like to create little areas of interest on my pages. Typically on photos or up in the top corners of my pages.

This view gives you a sample of each of these! I love to add sentiments or phrases onto my pages to help bring my feelings about the content to life. Stampin’ Up! has no shortage of amazing stamp sets to help us in our design.

final (4) 15.jpg

If you have not pulled out this luscious green to play with yet, I really encourage you to do so. It is quite distinct when paired up with some of our current greens and as you can see it really does make a stunning backdrop for this scrapbook layout.

I can’t wait to see what the rest of team has chose as their Favorite New In Color! You can go BACK to see what Melissa’s choice is or NEXT to see what Connie has selected! Please feel free to leave a comment. Its always nice to get feedback!

Color Fusers--May 2021 Blog Hop!

Hello friends and welcome to MAY the official month of spring! Things are starting to grow and poke through the dead that claims most of the year here in Edmonton where I live! The sun is shining for longer and longer every day. Its fantastic!
I love the Color Fusers Combo that we have for you this month! This combo is bright and happy and new I wanted to make a scrapbook page…wait, I ALWAYS want to make a scrapbook page! Cards come in second place!

05_2021 Graphic.jpg

I started my page with a base of Bumblebee—-it is such a gorgeous yellow! I decided on the theme of Mother’s Day and look at me, I am ahead of the game! Now I just have to pop a 5x7 photo onto my page and Mother’s Day 2021 will be in the books!

I love the bright colors on this page, they are so happy and work so well together!

I love the bright colors on this page, they are so happy and work so well together!

I always want to play with new stuff so I pulled out the new Quiet Meadow Bundle to pair up with a returning stamp set Dressed to Impress and the new Days to Remember stamp set.

I stamped a few floral images in the background by my photo mat and added in three different die cut florals from the Meadows Dies. The Flirty Flamingo striped DSP strip ion the left side is from the new Hostess options and is called Pattern Party. I know it will be a hit! I love it!

Layered over the die cut flowers I added a tag from the new Tailor Made Tags Dies in Flirty Flamingo. The sentiment ‘Hello Fabulous’ is stamped in Pool Party ink. And really, aren’t all moms fabulous! I think so! Behind the sentiment I layered some Bumblebee Gingham Ribbon and Lined Thread.

A Gilded Gems acts as the perfect accent to this little area!

I love to create little areas of interest on my page such as this!

I love to create little areas of interest on my page such as this!


I punched a 2 inch circle out of the Hand Penned DSP and lined it up along the top right of my page. I trimmed a small portion off.

I added another stem from the Meadow Dies cut from Poppy Parade. I added ‘May’ over top from the Days to Remember stamp set with some Lined Thread and cut Bumblebee Trinket as accents.

final (1) 18.jpg
final 19.jpg

‘Happy Mother’s Day’ is stamped in Flirty Flamingo ink and is die cut from the Meadows Die and then layered on top of a tag from the Tailor Made Tags Dies. I added some Linen Thread and Pool Party in between and tucked a couple more florals from the Meadow Dies underneath with a Gilded Gem.

I hope this page inspires you to make your own page in anticipation of Mother’s Day!

I can’t wait to see how the rest of the Design Team spins these 4 colors! If you joined the Hop here (welcome!) you can go back to see what Nicole has designed and if you hit Next you can see what Tami has created for this week! Please feel free to leave a comment, I would love to hear from you!

Create with Connie and Mary--My Favorite Pre-Order Bundle!

This was a good challenge as I had a hard time actually DECIDING on what was my favorite. In the end, I think a good punch wins every time so I have landed on the Flowers of Friendship Bundle as my Favorite Pre-Order Bundle!

21DesignTeamBadge.png

And of course I needed to use some of our NEW upcoming In Colors on this project as I just LOVE them. I love how they all look amazing together and blend so well with our existing colors. They just feel fresh and lovely.

final (2) 11.jpg

Nothing beats a crisp Basic White card base and layer. It’s a win every time especially when you pair it with such an awesome floral stamp set such as Flowers of Friendship. This set has 4 floral images and such as great mix of fonts on the sentiments. Of the 4 sentiments, 3 are ‘Thank You’ which is fantastic. Other than birthday, I send more thank you cards than any other. I love how each of the sentiments is unique.

The perk of this stamp set is that is is PUNCH BUNDLE! Yay! I always love a punch as it is more efficient than die cutting. The Flowers & Leaves Punch is designed to cut the two individual flowers, large and small, plus the two leafs in the stamp set.

Nothing beats a flick of your Stampin’ Write Marker or Stampin’ Blends across your project for a spray of color.  It’s literally one of my favorite tricks! I flicked my Evening Evergreen Blend on this card concentrated at the bottom.  This adds to t…

Nothing beats a flick of your Stampin’ Write Marker or Stampin’ Blends across your project for a spray of color. It’s literally one of my favorite tricks! I flicked my Evening Evergreen Blend on this card concentrated at the bottom. This adds to the crisp white feel of the top of the card.

I felt that stamping in black ink felt to stark against the white, so I chose to stamp my floral images in Grey Granite ink. I stamped the large floral stem three times on the Basic White and then colored the flower buds and leaves in with my Stampin’ Blends in Pale Papaya (with a hint of Calypso Coral), Petal Pink (with a hint of Pale Papaya) and Fresh Freesia. The leaves were colored in with Soft Succulent Blends.

The punched flowers were colored in Soft Seafoam (with a hint of Soft Succulent), Pale Papaya (with a hint of Calypso Coral) and Fresh Freesia. In the center of each of these flowers I added an Opal Round.

final+%281%29+13.jpg

The sentiment is stamped in Evening Evergreen—-I really love this color as an alternative to black!

And finally I added my favorite new embellishment, Loose Flower Flourishes! You get two sizes and three colors with this amazing embellishment—Pale Papaya, Fresh Freesia and Polished Pink.

I can’t wait to see what the other members of the Design Team chose as their favorite pre-order item. Honestly, early access is one of the things that I LOVE the most about being a Demonstrator. Haha! We all have our thing right?

You can go BACK to see what Melissa has designed and NEXT to see what Connie has created.

You're So Cool

Posting a day early in anticipation of National Scrapbooking Day! I have a big team event and a card scheduled for my feed tomorrow…so lucky you! You can steal this page layout idea and make your own version tomorrow! I do plan on making a page tomorrow night while I enjoy a glass of Prosecco!

final (2) 14.jpg

I created this page because I am hosting an Ice Cream Social with my Team Leader tomorrow in one of our annual team events! We are making a bunch of projects featuring the Ice Cream Corner Suite so I wanted to share an idea with them for a scrapbook page.

And I am really loving Gorgeous Grape right now so I decided to make my page layout on this base. I added Coastal Cabana photo mats that I stamped with the cone detail stamp from the Sweet Ice Cream set.

The sentiment ‘You’re so Cool’ is stamped in the coordinating ink across the background and I gave the page a little spray of color with my Gorgeous Grape Stampin’ Write Marker.

final (2) 13.jpg

I love to create little areas of interest on my pages. At the top right corner of this page I add a partial circle from the Ice Cream Corner DSP. I hand trimmed two popsicles from the DSP and added some White Twine behind. I stamped ‘You’re so Cool’ in Whisper White Craft Ink and embossed it with White Embossing Powder. I then hand trimmed out the So Cool to draw attention to the words.


I stamped ‘Treat Yourself’ in White Craft ink and embossed it on black. I love the contrast with the sentiments being in black and white and the page being such loud colors.

I added one of the new Loose Flower Flourshings to the sentiment and tucked some of the new Highland Heather 1/2 Grosgrain behind. The Calypso Coral ribbon is sadly long retired! I love a good thin ribbon!

final 21.jpg

I stamped out a popsicle from the Sweet Ice Cream stamp set and tucked it in behind my sentiment. I love this picture of me and some girlfriends in the mountains of Montana—it was HOT! And we definitely enjoyed some Ice Cream while we were on this girls trip!

final (4) 11.jpg

This was a pretty ‘sweet’ trip if I don’t say so myself, especially as it was my last girls road trip! Ahh, life before Covid!

I hope you have an awesome National Scrapbook Day and can take some inspiration from my page!

If you are ever looking for a Canadian Demonstrator, please reach out to me! I have so much on the go and to offer virtually!

Create with Connie and Mary-Evergreen!

Hello friends! This week our theme is EVERGREEN or ‘all the greens’… I am happy to say that I did use three greens on my project including one of our new upcoming In Colors!

21DesignTeamBadge.png

This week I wanted to create a scrapbooking page to feature some of my favorite greens and my favorite subject, my adorable Frenchie Hawkins. Wherever I go he is close by my side, whether its laying under my craft table or staring at me while I am in the bathroom (dog lovers get this, in fact it’s not even weird anymore!!). I recently got some cute pictures of him that I wanted to scrapbook.

final (1) 9.jpg

This scrapbook page is a mashup of January to June Catty products and brand NEW stuff being released in the Annual Catalogue in May! So exciting! I love all of the little details I was able to incorporate into my page.

I always try to incorporate some background stamping and I chose one of the dandelion images from the Garden Wishes stamp set. The image is stamped in Mossy Meadow to create that tone on tone stamping as that is the color of my 12 x 12 card stock.

I also chose two of the patterns from the Dandy Garden 6x6 Stack to add a little pattern to my layout.


I always like to add little areas of interest to my scrapbook pages. I added a small piece of the new Open Weave Evening Evergreen ribbon underneath my photo with the word “Handsome” trimmed from a sentiment in the Handsomely Suited stamp set.

A few die cut shapes from the Dandy Wishes Dies add some fun texture and I even die cut one from the new Evening Evergreen In Color. I added a cute little Bumblebee trinket too (coming out in the new Annual Catty).

final (1) 8.jpg

I decided to add in some grey tones to this page too as to me Mossy Meadow has a grey base and they pair so well together. I ran a strip of the Basic Grey card stock through the Pinewood Planks 3D (at an angle for a twist) and added an Old Olive scallop edge from the Scalloped Contours dies (also new and upcoming!!).

The sentiment “Love You Much” is from another new set called Pansy Patch. I love the mix of fonts in this short sentiment. I added a bit of grey twine from the Well Suited Suite behind the sentiment and stamped it in Old Olive ink on a bitty piece of Old Olive card stock.

I isolated the word “True Friend” using my Basic Grey Stampin’ Write marker from the Garden Wishes set

I isolated the word “True Friend” using my Basic Grey Stampin’ Write marker from the Garden Wishes set

I am a sucker for a great ribbon and I was so happy to see this awesome Smokey Slate Textured Ribbon in the upcoming Annual Catalogue. And I couldn’t resist adding one of the little Ladybug Trinkets onto the page. The second photo is also matted with Smokey Slate to bring in another grey tone to the page.

final 13.jpg

This little area is my favorite on the page! I cut several of the dandelion shapes from the Dandy Wishes Dies in Evening Evergreen, Mossy Meadow, Old Olive and Bumblebee (to carry that yellow across the page). I let the stems hang off the page and trimmed away the excess. And I had to add another cute Ladybug Trinket! It was really easy to assemble these shapes using my Tombow glue! Definitely a craft room must have!

If you want some more green inspiration, check out my blog post from Friday (yesterday). I created an amazing card featuring the new upcoming Evening Evergreen color.

I hope this page inspires you to use some of your favorite greens in your Stampin’ collection! I love that we have 11 different green tones to choose from.  Isn’t that AMAZING?

I hope this page inspires you to use some of your favorite greens in your Stampin’ collection! I love that we have 11 different green tones to choose from. Isn’t that AMAZING?

I can’t wait to see what the other members of the Design Team have created this week and to see what green shades they really love! You can hit BACK to see what Melissa has designed and NEXT to see what Connie has created for us. And as always—please feel free to leave a comment!