Color Fusers-March 2021 Blog Hop

Welcome to the Color Fusers March Blog Hop! We have sort of a masculine color combo to work with this month but I put a bit of a girly spin on these colors—Seaside Spray, Grey Granite and Early Espresso!

03_2021 Graphic (1).jpg

I knew that I wanted to use Early Espresso as my base and to create some extra texture to the cards I decided to add some strips of Early Espresso card stock in 3/4 inch widths across the base of the cards. It almost looks like panelling! I have been watching a lot of HGTV lately so maybe that is what influenced me! ha ha ha!

final 13.jpg

I cut a Basic White Stitched Rectangle to use as my focal point on the card. Using my Blending Brush (new favorite tool alert!) I added a bit of Grey Granite to the base and flicked my Grey Granite Stampin’ Write Marker over top. I love the look of a good marker spray over your projects!

final 15.jpg
 

The In Bloom bundle was used to embellish the rest of this card. The dies are AAAMAZING! I haven’t even put them away since I got them! I cut a few flowers in Seaside Spray, the stitched detail in the flowers plays into the stitched rectangular layer which I really like.

I added a few small Early Espresso flowers with some Silver Metallic Pearls.

I stamped and hand trimmed a couple of flowers in Grey Granite ink. You might wonder why I didn’t use a die and that is because the stamped images in this set do not have dies. The dies are all independent stitched shapes that coordinate with the stamped images.

The sentiment is from the In Bloom stamp set and is stamped with Early Espresso ink on Grey Granite card stock. I added a strip of the Seaside Spray Metallic Ribbon (found in the annual catalogue) behind it and popped it up on Dimensionals for a little lift.

final+%281%29+2.jpg

Whenever you use a dark card stock color as a base you need to add a lighter layer on the inside so you can write a message. I added in a Basic White base and of course had to do a little stamping. I stamped some little Grey Granite flowers and ‘You Mean so Much to Me’ in Seaside Spray. I added a few more teeny flowers in Early Espresso and a Silver Metallic Pearl to pull all of the outside elements of the card inside.

I can’t wait to see what the other members of the team have created with this color combo! I love to challenge myself with color combos and I hope this Hop inspires you as well!

The fantastic Melanie Hockin is up next so let’s see what she has designed!

If you are starting here you can always go back as well to see what Bonnie O’Neill has designed! I know you will find inspiration all through this hop!

Create with Connie and Mary--Masculine Cards!

I don’t know about you but I always find Masculine Cards the trickiest to design! I was up for the challenge this week and have a special 30th birthday drive by party to attend this weekend, so the timing was great!

Design Team.jpg

I decided to make a card with our rich and elegant Night of Navy card stock as my base and feature. When I think of masculine cards I also think of bold geometric shapes too so I decided to use The Right Triangle dies, and the Whiskey Business stamp set combined.

I love how these stitched triangles look layered together with a bit of tone on tone design! I stamped a couple of the triangles with a print from the Right Triangle Stamp Set in Night of Navy Ink.

I love how these stitched triangles look layered together with a bit of tone on tone design! I stamped a couple of the triangles with a print from the Right Triangle Stamp Set in Night of Navy Ink.

In order to make sure my design came together I actually layed out the dies on my card base before I actually cut anything. This is a great first step in bringing your design idea to life and a way to make sure you are not wasting paper!


After I had my triangle dies set up the way I wanted for my card design I took a picture so that I could reference it once I had all of the triangles cut out of the Night of Navy card stock. This made assembly so easy!

IMG_4074.jpg
This was such a quick and easy card to assemble once I had decided on my design!

This was such a quick and easy card to assemble once I had decided on my design!

The Right Triangle bundle does not have an sentiments so I decided to use “Cheers To You” from the Whiskey Business stamp set. I stamped it in NIght of Navy ink on a piece of Seaside Spray card stock.

I couldn’t resist adding a few embellishments from the Flowers for Every Season Ribbon Pack and the Playing with Patterns Ribbon Combo Pack, plus a few Holiday Rhinestones!

To see what the rest of the Design Team has created, you can go BACK to see Melissa’s creation or NEXT to see what Connie has created for some amazing masculine inspiration!

Artisan Design Team February Share!

Hello friends! I am so excited to share a few more details on my Artisan Design Team projects for February! My focus was on the A Touch of Ink stamp set and the Golden Garden Acetate Specialty Paper. I knew right away that I wanted to use this acetate paper on a scrapbook page and share an easy tip for coloring it.

The design is printed on a thick window sheet or acetate and is gold on one side and silver on the other! You can feature either side by just coloring on the opposite or backside of what you want to feature.

The design is printed on a thick window sheet or acetate and is gold on one side and silver on the other! You can feature either side by just coloring on the opposite or backside of what you want to feature.

The easiest way to color our acetate sheets is to use our alcohol based Stampin’ Blends markers in the DARK option. Some of the alcohol inks depth is lost on the window sheet so I found I had better success using the dark option and then you can layer on a bit of color by adding in a different shade on top like I did on some of the leaves with Old Olive and Mossy Meadow.


You also want to make sure that you peel off the protective layer that is on the silver side of the acetate sheet.

Once you have done this you can start coloring with your Stampin’ Blends.

I also decided to hand trim around the flowers of the 12x12 sheet.

final (14).jpg
closeup.jpg
You can use this easy coloring technique embellish a scrapbook page or a card!

You can use this easy coloring technique embellish a scrapbook page or a card!

IMG_2442.jpg

I used Basic White Note Cards for the two cards that I designed. I added a bit of the Gilded Leafing to both my butterfly on the note card and the hummingbird on my scrapbook page. I also stamped with the Gilded Leafing on the butterfly card and hand trimmed some of the florals from the Fine Art Floral DSP.

On the second note card I colored a strip of the acetate that I had left over from my scrapbook page and added it to a piece of the Fine Art Floral Designer Series Paper.

I hope you are inspired to try coloring the Golden Garden Acetate paper and adding into onto one of your crafty projects! Make sure to check out the whole Artisan Design Teams creations on Stampin’ Up!’s Facebook and Instagram accounts!

IMG_2439.jpg

Create with Connie and Mary--Kids Cards!

Are you loving all of the fun whimsical images in our new January to June catalogue? I know I am, especially this adorable crocodile! So when I heard this weeks theme was Kids Cards I knew I wanted to play with this awesome set!


The stamp set I am referring to is called Oh Snap! and its really just too much fun! I love the big bold crocodile and the 11 different phrases included in the set.

Design Team.jpg
final (2) 3.jpg

I wanted to include the Oh So Ombre Designer Series paper into this project as we are in the final weeks of Sale-a-bration! It makes for a great background and it was fun to stamp direct to the DSP, something that I don’t do that often.

The little fish as so cute and I colored them with the Mango Melody Stampin’ Blends. The little pool of water is stamped on Basic White with Balmy Blue ink and hand trimmed.


I wanted my crocodile to have a bit of a different look so I created this watercolor background on Shimmery White card stock.

I used Soft Seafoam, Pear Pizzazz and Granny Apple green.

And easy way to create a water color background is to cut a piece of Window Sheet to the same size of your card base.

final (10).jpg

Smash the lightest color of ink on the window sheet and then spritz with water. Make sure you move the water around to eliminate any harsh edges. You can then take your card base and lightly tap it against the window sheet to create a fun watercolor look.

Clean it with a tissue and move on to the next color, tapping your card base in different spots onto the ink. I let the ink move around on my paper and heat each layer with my heat tool.

You then get this really unique background! I thought it was fun to stamp my crocodile on top so he got lots of color and dimension to you know, maybe minim his scales? Either way, he looks fun and different.

You will need to hand trim this sucker out so make sure you have the time and patience to do it!

You will need to hand trim this sucker out so make sure you have the time and patience to do it!

Once I cut out my croc I popped him up on Mini Dimensionals to give him a little extra lift off the page. I decided to add in a strip of Balmy Blue card stock and a scallop edge in Mango Melody to help tie all of the colors together

I also added in a few of the Frosted & Clear Epoxy Droplets found in our main catalogue!

I had a lot of fun playing with this set, I hope you do too! If you would like to order from me and live in Canada you can do so any time by clicking the hostess link on the side!

I can’t wait to see what the rest of the design team came up with! You can go BACK to see Melissa’s project or NEXT to see what Connie has created! Make sure to hop the whole way through and leave a comment!

Around the World on Wednesday--You've Got Mail!

Hello friends! Welcome to another Around the World on Wednesday Blog Hop! This month our theme is You’ve Got Mail so I made a card with a design on the outside, inside and a coordinating envelope! I am currently living in a polar vortex in Edmonton, Alberta. Today’s temperature as I write this is -48 with the wind chill. So gross. Luckily my card is bright and cheery and makes me think of warmer weather!

91442295_10216484369808661_2887014979863576576_n.jpg

The Snail Mail Suite was the perfect choice for this theme. I have had so much fun creating with it lately as I find coloring very therapeutic! I love that it has dies and a coordinating punch (Rectangular Postage Stamp), plus some amazing Resin Heart embellishments and twine! So thankful Twine is back in our line up!

IMG_3447.jpg

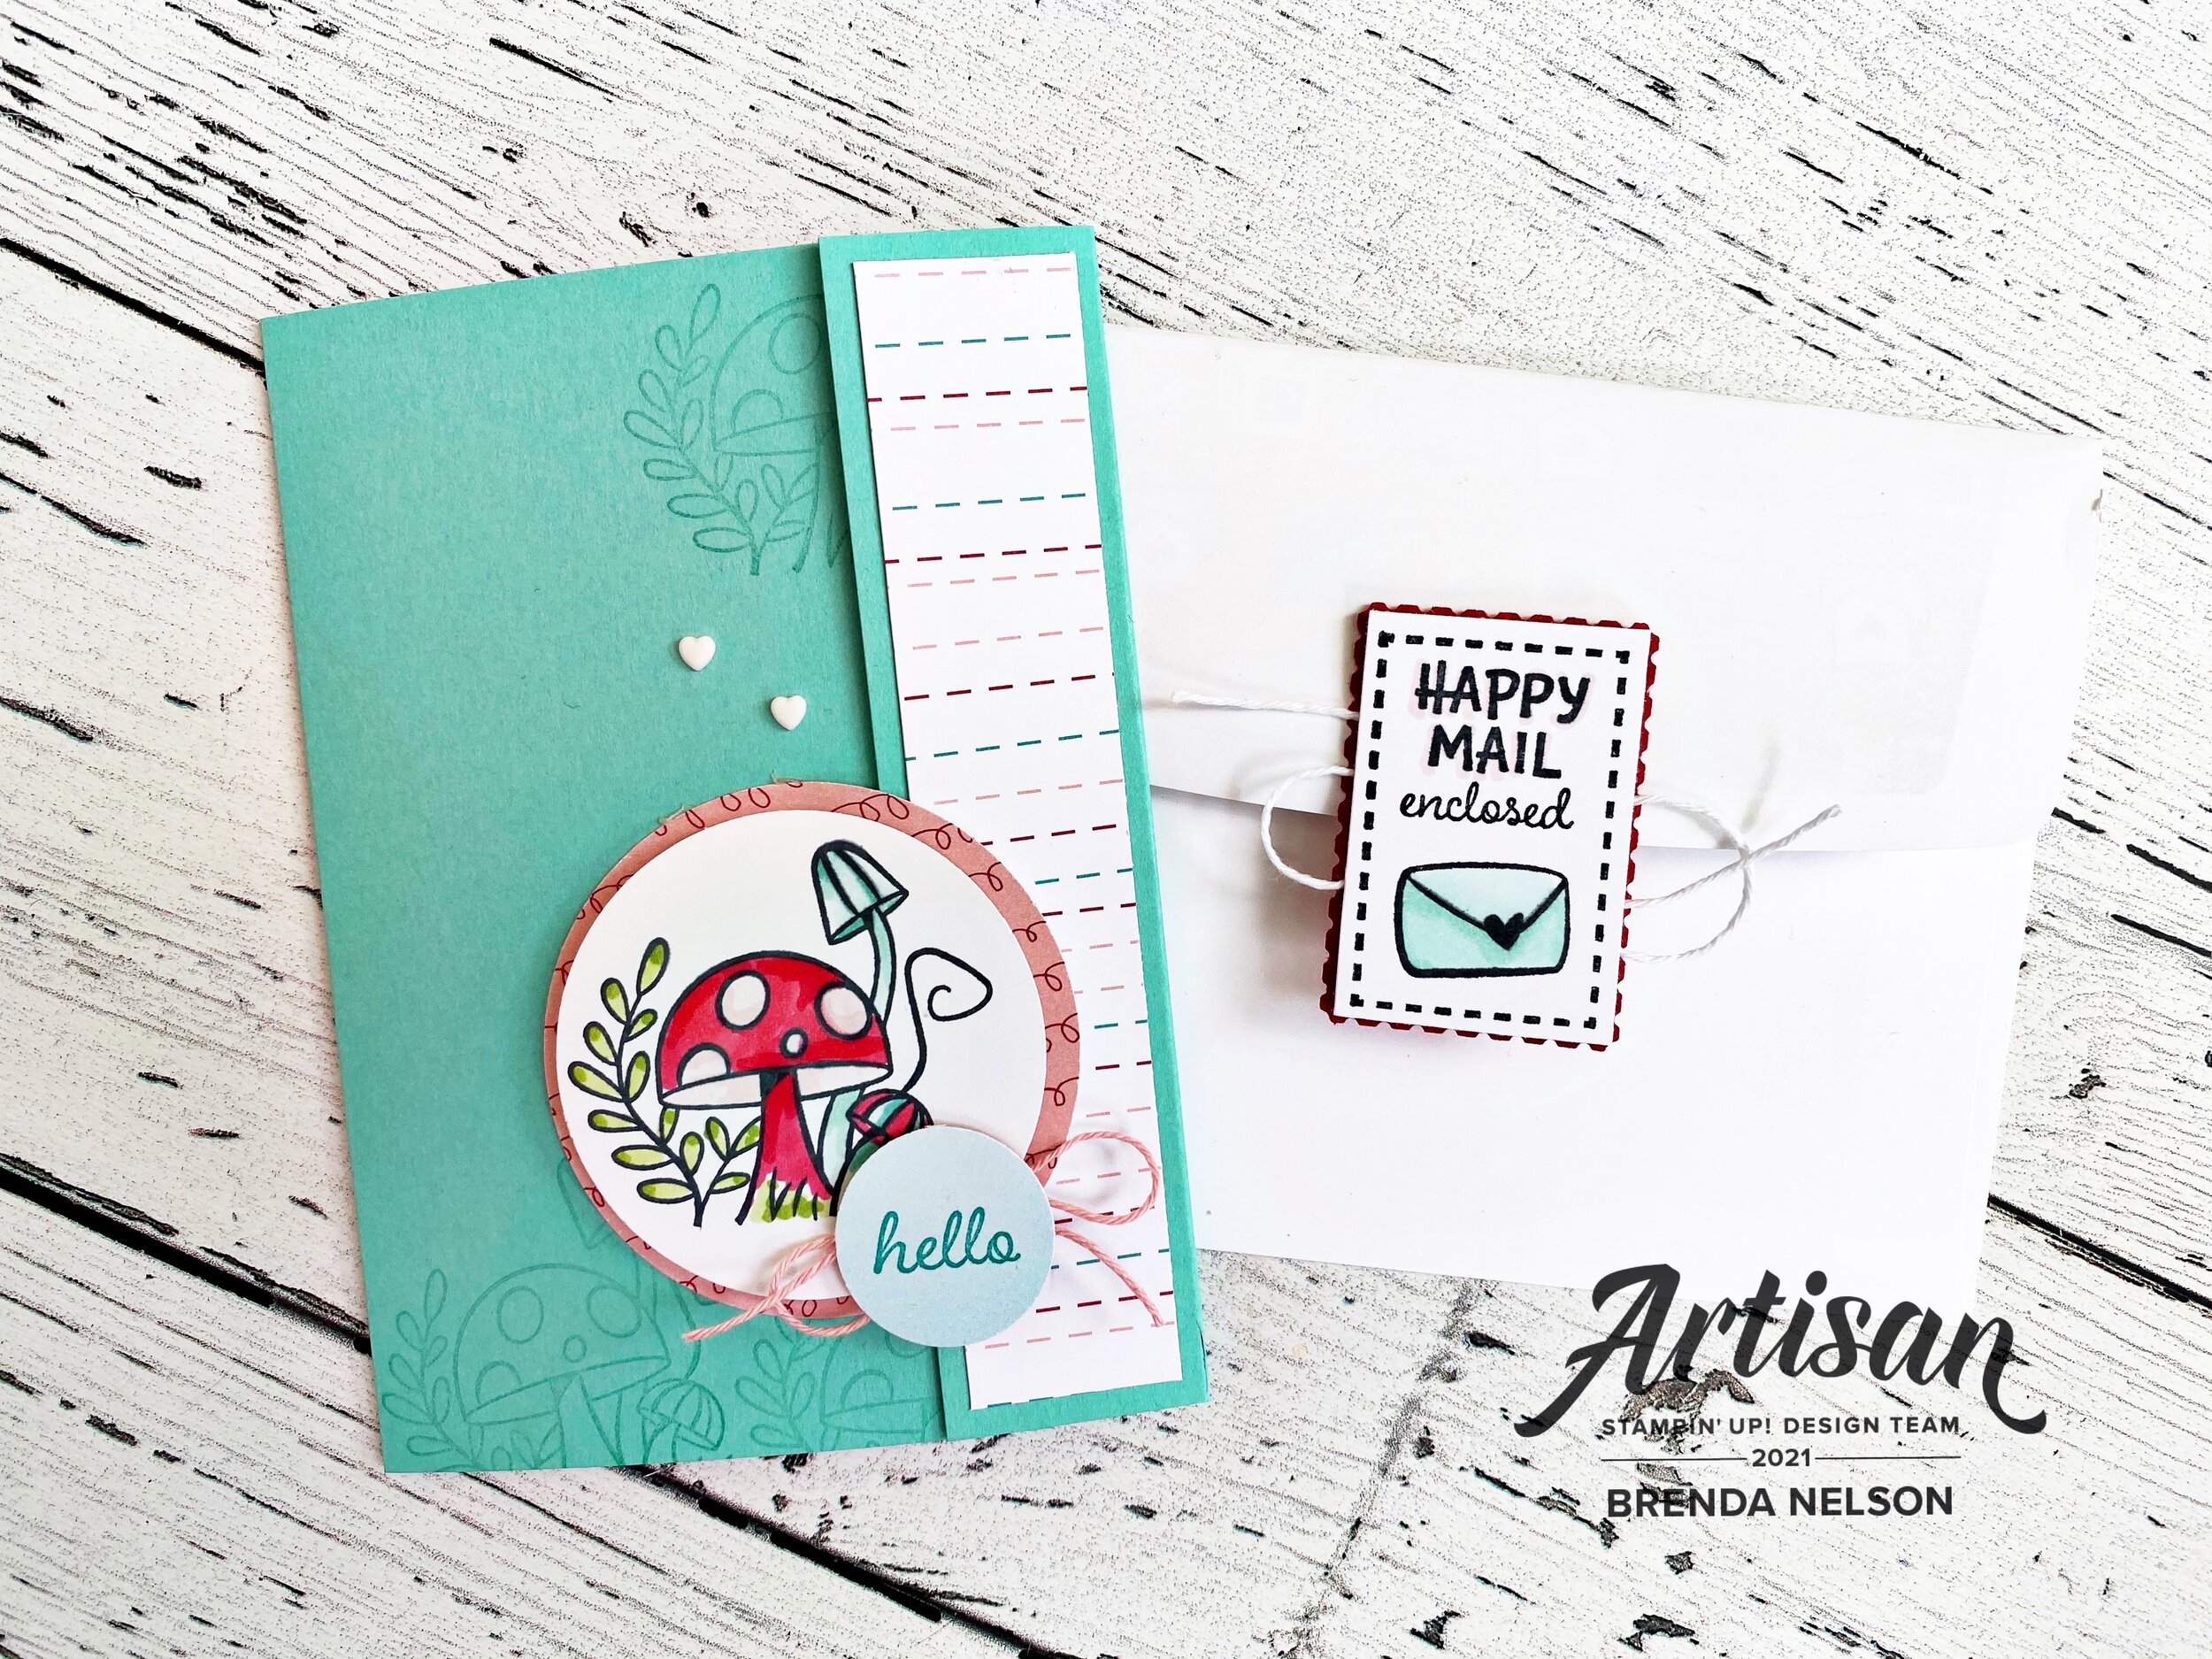
Isn’t the back of this envelope so cute and fun? I added a bit of Tombow glue to the bottom and let it air dry. This allows the glue to become tacky so you can use it to close something but it can also be lifted up! Its a fun tip if you have never used the glue in that way before!

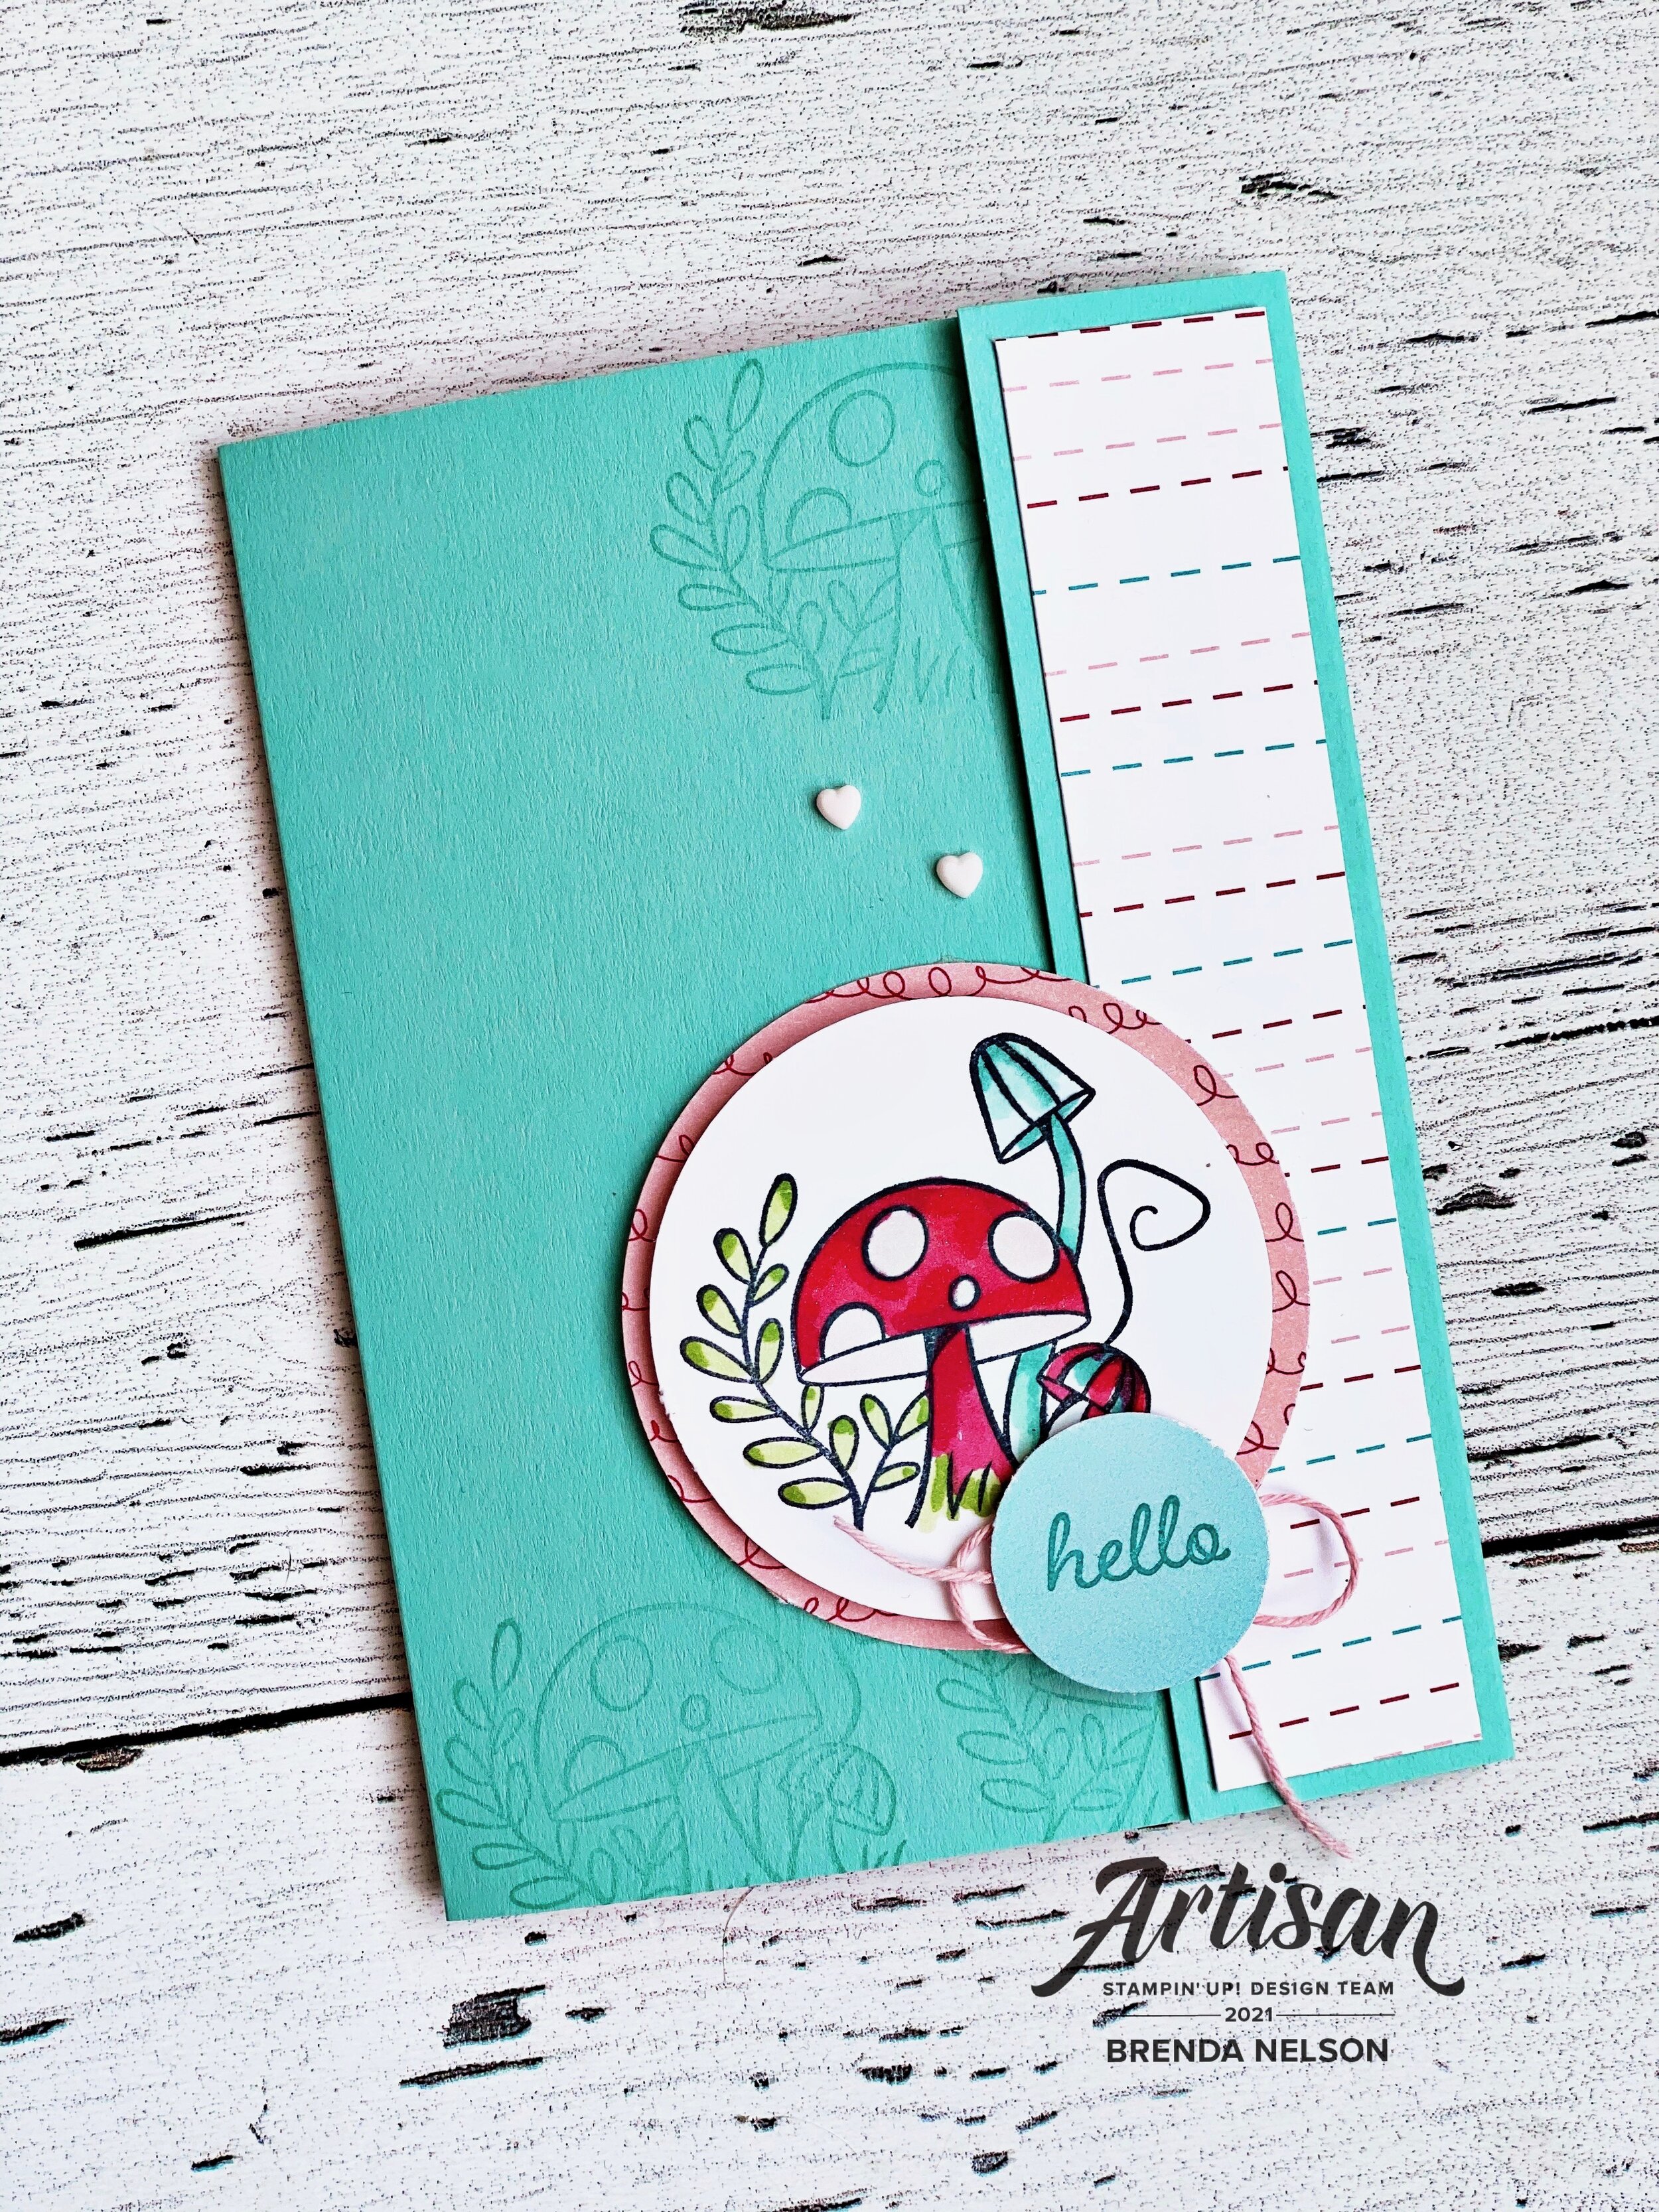
My card is also a bit of a fun fold card too! The dimensions are 5 1/2 x 8 1/2 and you score the base at 3 1/4 and 7 1/4. It makes the fun little flap on the front that you can embellish with Designer Series Paper. I used the Snail Mail paper on my card with a Coastal Cabana card base.


The flap is going to want to hang open so you need to find a creative way for it to stay closed until you want to open your card.

I used a 2 1/4 DSP circle and added a 2 inch Basic White circle on top that I stamped the fun mushroom image from the Snailed It stamp set. I used my Stampin’ Blends to color him in with some Wink of Stella on the main mushroom.

IMG_3439.jpg
IMG_3444.jpg

The inside panel is Basic White cut to 3 3/4 x 5 1/4. I stamped my cute snail and created a mask so that I could use my Blending Brush around him to create a Coastal Cabana halo. I then stamped Hello across the background. The snail is also colored with Stampin’ Blends. I created a little polka dot pattern on his present and added in a red Resin Heart! LOVE!

IMG_3454.jpg

Remember our theme? Well I knew I needed to dress up the envelope a bit so I pulled out a very very old retired die that cuts an envelope liner and I added it to the inside of our Basic White envelope. You could always trace one of our envelopes on your Designer Series paper to achieve the same idea.

IMG_3446.jpg

I had alot of fun with this theme and was so happy with what I was able to create! If you haven’t played with the Snail Mail Suite I hope you will give it a try, it is alot of fun!

IMG_3450.jpg

I can’t wait to see what the other design team members have created this month. I am sure you will be truly inspired as you travel around the world with us! You can click on Next Blog to see what Tricia Butts from the United States has created!